
Conditional Logic
Conditional logic is a system of rules you can use to specify when an interaction you've built should occur in the web browser. For example, you can stipulate that a button click will advance users to the next page in your prototype only if they have filled in all required fields in a form.
Think of conditions as having an if/then relationship with their interactions: if the condition is met, then the interaction will be executed.
You can create everything from simple conditions that affect only a single interaction to complex branching logic that controls every area of a prototype.
Building Conditions

To add conditional logic to an interaction, hover over the event name and click Enable Cases. In the Condition Builder dialog that appears, click Add Logic.
In the Condition Builder, you can configure one or more conditional statements using the fields in each row. A conditional statement compares two values in some way to produce a true or false result:
One value — How it compares to — A second value
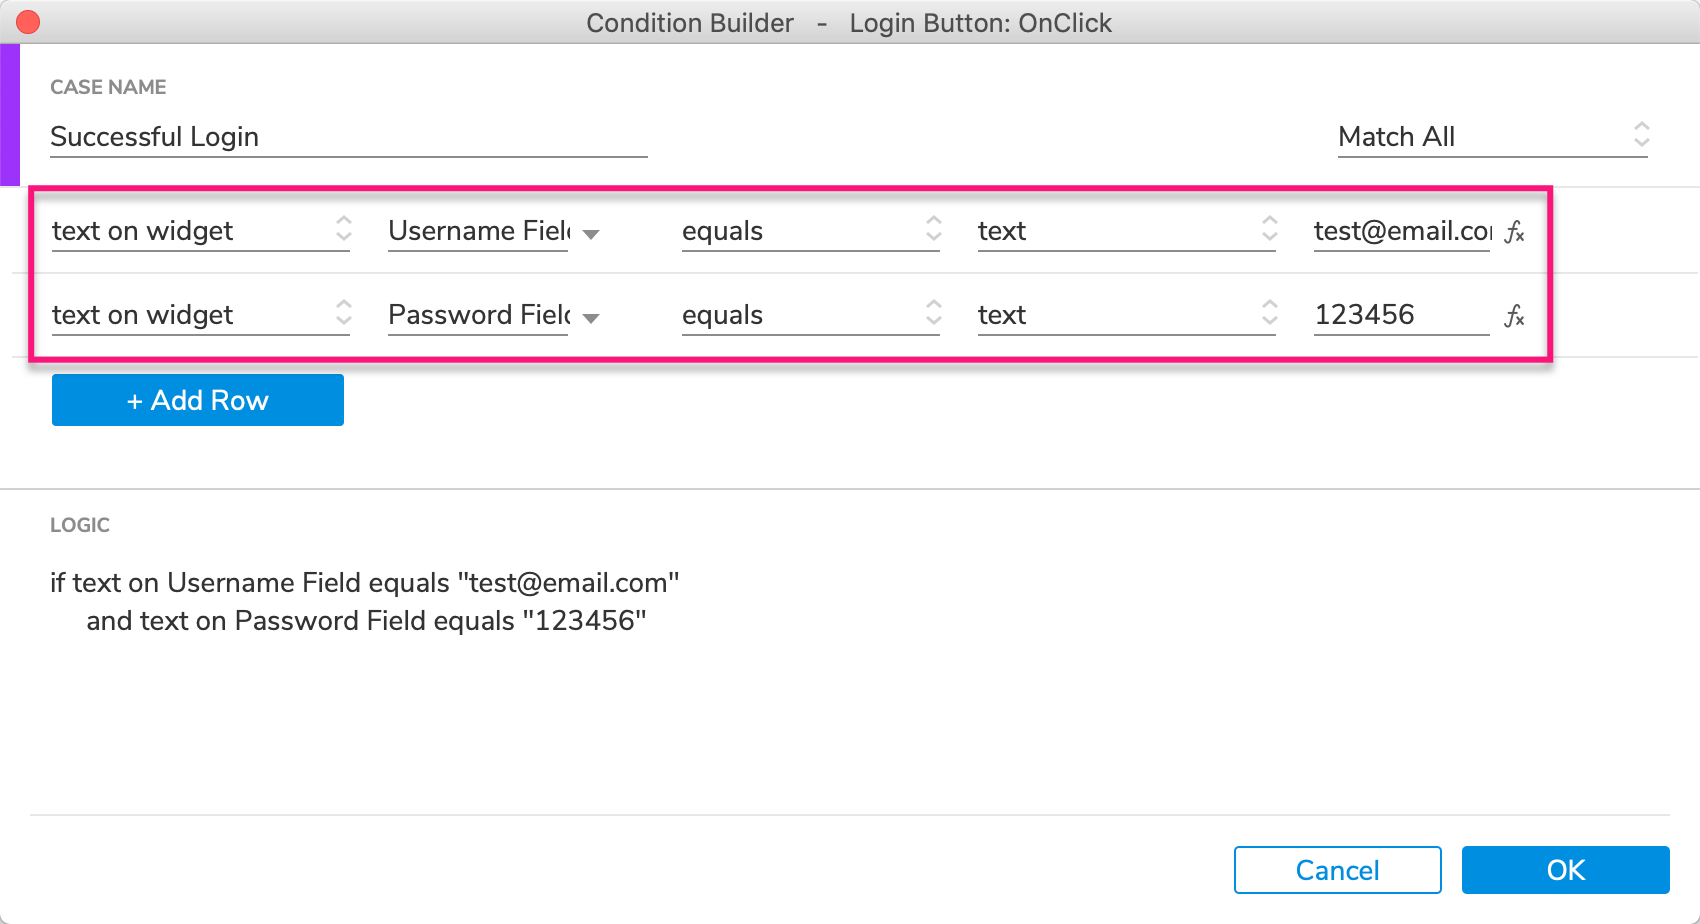
For example, you can verify that a text field has been filled in with a particular value with the following condition:
text on widget — Text Field — equals — text — your value here
This conditional statement evaluates to true when the target text field's entered text equals the value provided in the rightmost field.
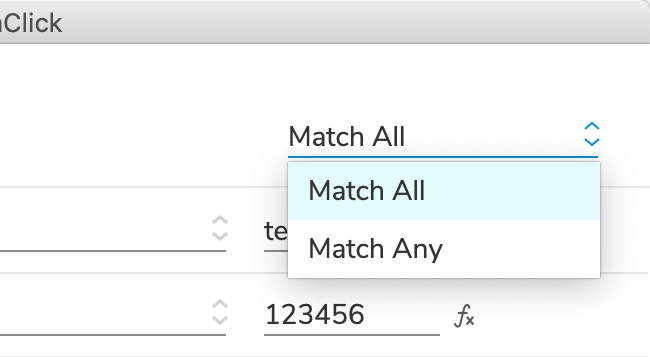
Satisfying "All" or "Any" Conditional Statements
When you set up multiple conditional statements for a case, you can decide whether the case gets executed when all the statements evaluate to true or when just any one statement evaluates to true. You can control this in the dropdown at the top-right of the Condition Builder.
Events With Multiple Conditional Cases (IF and ELSE)
When an event has multiple cases under it, you can use conditional logic to determine which of them will be executed in the web browser. You do this by building IF / ELSE chains.
IF / ELSE chains are made up of conditional cases whose conditions depend on one another. Each condition in the chain will only be evaluated if the previous condition "fails" by evaluating to false. Once a condition "passes" by evaluating to true, the prototype will stop evaluating further conditions in the chain.
For example, the submit button for a login form might have two conditional Click or Tap cases that do different things depending on whether or not the user has provided valid login credentials.
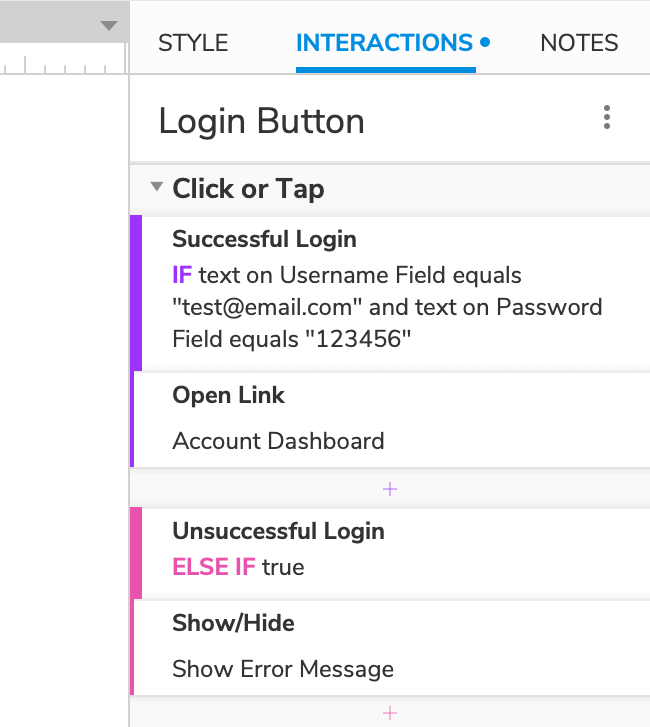
If the Email and Password fields both contain the correct values when the button is clicked, the first condition will evaluate to true and its case will be executed, opening the Account Dashboard page. The second case will not be evaluated at all.
If, however, one of the two fields doesn't contain the correct value when the button is clicked, the first condition will evaluate to false and its case will not be executed. The prototype will then move on to the second case and evaluate its condition. The second case has no condition, so it gets executed by default, and the error message is displayed.
Tip
Placing an ELSE IF true case (one with no condition) at the end of an IF / ELSE chain is a common way to create a catch-all or "default" case that will always be executed when all other conditions in the chain above it fail. Don't put any other ELSE cases after it, though — their conditions will never be evaluated since the ELSE IF true case evaluates to true automatically.
The example above is fairly simple, but you can add as many ELSE cases to a chain as you like. For instance, the Click or Tap event above could include another ELSE case, above the one for the error message, that opens an administrator user profile when you log in to an admin account. The error message would only be displayed if incorrect credentials were entered for both the admin and non-admin accounts.
Creating Multiple IF / ELSE Chains
By default, the first conditional case under an event is the IF case, and all following cases are ELSE cases in the IF / ELSE chain. You can create additional IF / ELSE chains by changing ELSE cases into IF cases. To do so, right-click a case name and select Toggle IF / ELSE.
IF cases' conditions are always evaluated in the web browser, and each IF case starts its own IF / ELSE chain. Create multiple chains when you want to evaluate multiple conditional criteria independently of one another.
For example, the submit button for a signup form might have two IF / ELSE chains under its Click or Tap event, one that that determines whether the user has opted to sign up for a newsletter and a second determines whether the user has filled in all required fields.
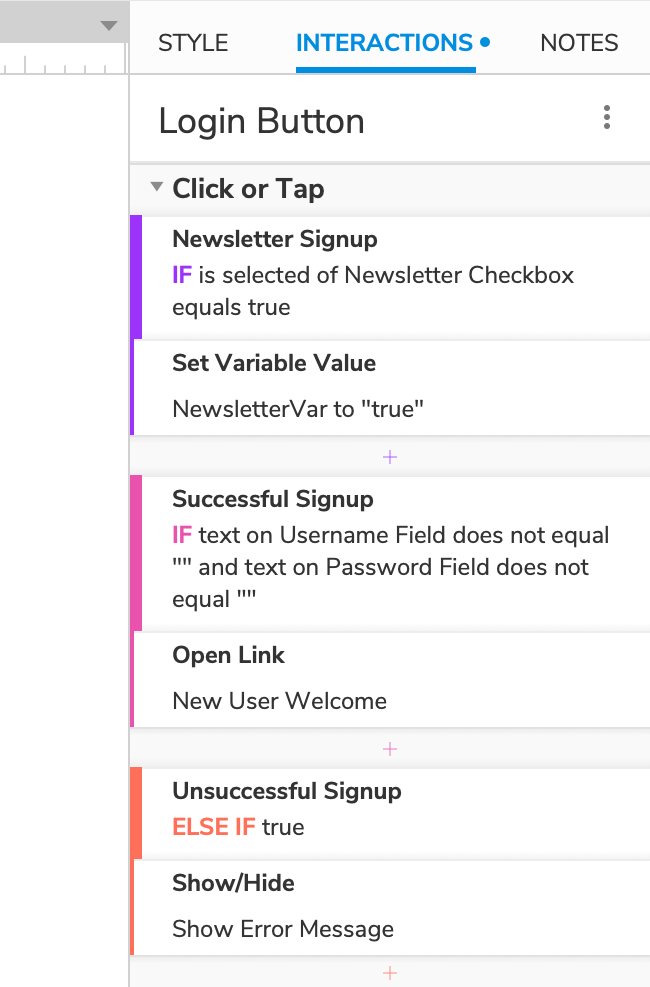
If the Newsletter Checkbox is checked when the submit button is clicked, the first case's condition will evaluate to true, and the NewsletterVar variable's value will be set to "true."
The second case's condition will then be evaluated regardless of the outcome of the first case. If the user has filled in both text fields, the condition will evaluate to true, and the user will be directed to the Account Setup page. The third case's condition will not be evaluated because it is an ELSE case in the second case's IF / ELSE chain.
However, if one or both of the text fields is blank, the second case's condition will fail, and the prototype will move on to the third case, which shows an error message.