Axure Docs
  • Axure RP Reference
  • Axure RP Tutorials
  • Axure Cloud Reference
  • Axure Support
  • Download

›Masters

Installing and Activating RP

  • Activating Axure RP
  • Installing on macOS
  • Installing on Windows

Getting Started

  • Getting Started Video
  • The Axure RP Environment
  • Viewing and Sharing Your Prototypes
  • Keyboard Shortcuts
  • Auto-Saved Backup Files

Working with Widgets

  • Organizing Widgets
  • Widget Groups
  • Styling Widgets
  • Widget Libraries
  • The Grid, Guides, and Snapping

Basic Widgets

  • Buttons, Shapes, & Text
  • Images
  • Hot Spots
  • Lines & Arrows
  • Dynamic Panels
  • Inline Frames
  • Text Fields & Text Areas
  • Droplists
  • List Boxes
  • Checkboxes
  • Radio Buttons
  • Trees
  • Tables
  • Classic Menus
  • Snapshots

Working with Pages

  • Managing Pages
  • Styling Pages

Masters

  • Creating and Using Masters
  • Master Views
  • Raised Events

Introduction to Interactions

  • Events, Cases, and Actions
  • List of Events
  • List of Actions
  • Text Links
  • Style Effects
  • Animations

Advanced Interactions

  • Variables
  • Conditional Logic
  • Math, Functions, and Expressions
  • Selection Groups
  • Move Action Boundaries

The Repeater

  • Repeaters
  • Dynamically Adding Rows
  • Dynamically Deleting Rows
  • Updating Rows
  • Marking Rows
  • Sorting Rows
  • Filtering Rows
  • Pagination

Adaptive Views

  • Adaptive Views

Documenting Your Prototype

  • Page and Widget Notes
  • The Word Specification
  • Printing

Flow Diagrams

  • Flow Diagrams
  • Flow Connectors

Publishing Your Prototype

  • The Prototype Player
  • Customizing the HTML Output
  • Web Fonts and Font Mapping

Team Projects

  • Creating and Sharing Projects
  • Working with Team Projects
  • Team Project History
  • Troubleshooting Team Projects
  • Upgrading Projects to RP 9

Raised Events

Raised events are events in masters that you "raise" up out of the master to be accessible at the page level. This allows you to configure actions under the event that target widgets outside the master. It also allows you to configure different actions under the event for each instance of the master.

Raising an Event

  1. Open a master on the canvas.

  2. Select a widget in the master whose event you want to raise. You can also click a blank spot on the canvas to work with the master's own page events.

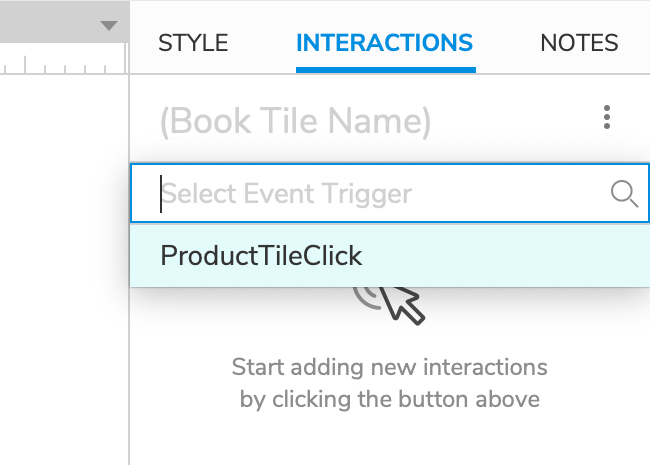
  1. In the Interactions pane, click New Interaction and select the event you want to raise.

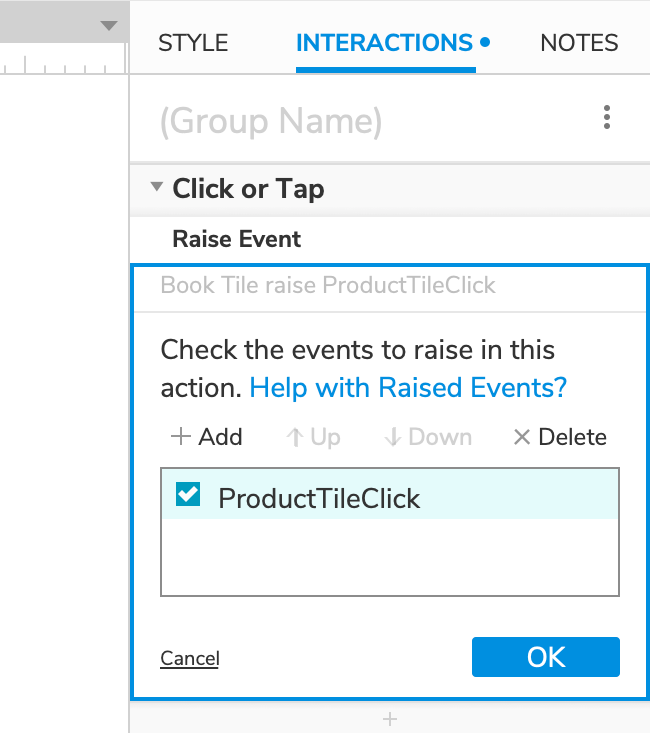
  2. At the bottom of the action list, select Raise Event.

  3. Click Add to create a new raised event, and give it a descriptive name. Alternatively, you can select from the list of raised events you've previously created in this master.

    Note

    You can manage all the raised events in the master you're currently editing by going to Arrange → Manage Raised Events.

  4. Click OK. You can now access the raised event from pages you've added instances of the master to.

Using a Raised Event

Once you've created a raised event in a master, each instance of that master will have its own version of the raised event that you can configure at the page-level. Select an instance of a master and click New Interaction in the Interactions pane to access its raised events.

← Master ViewsEvents, Cases, and Actions →
  • Raising an Event
  • Using a Raised Event
Axure Docs
Stay Connected

Sign up to receive Axure tutorials and news. You can unsubscribe at any time.

Axure
TourEnterpriseCompanyDownloadPurchase
Legal
Customer AgreementPrivacy PolicyGDPRSecurityPatents
Resources
BlogForumLicense PortalAxure Cloud
Support
Learn and SupportGetting StartedReferenceWidget LibrariesAxure RP 8 Documentation and Tutorials
Copyright © 2002–2021 Axure Software Solutions, Inc. All rights reserved. Axure® is a registered trademark of Axure Software Solutions, Inc.