Working with Team Projects
Each team project has two parts:
a central, Axure Cloud–hosted copy of the project — called the "team directory" — that manages the shared resources
one or many local copies of the project, each belonging to a co-author who contributes to the team project
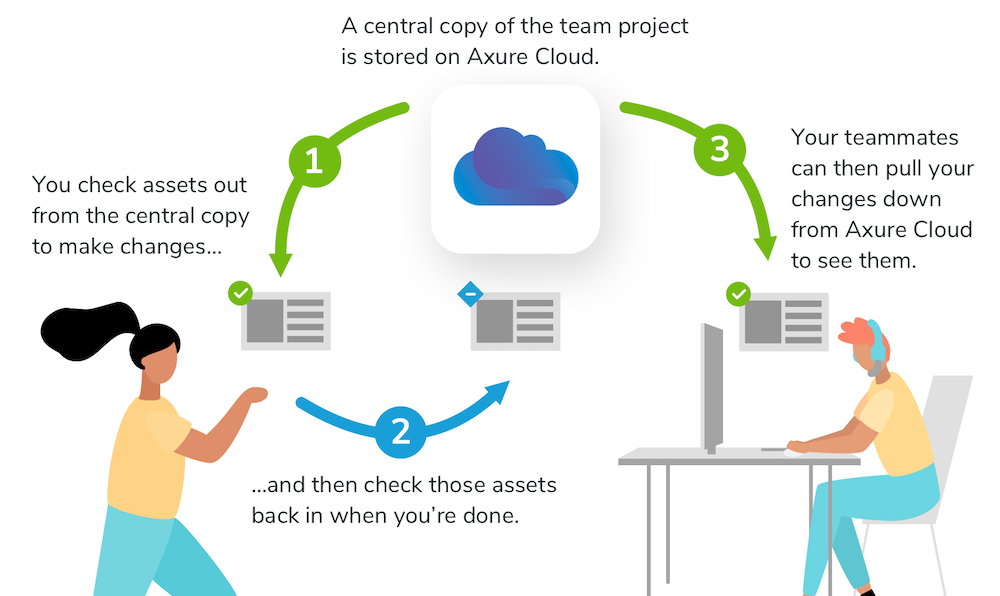
Each user can check out pages and other project attributes (masters, generators) for editing in their local copy. When a page is checked out to one user, no other user can edit that page. When changes are complete, the user can check in their changes to the team project. The checked-in changes can be viewed by other users, and the checked-in pages and attributes are freed up to be checked out by another co-author for further editing.
Changes you make in your local copy must be either "sent" or "checked in" to the team project before your co-authors can see them. Below, you'll learn how to "check out" items for editing and then send or check in your changes after you've made them. You'll also learn how to get changes from the team directory so that you can see your teammates' changes.
Note
You must have a license for Axure RP Team edition in order to work with team projects.
Making Changes in Team Projects
Checking Out Items for Editing
To edit a page, master, or generator, you must check it out. When you check out an item, you'll also automatically get the latest changes to it (if you don't have the latest version already), and it will be reserved for you exclusively. You can then edit on the canvas like you would a page or master in a regular .rp file.
Pages and Masters
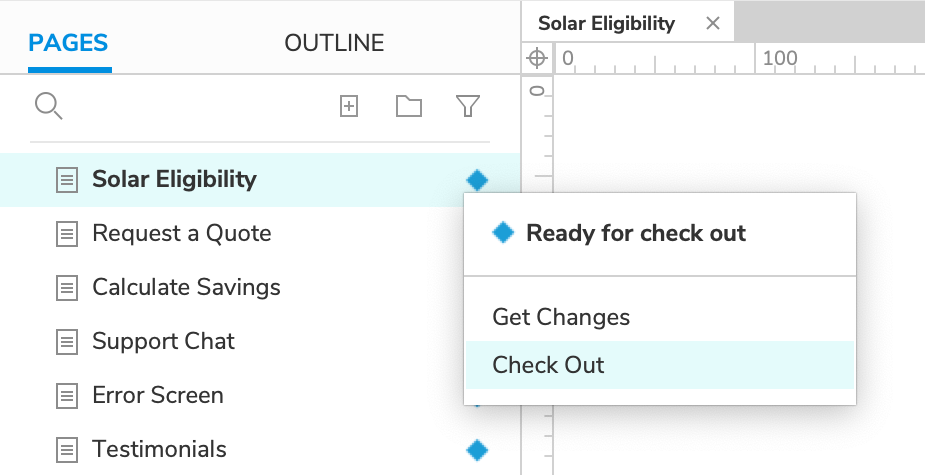
To check out a page or master, right-click it in the Pages or Masters pane and choose Check Out from the context menu. You can also access this this menu option by clicking the page or master's status icon.
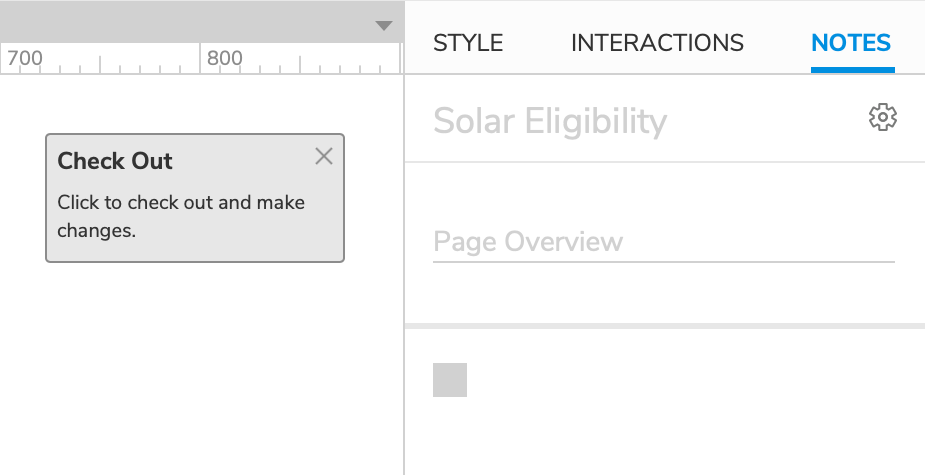
Another way to check out a page or master is to first open it on the canvas and then click the Check Out button that appears at the top-right corner of the canvas when you hover over the canvas.
Generators
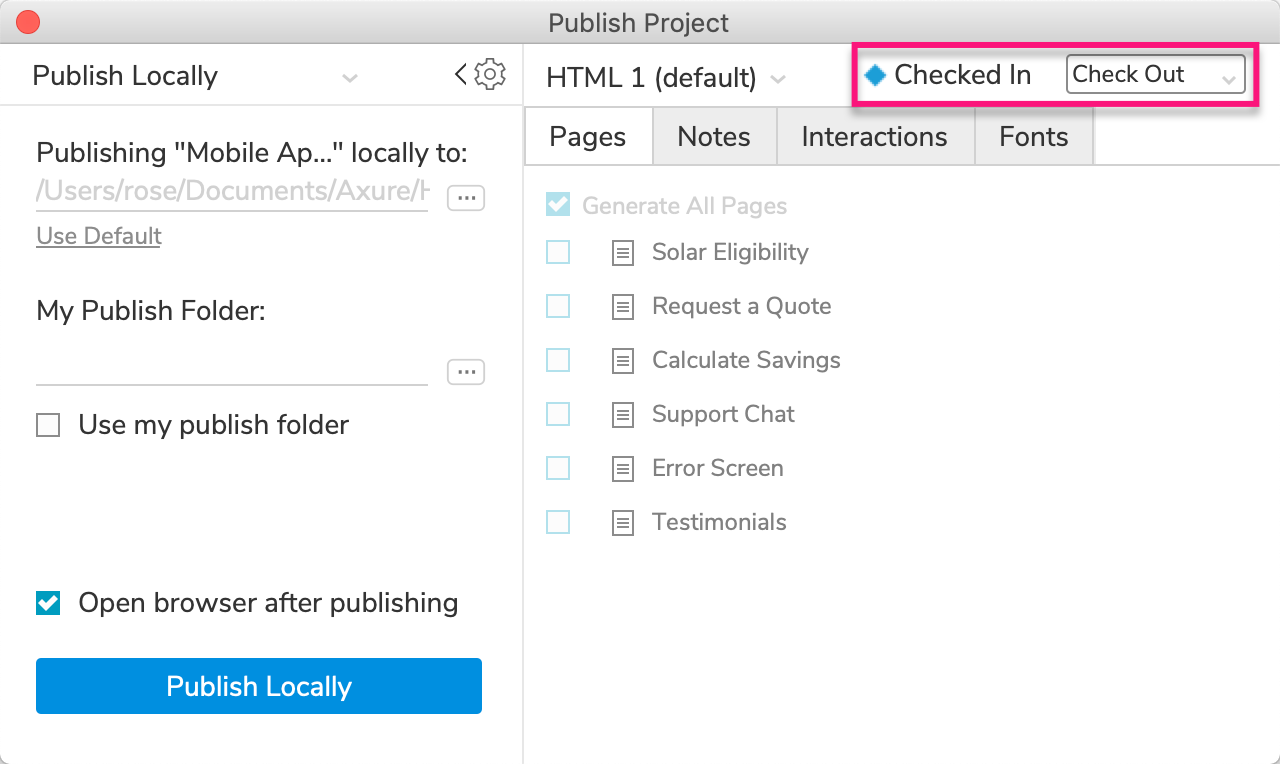
To check out a generator, open the generator and click Check Out in the top-right corner of the dialog.
You can also use the Team → Check Out Everything menu command to check out all of the pages, masters, and generators in the team project.
Note
Keep in mind that check-outs are made per local copy and not per user. That is, if you have a local copy on your desktop computer and another one on your laptop, a check-out from your laptop will not result in that same item being checked out to you on your desktop computer. Instead, your desktop computer copy will reflect that someone with your user account name has that item checked out, which will be the case — because the "you" on your laptop has it checked out.
Undoing a Check-Out
You can cancel all your changes that have not been checked in and revert to the latest check-in by using the Undo Check Out option. This will also revert the item to being available for check-out.
To cancel all changes you've made to a page or master since you checked it out, right-click its name in the Pages or Masters pane and click Undo Check Out.
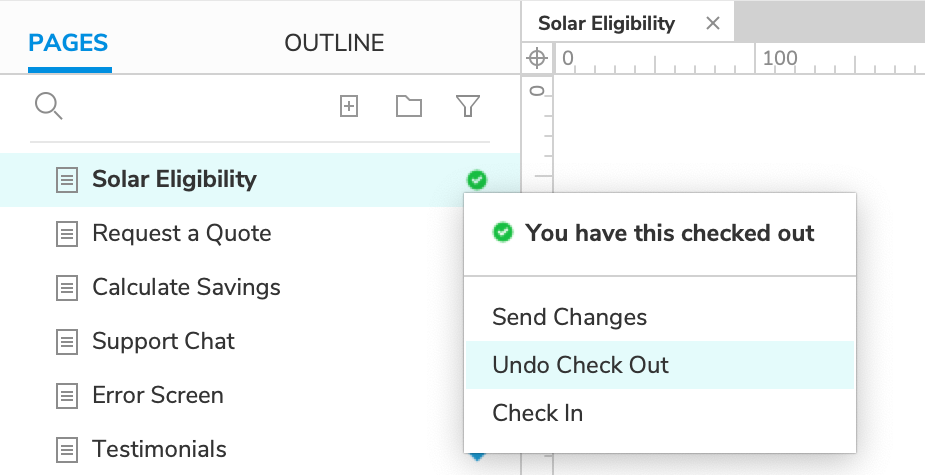
To cancel changes made to a generator, open the dropdown in the top-right corner of the generator dialog and click Undo Check Out.
To cancel all changes in your local copy, go to Team → Undo All Check Outs.
Changes That Don't Require a Check-Out
Some project properties can be edited without a check-out. These include styles, global variables, widget note and page notes fields, and adaptive views. You can also add, delete, and reorganize pages and masters without a check out.
This allows multiple people to work with these project properties at the same time. Any changes to items in this category will be sent whenever you do a check-in on the project to a page, master, generator, or when you perform a Send All Changes or Check In Everything from the Team menu.
Unsafe Check-Outs
If you try to check out an item that's already checked out to another local copy — either to a co-author or to another of your own copies — you'll see the Unable to Check Out dialog.
The default option in this dialog is Do Not Edit, which leaves the requested item alone. You'll be able to see the username of the teammate to which the item is checked out, so you can contact that person to ask them to check the item in. After they have done so, you can check it out.
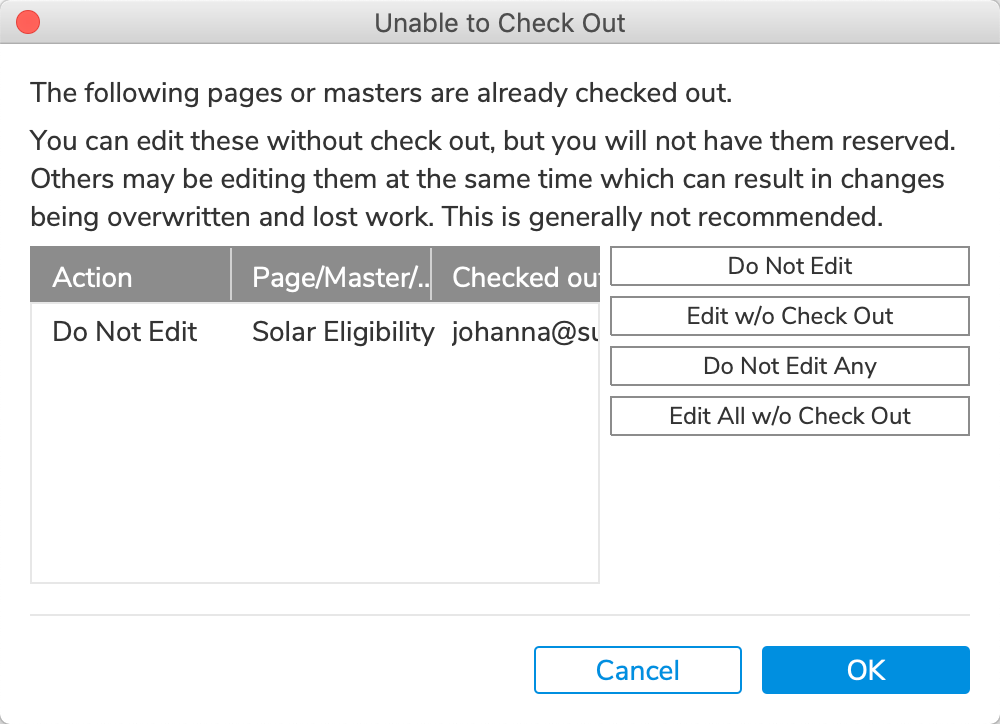
You can alternatively choose the option Edit w/o Check Out. If you choose this option, you'll have an "unsafe check-out" of the item. You'll be able to edit the page, even though it's checked out to your teammate.
Warning
You typically won't want to do an unsafe check-out as it can lead to a conflict. A conflict occurs when multiple local copies edit the same item at the same time, and the team directory can only choose one set of changes to accept. The other set(s) of changes are dismissed and will need to be manually reapplied.
"Stealing" a Check-Out
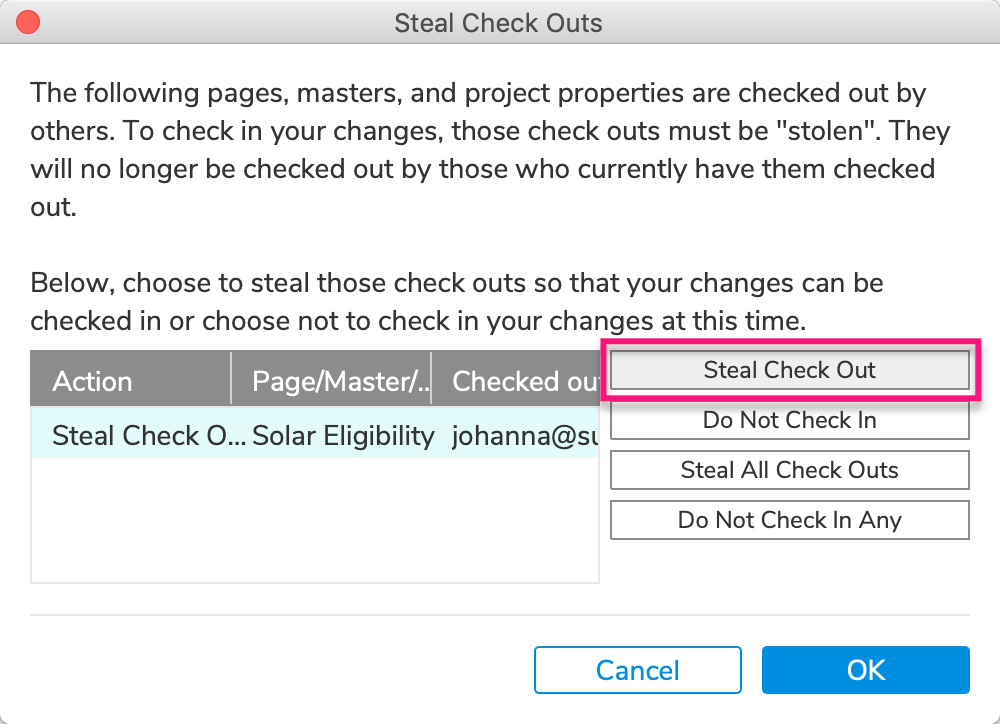
An unsafe check-out can be useful if there's an issue preventing a page from being checked in from the local copy where it's currently checked out, such as when:
- there's a hardware issue with the computer that has the local copy
- there's a temporary problem connecting to the team directory to do a check-in
- a colleague forgot to check in before leaving for vacation
In these cases, do the following:
- Proceed with an unsafe check-out on the desired asset.
- Make a change to it.
- Check it in.
This will "steal" the asset back from the local copy that previously had it checked out.
Sending Changes to the Team Directory
Checking In
When you check in, you send to the team directory all of the changes you've made to your local copy. For items you've checked out (pages, masters, and generators), a check-in will also release the item so that others are able to check it out for further editing.
Pages and Masters
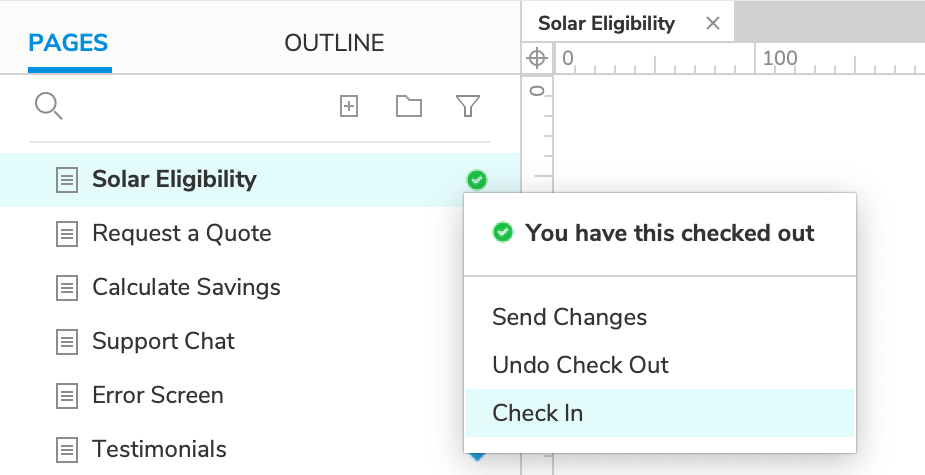
To check in a page or master, right-click it in the Pages or Masters pane and choose Check In. You can also access this this menu option by clicking the page or master's status icon.
Any changes you've made to items that don't require a check-out (as noted above) will be sent at this time, too.
Generators
To check in a generator, open the generator and click Check In in the top-right corner of the dialog.
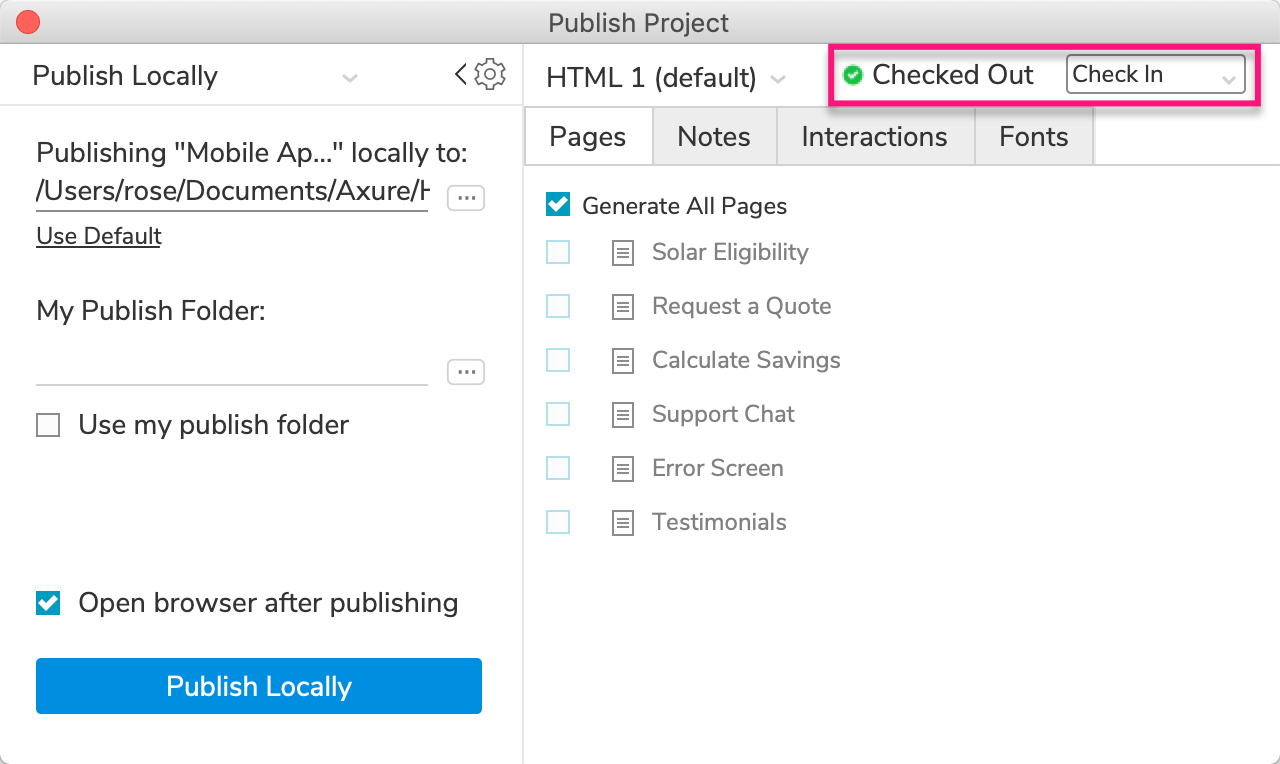
You can also go to Team → Check In [current page/master name] or Team → Check In Everything.
The Check In Dialog
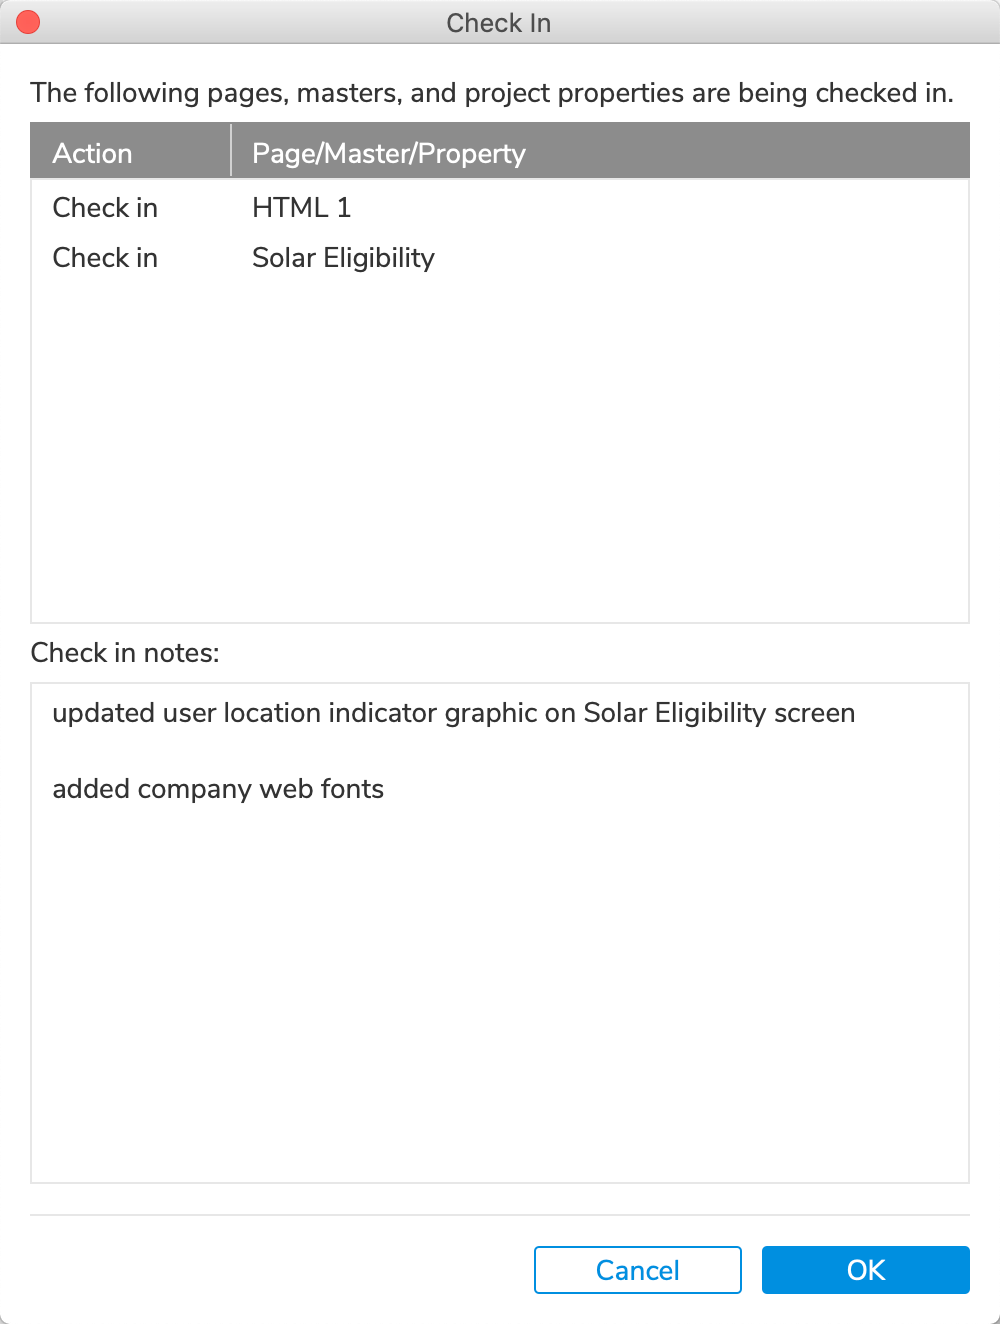
The Check In dialog will open. At the top of the dialog you'll see a list of all the project items (pages, etc.) being checked in. At the bottom, write your check-in notes.
Each time you check in, a new revision of the team project is stored in the team project directory. You can access those revisions and view their associated check-in notes in the team project's history.
It's a good idea to check in your changes regularly so that your team members can see them, and also so that you have a saved record of your work.
Sending Changes without Checking In
You can "send changes" when you want to update the team directory with your recent changes but want to keep pages, masters, or generators checked out to you for further editing.
Go to Team → Send All Changes to Team Directory to send everything.
You can also right-click a page or master and click Send Changes to send your changes to that particular page or master plus related project attributes. For generators, open the dropdown in the top-right corner of the generator dialog and click Send Changes.
The Send Changes Dialog
The Send Changes dialog will open. At the top of the dialog you'll see a list of all the project items (pages, etc.) with changes to send. At the bottom, write your change notes.
Each time you send changes, a new revision of the team project is stored in the team directory. You can access those revisions in the team project's history.
Getting Changes from the Team Directory
It's a good idea to regularly get your co-authors' changes. Go to Team → Get All Changes from Team Directory to update your entire local copy with the latest from the team directory.
You can also right-click a page or master and click Get Changes to update that particular page or master, along with any project attributes used by that page or master. For generators, open the dropdown in the top-right corner of the generator dialog and click Get Changes.
