
Set Text with Droplist Tutorial
In this tutorial, you'll learn how to dynamically set the text on a widget based on a selection made in a droplist widget.
Note
Click here to download the completed RP file for this tutorial.
1. Widget Setup
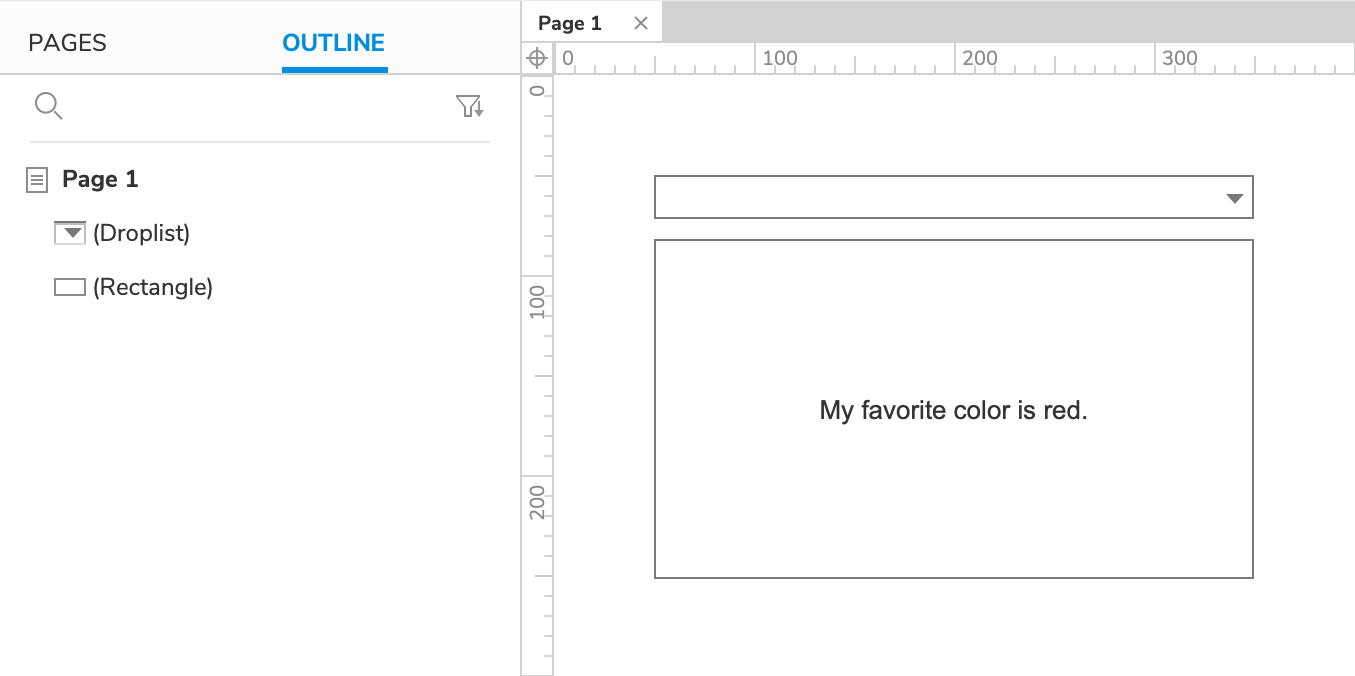
Open a new RP file and open Page 1 on the canvas.
Drag a rectangle widget and a droplist widget onto the canvas from the Libraries pane.
Set the text on the rectangle widget to
My favorite color is red.
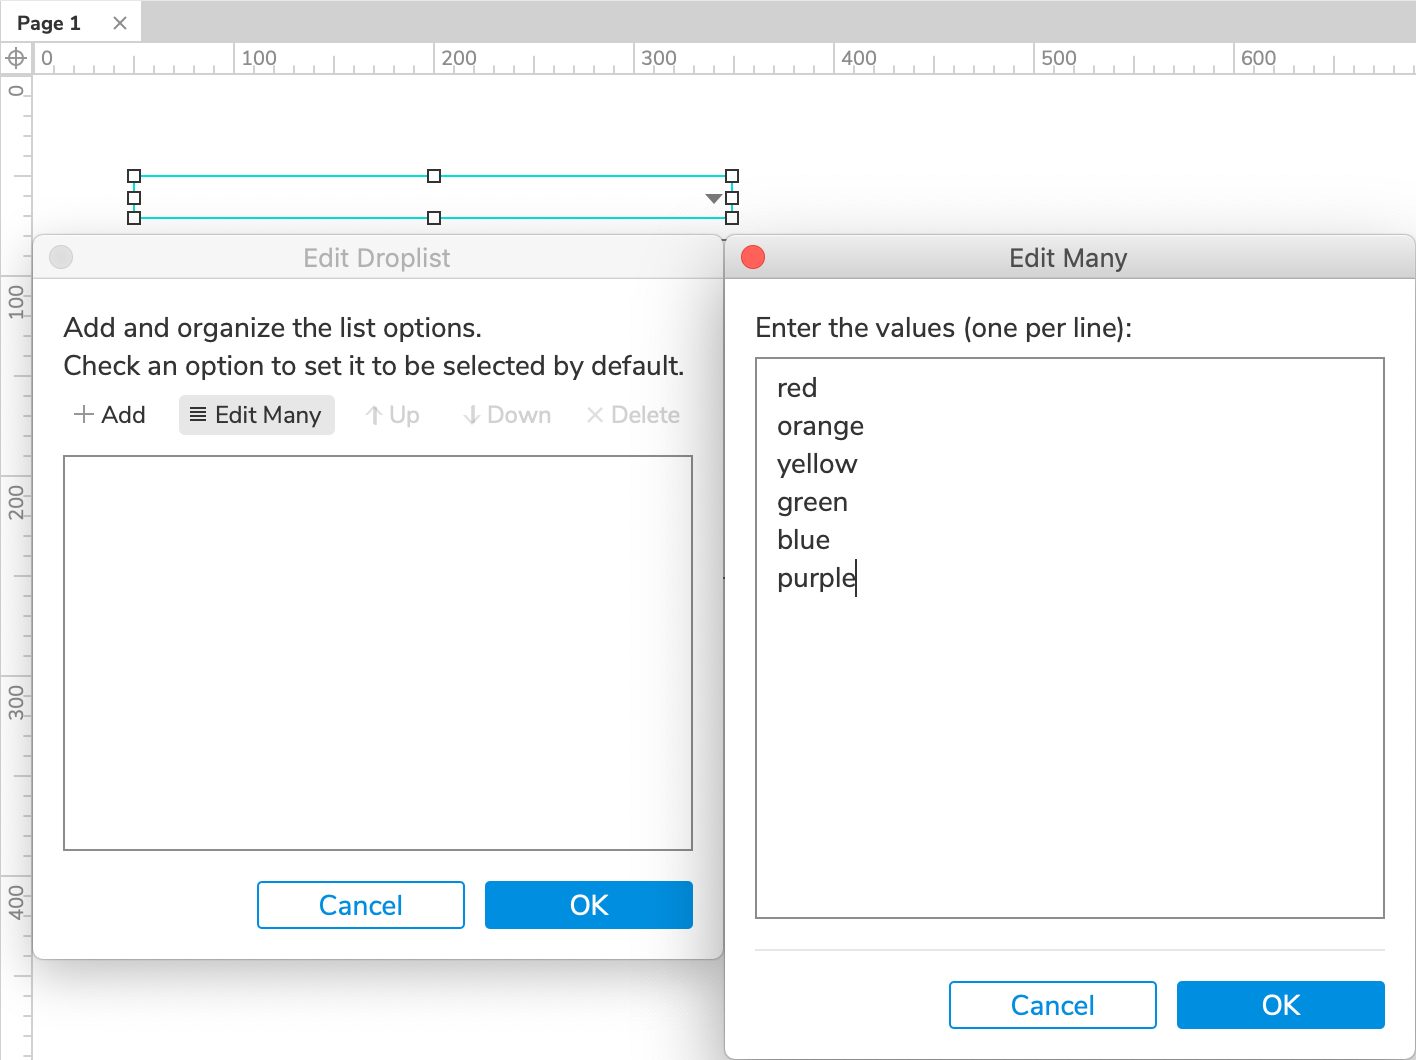
Double-click the droplist to edit its options, and click Edit Many at the top of the dialog. In the window that appears, enter the following options, separated by line breaks:
red
orange
yellow
green
blue
purple
Click OK to close the Edit Many window, and click OK again to close the Edit Droplist dialog.
2. Change the rectangle widget's Text When the Droplist's Selection Changes
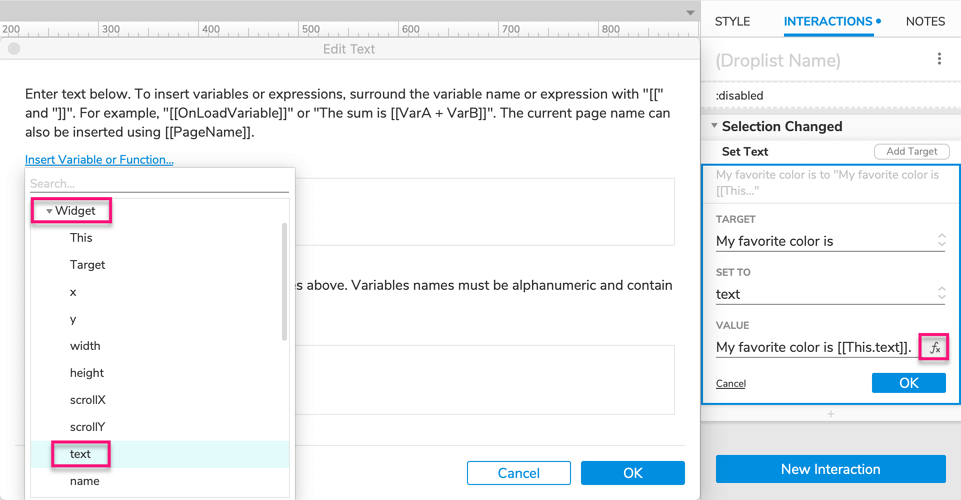
Select the droplist and click New Interaction in the Interactions pane.
Select the Selection Changed event in the list that appears, and then select the Set Text action.
Select the rectangle widget in the Target dropdown.
Click the fx icon to the right of the Value field to open the Edit Text dialog.
In the field at the top of the dialog, select the word
redin the sentence.Click Insert Variable or Function above the field. In the dropdown that appears, select text under the Widget heading.
The upper field of the dialog should now read
My favorite color is [[This.text]].(The bracketed expression will be replaced by the droplist's currently selected option in the web browser.)Click OK to close the Edit Text dialog, and then click OK again to save the Set Text action.
3. Preview the Interaction
Preview the page and select a different color in the droplist. The sentence displayed on the rectangle widget should update to reflect your selection.
Additional Information and Tips
Set Text with a Radio Group
If you'd rather present the options in a radio group instead of a droplist, you can still build a similar interaction to the one described in the tutorial above. Use the same Set Text action, and add it to the Selected event of each radio button in the group.