Scroll Activated Sticky Header Tutorial
In this tutorial, you'll learn how to make a header that sticks in place when the page is scrolled down and unsticks when the page is scrolled back to the top.
Note
Click here to download the completed RP file for this tutorial.
1. Widget Setup
Create a Scrolling Header
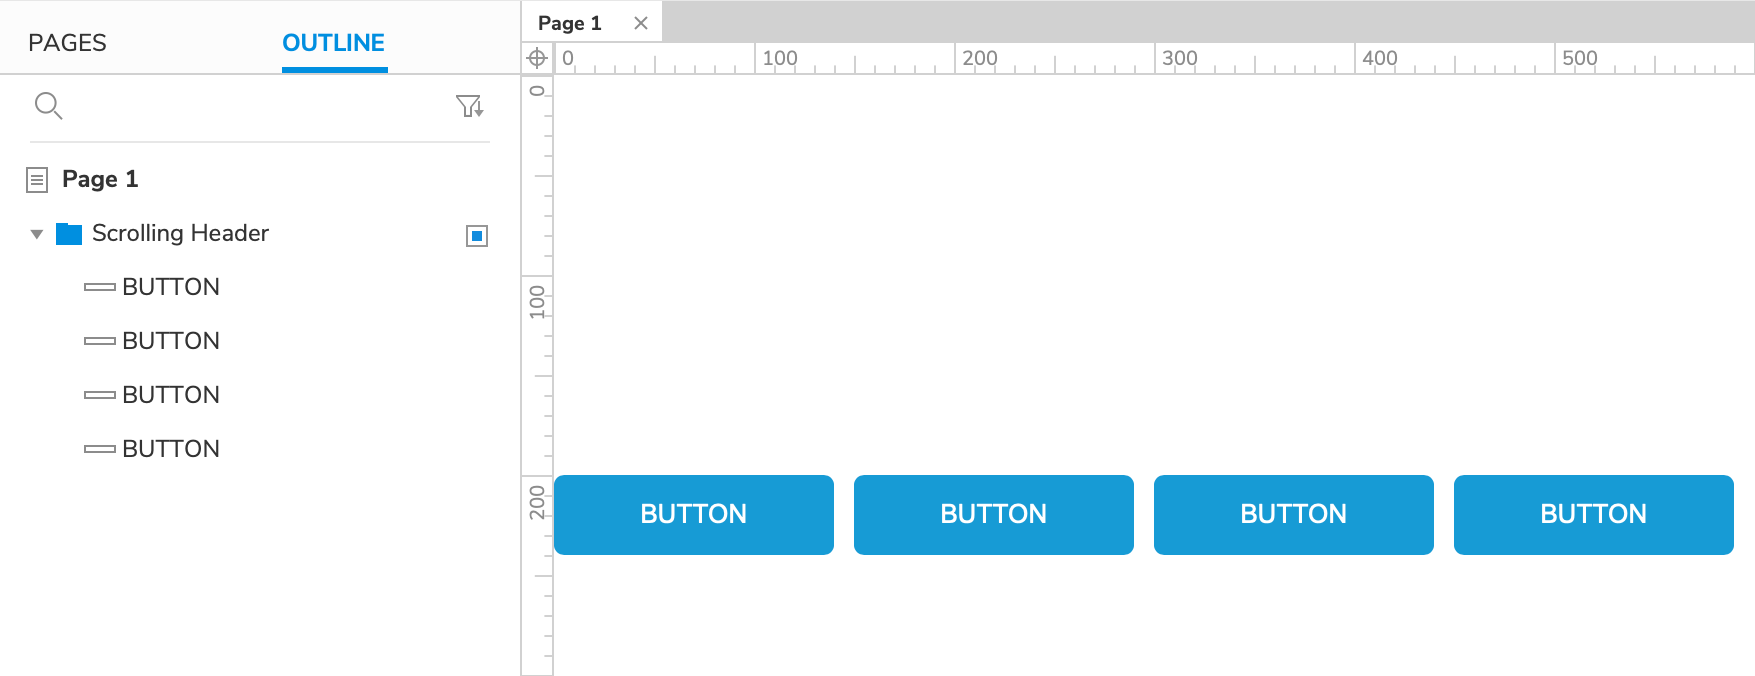
Open a new RP file and open Page 1 on the canvas.
Drag four button widgets onto the canvas. Line them up horizontally and place them at (0,200).
Select all four button widgets and click Group in the top toolbar to group them.
Name the group
Scrolling Header.
Create a Sticky Header
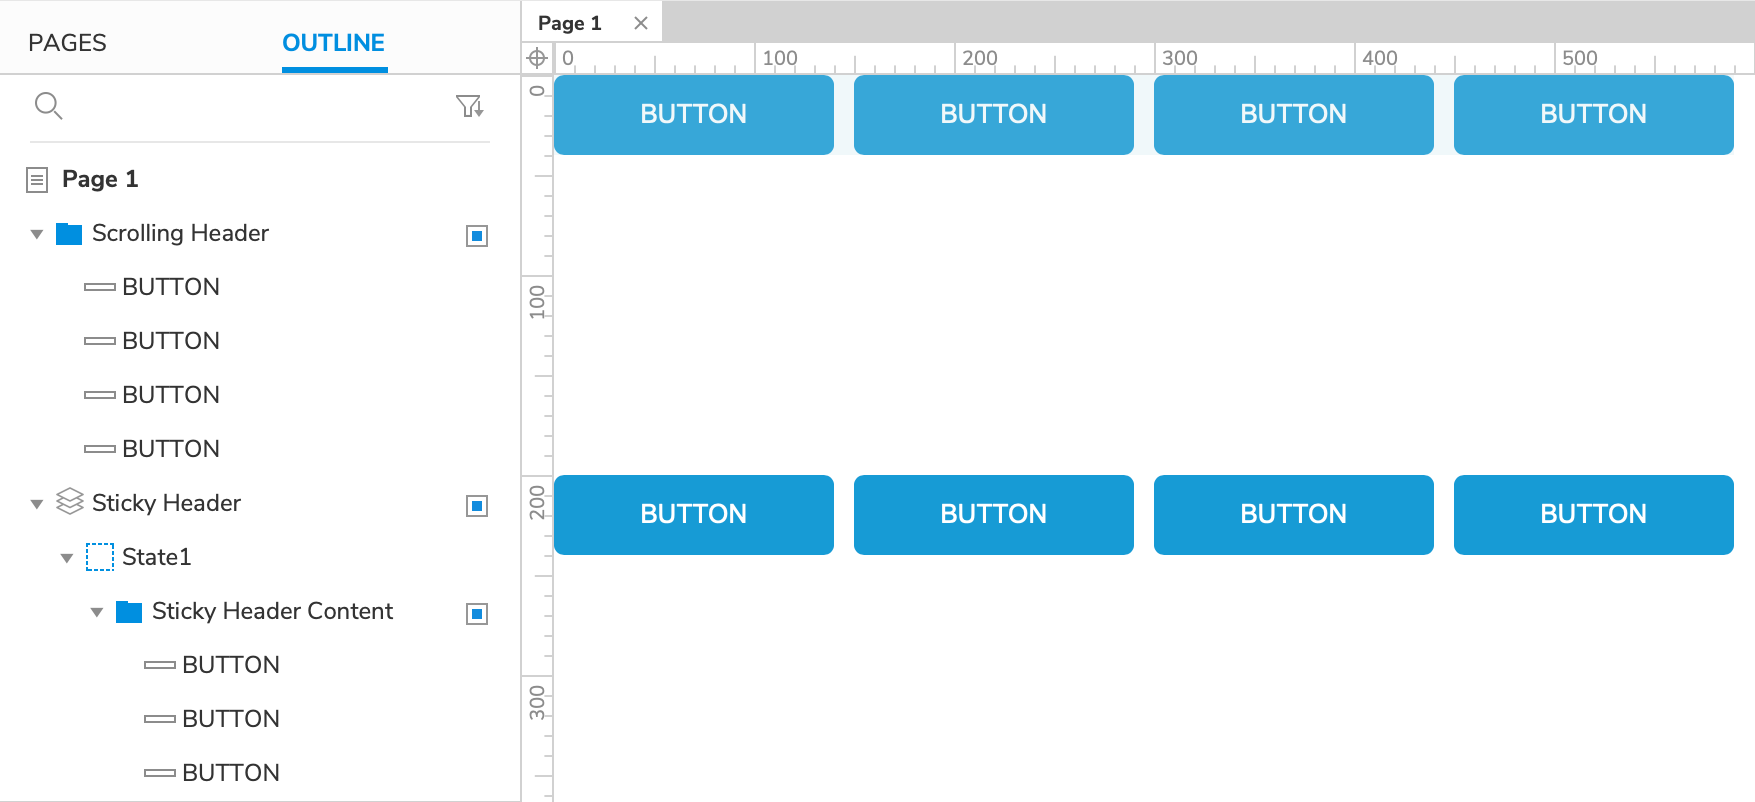
Copy the Scrolling Header group and paste a copy of it onto the canvas at (0,0). Name the copy
Sticky Header Content.Right-click the new group and select Create Dynamic Panel in the context menu.
Name the new dynamic panel
Sticky Header.
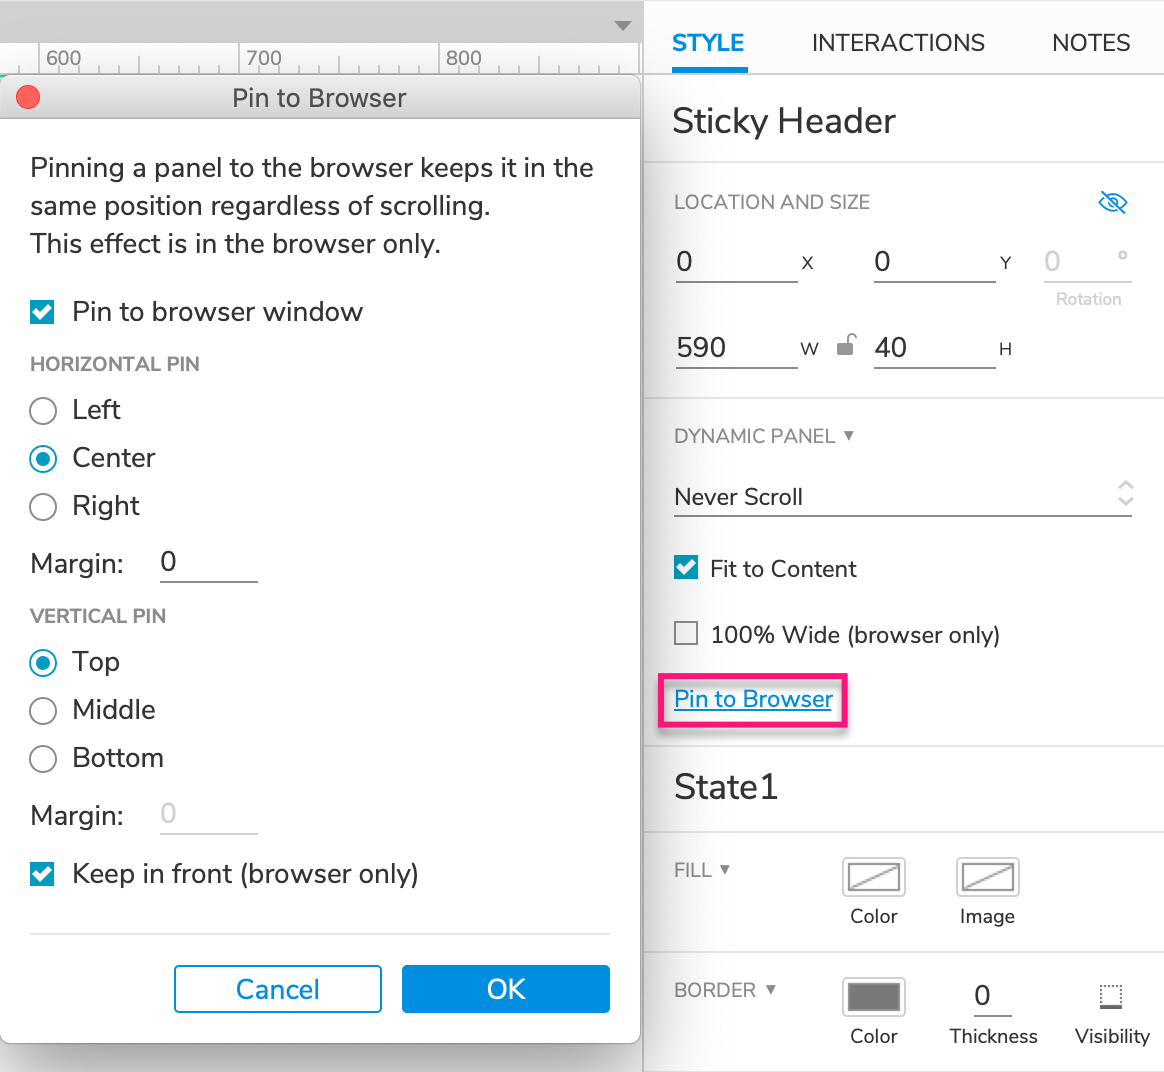
In the Style pane, click Pin to Browser.
In the dialog that appears, check the box for Pin to browser window.
If your page is center-aligned (default), set the horizontal pin to Center.
If your page is left-aligned, leave the horizontal pin set to Left.
Click OK to close the dialog.
Make the Page's Content Long Enough to Scroll
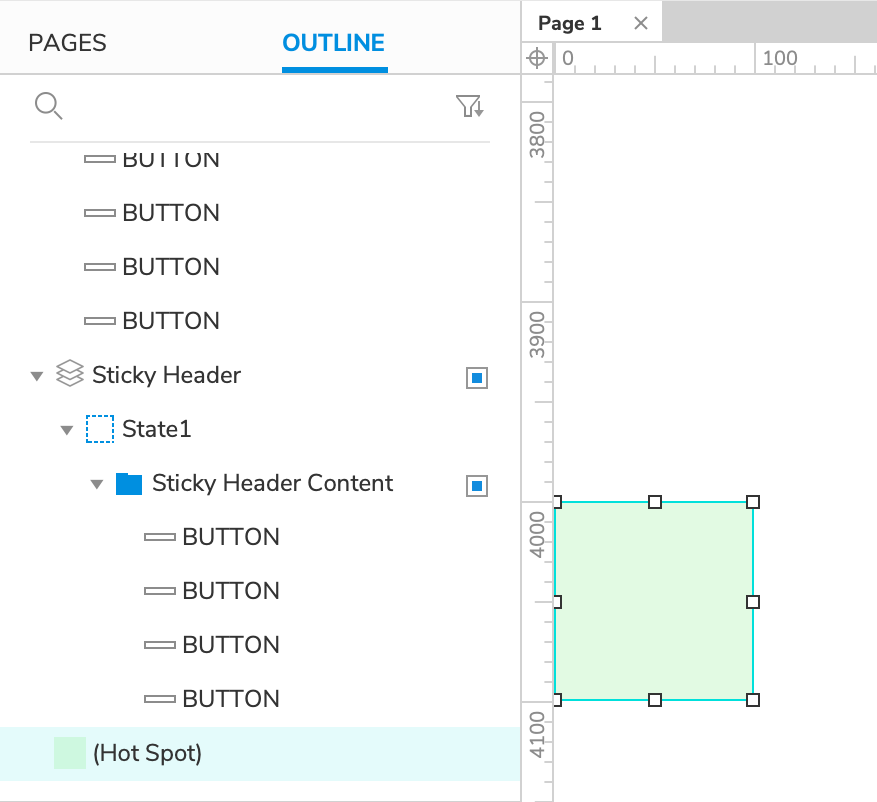
- Drag a hot spot widget onto the canvas and place it at (0,4000). This will make the page scrollable in the web browser, but the hot spot widget will not be visible.
2. Hide the Sticky Header Until the Page Is Scrolled Down
Make the Sticky Header Hidden by Default
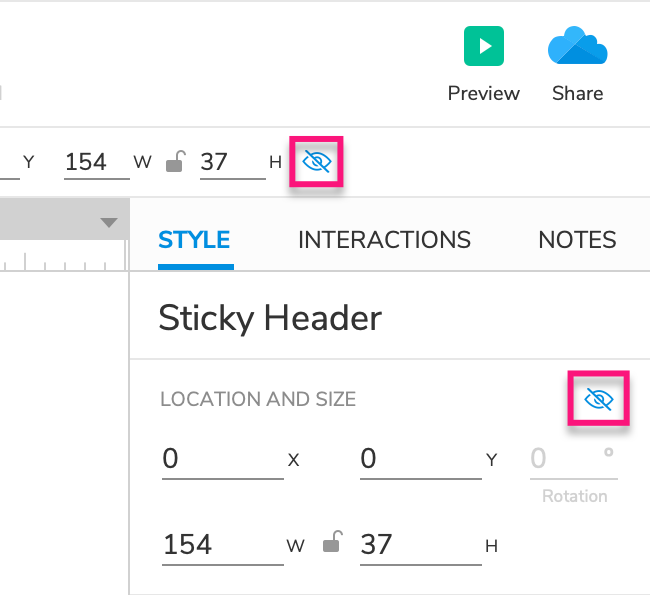
- Select the Sticky Header dynamic panel and click the Hidden icon in the Style pane or the style toolbar.
Show the Sticky Header When the Page Is Scrolled
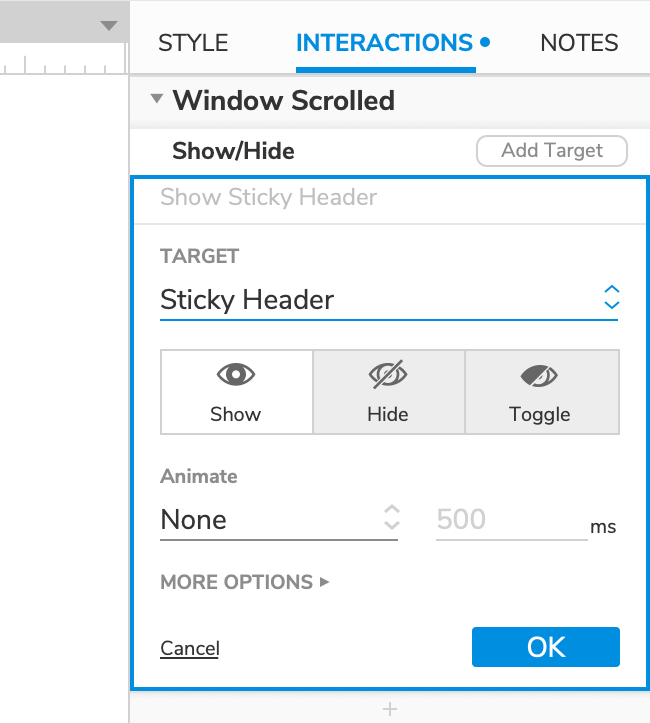
Click a blank spot on the canvas to select the page itself, and click New Interaction in the Interactions pane.
Select the Window Scrolled event in the list that appears, and then select the Show/Hide action.
Select the Sticky Header dynamic panel in the Target dropdown.
Leave Show selected and click OK to save the action.
Hide the Scrolling Header When the Page Is Scrolled
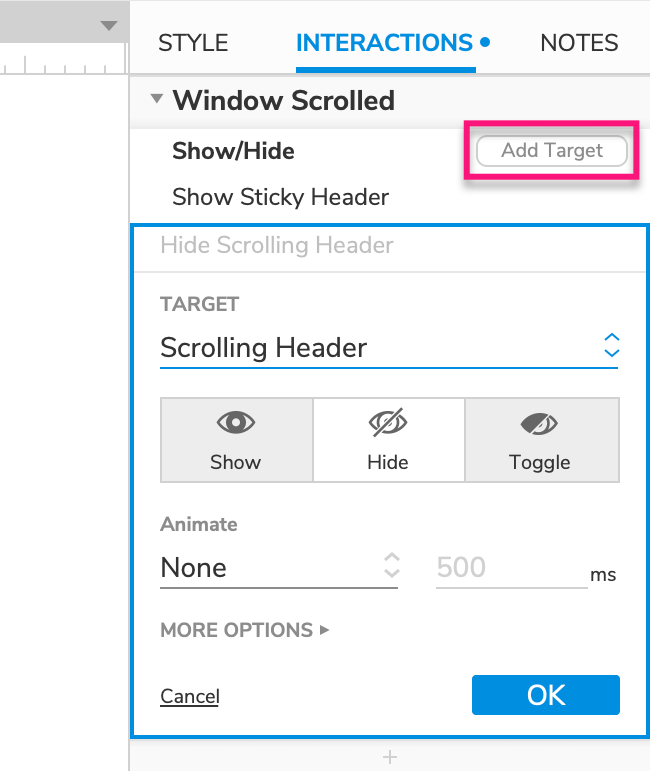
Hover over the Show/Hide action and click the Add Target button that appears.
Select the Scrolling Header group in the Target dropdown.
Select Hide and click OK to save the action.
Add a Condition That Checks the Page's Scroll Position
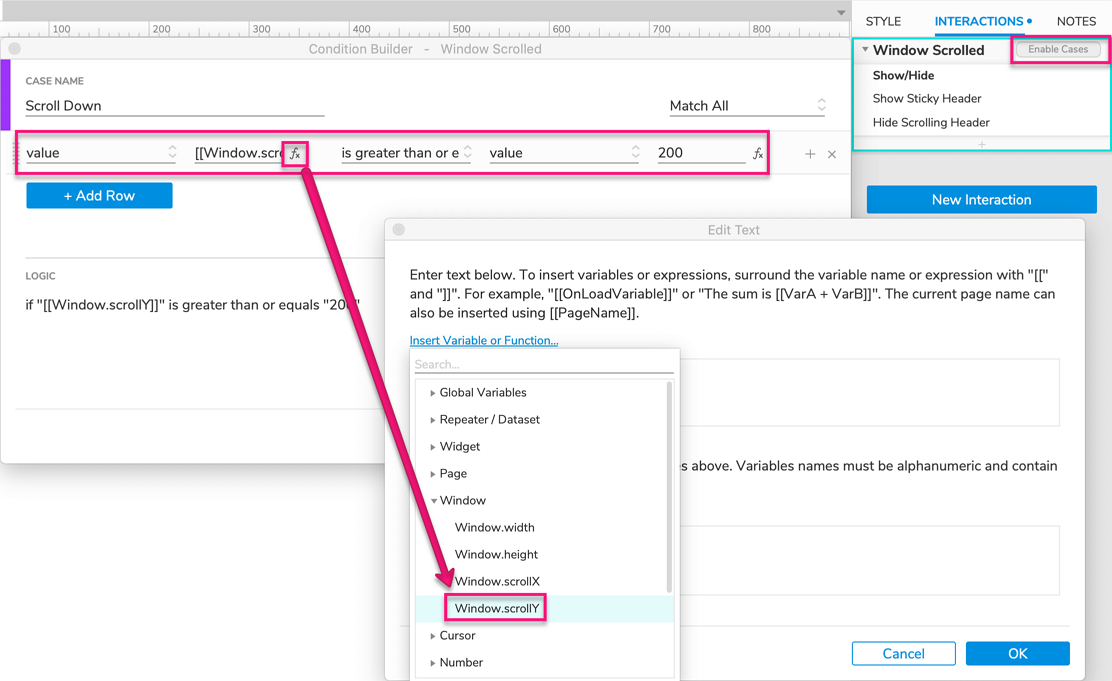
Hover over the Window Scrolled heading in the Interactions pane and click Enable Cases to the right. In the Condition Builder dialog that appears, name the case
Scroll Downand click Add Logic.In the condition row that appears, select value in the first dropdown. Then click the fx icon to the right of the second field to open the Edit Text dialog.
At the top of the dialog, click Insert Variable or Function. In the list that appears, select Window.scrollY under the Window heading.
The field at the top of the dialog should now read:
[[Window.scrollY]]. (This bracketed expression represents the number of pixels the page has been scrolled vertically in the web browser.)Click OK to close the Edit Text dialog.
In the condition row's third field, select is greater than or equals. In the field to the right, enter
200.The summary at the bottom of the Condition Builder dialog should now read:
if "[[Window.scrollY]]" is greater than or equals "200". This condition will be met when the page has been scrolled 200 pixels downward, which is precisely when the Scrolling Header group, located at (0,200), will reach the top of the page. Hiding that group and showing the Sticky Header dynamic panel at the same time will give the appearance that the header has stopped scrolling.Click OK to close the Condition Builder dialog.
3. Preview the Interaction
Preview the page and scroll down. The header should stick in place once it reaches the top of the page.
4. Show the Scrolling Header Again When the Page Is Scrolled Up
Add a Second Window Scrolled Case
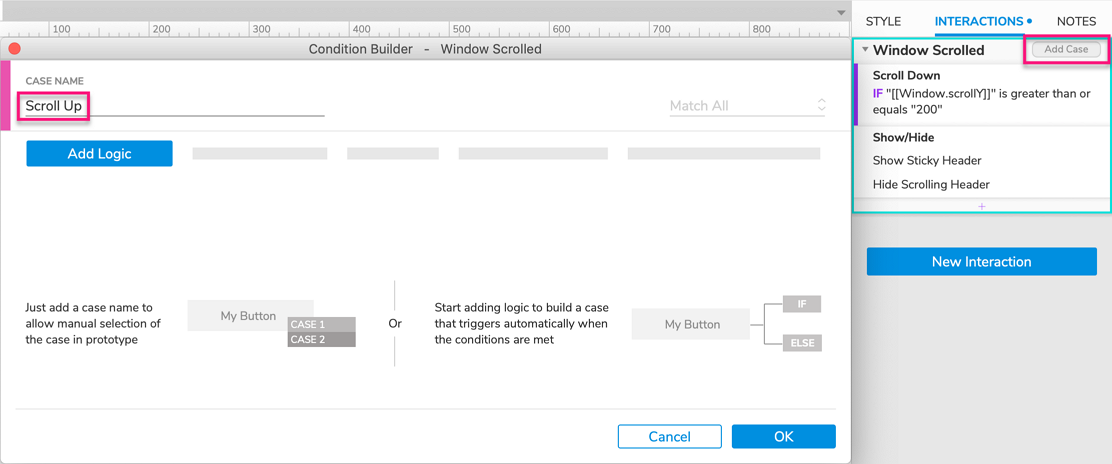
- Back in Axure RP, hover over the Window Scrolled heading in the Interactions pane and click Add Case to the right. In the Condition Builder dialog that appears, name the case
Scroll Upand click OK without adding any logic.
Note
Notice that even though we didn't set up a condition for this case, it has the condition
ELSE IF true. This case, also known as a "default" case, will fire if the first case's condition doesn't pass (when the page is scrolled up past Y=200).
Show the Scrolling Header Group
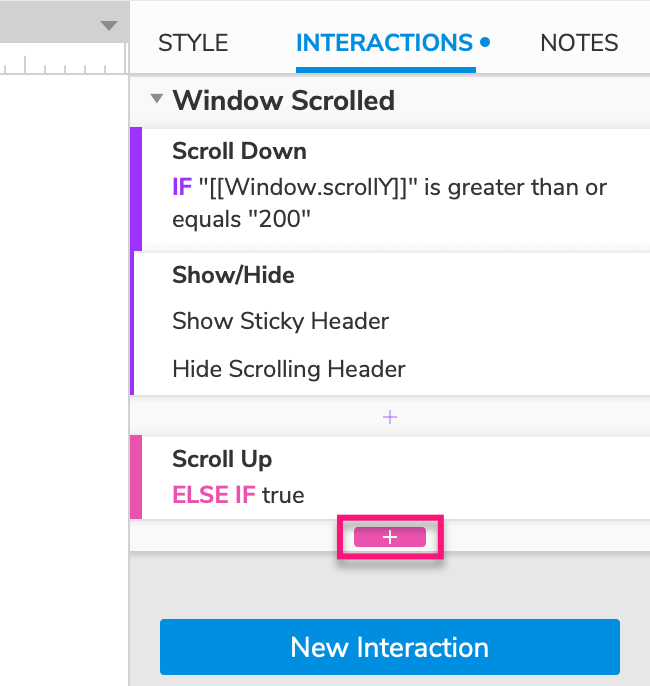
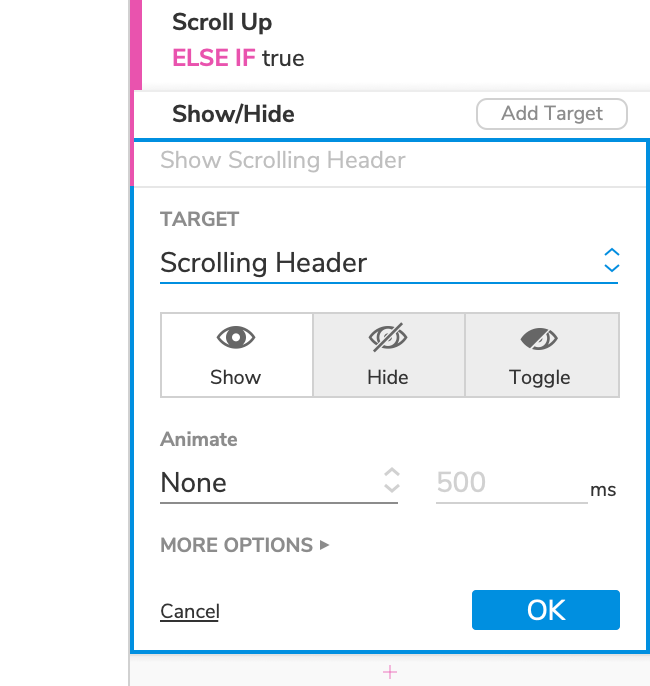
Click the Insert Action icon at the bottom of the Window Scrolled block, and select the Show/Hide action in the list that appears.
Select the Scrolling Header group in the Target dropdown.
Leave Show selected and click OK to save the action.
Hide the Sticky Header Dynamic Panel
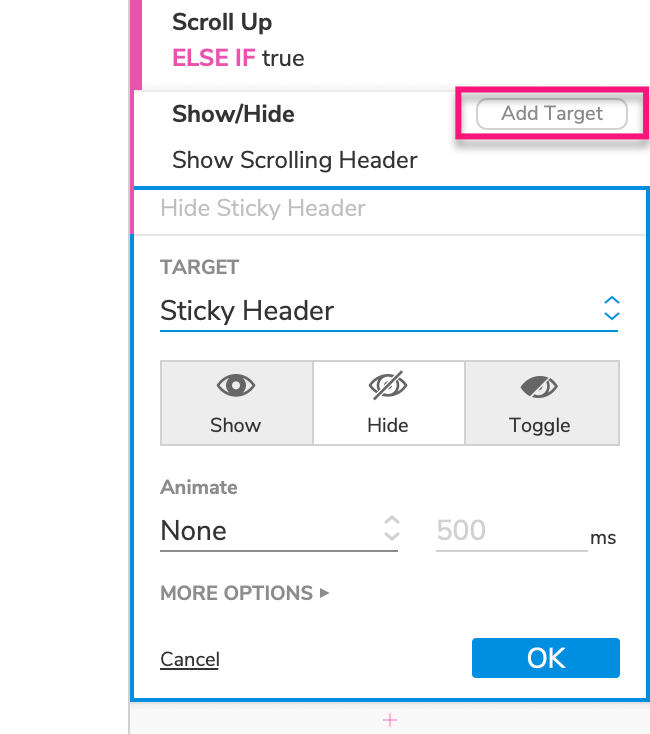
Hover over the Show/Hide action and click the Add Target button that appears.
Select the Sticky Header dynamic panel in the Target dropdown.
Select Hide and click OK to save the action.
5. Preview the Interaction
Preview the page and scroll up and down. The header should stick in place when you scroll down far enough and then unstick again when you scroll back to the top of the page.
