
Set Dynamic Panel State on Next Page Tutorial
In this tutorial, you'll learn how to use a global variable to set the state of a dynamic panel based on a selection made on a previous page in the prototype.
Note
Click here to download the completed RP file for this tutorial.
1. Widget and Page Setup
Page 1 – The Selection Form
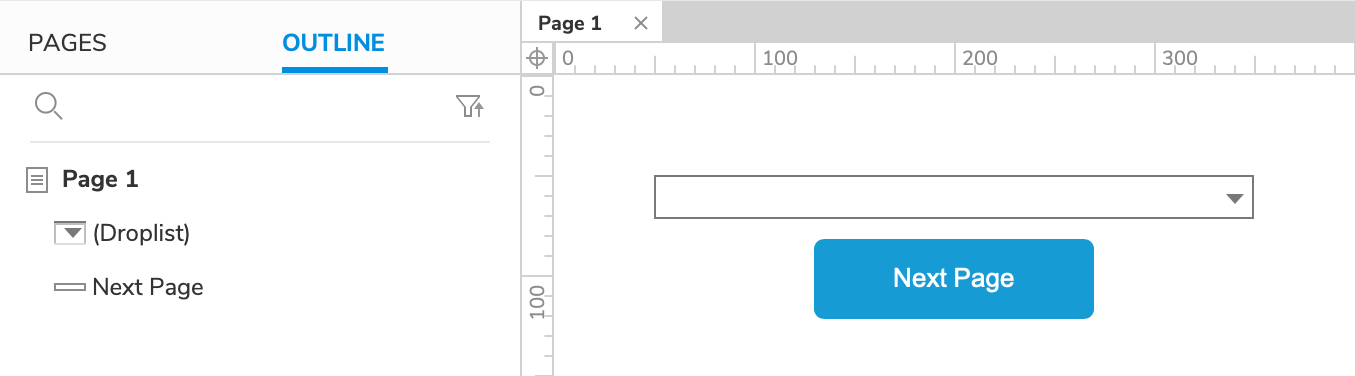
Open a new RP file and open Page 1 on the canvas.
Drag a droplist widget and a button widget onto the canvas from the Libraries pane.
Set the button's text to
Next Page.
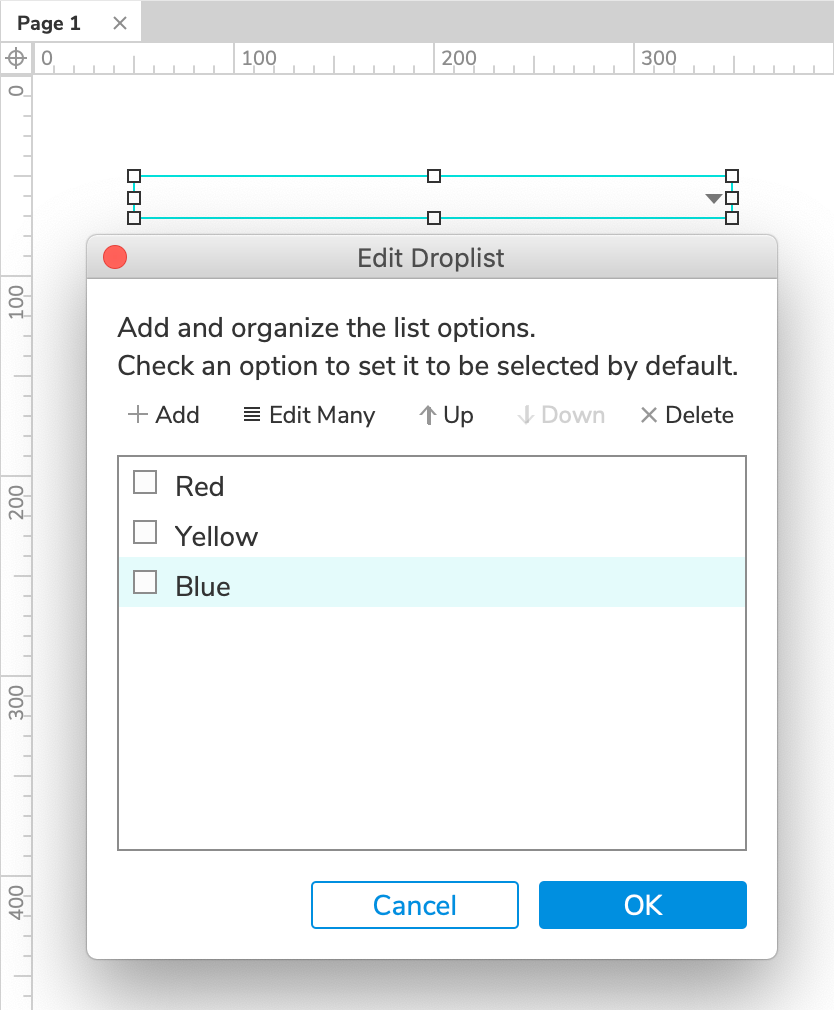
Double-click the droplist to edit its options.
In the dialog that appears, click Add three times to create three new options. Make one
Red, oneYellow, and oneBlue.
Page 2 – The Dynamic Panel
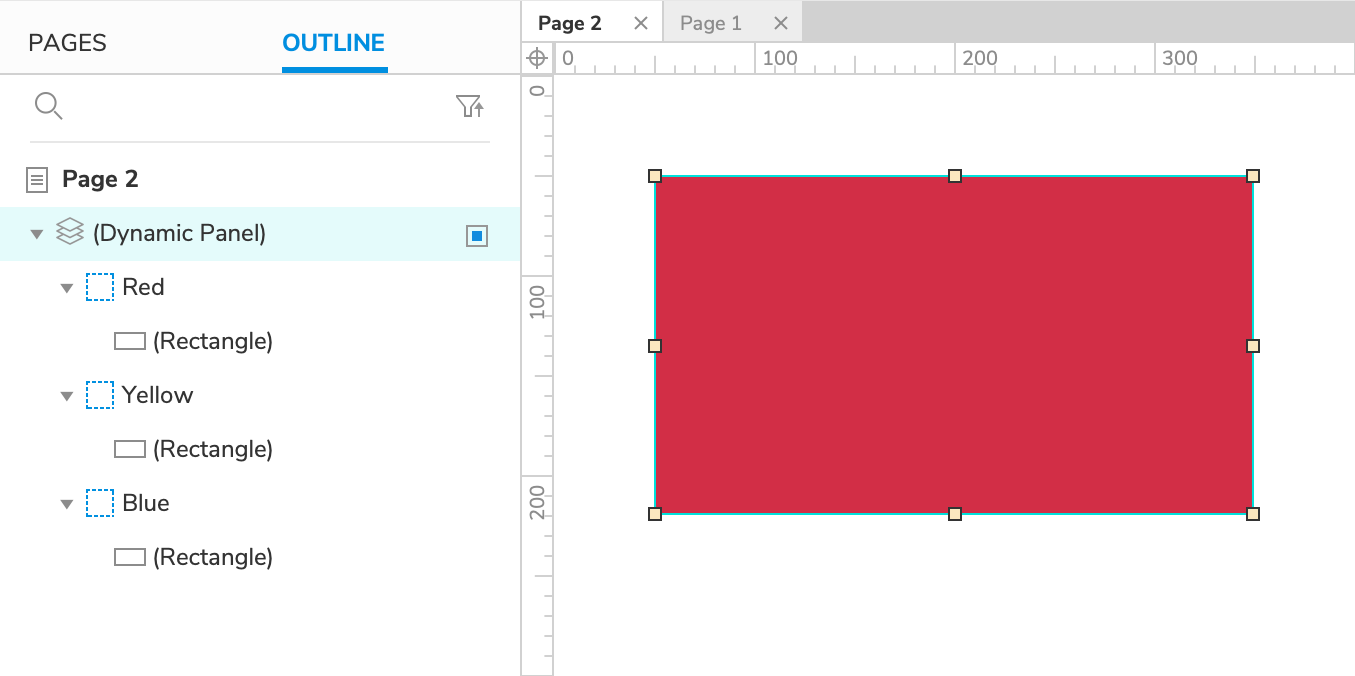
Add a new page to the project and open it on the canvas.
Drag three rectangle widgets onto the canvas. Give one a red fill color, one a yellow fill color, and one a blue fill color.
Right-click the red rectangle and select Create Dynamic Panel in the context menu.
In the Outline pane, rename the dynamic panel's first state to
Red.Note
The dynamic panel's state names must match the options in the droplist widget on Page 1.
Give the dynamic panel two new states. Name one
Yellowand the otherBlue.In the Outline pane, drag the yellow rectangle widget into the Yellow panel state. Then, move it to (0,0) on the canvas. Repeat this for the blue rectangle widget.
2. Create a Global Variable to Store the User's Selection
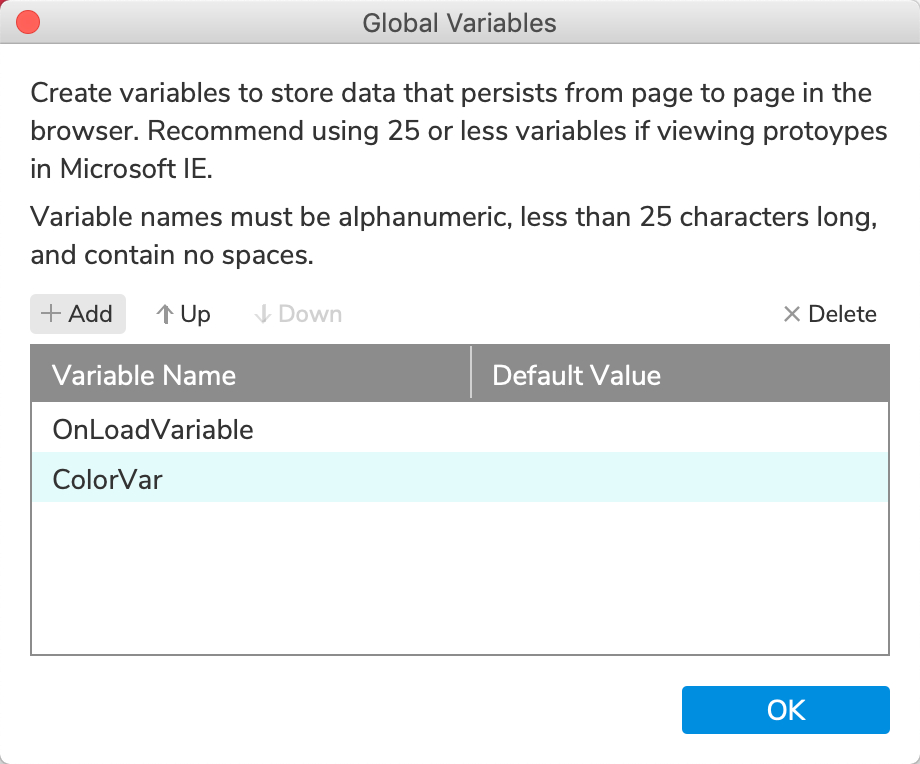
In the top menu, go to Project → Global Variables.
In the Global Variables dialog, click Add to add a new variable. Name it
ColorVar.Click OK to close the dialog.
3. Capture the User's Input and Go to the Next Page
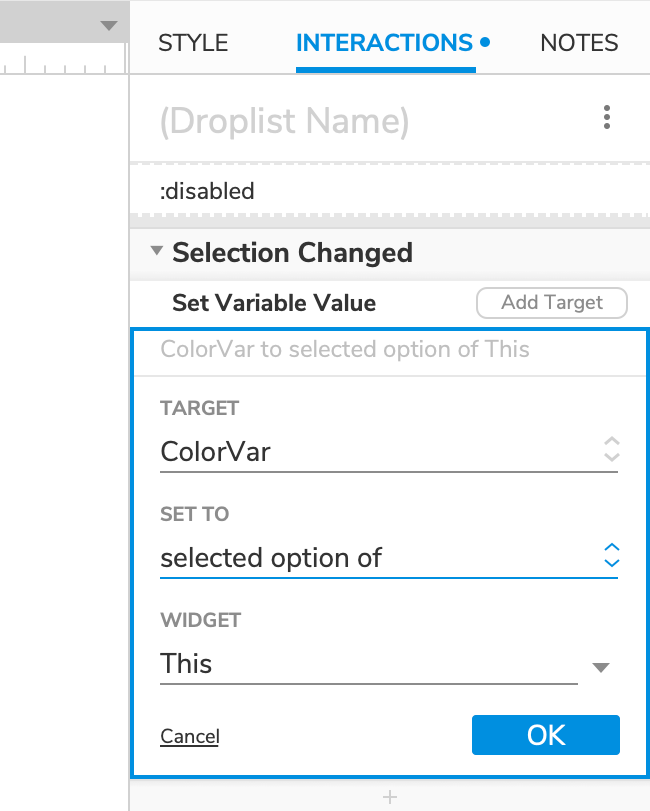
Set the Variable's Value to the Droplist's Selection
Open Page 1 on the canvas and select the droplist widget.
Click New Interaction in the Interactions pane.
Select the Selection Changed event in the list that appears, and then select the Set Variable Value action.
Select the ColorVar variable in the Target dropdown.
In the Set To dropdown, select selected option of.
Leave This selected in the Widget dropdown, and click OK to save the action.
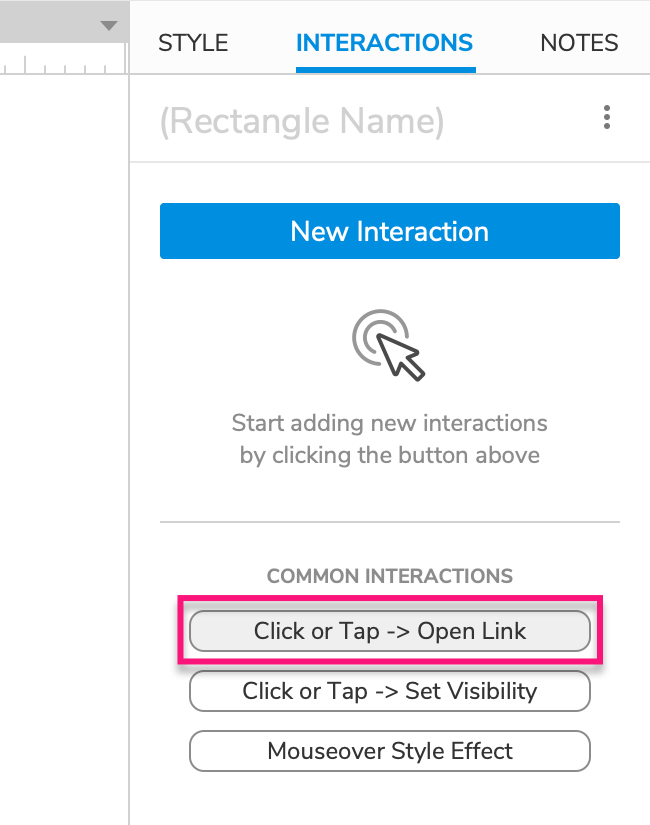
Open Link to Page 2
Select the button widget and click Click or Tap → Open Link in the Interactions pane.
Select Page 2 in the Link To drodown and click OK to save the action.
4. Set the Dynamic Panel's State to the Variable's Value
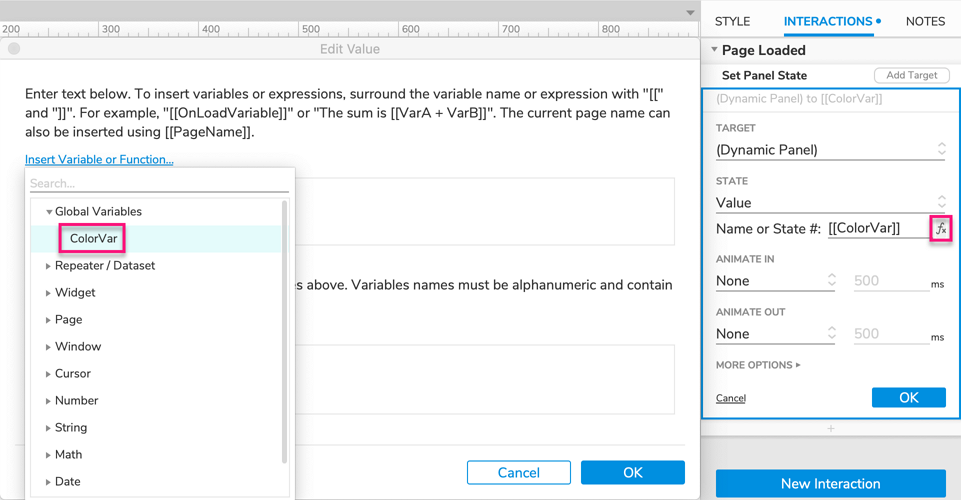
Open Page 2 and click a blank spot on the canvas to select the page itself. Then click New Interaction in the Interactions pane.
Select the Page Loaded event in the list that appears, and then select the Set Panel State action.
Select the dynamic panel in the Target dropdown.
In the State dropdown, select Value. Then click the fx icon next to the field that appears to open the Edit Value dialog.
Delete the text in the upper field of the dialog, and then click Insert Variable or Function.
In the dropdown that appears, select ColorVar under the Global Variables heading. The field at the top of the dialog should now read:
[[ColorVar]]. (This bracketed expression will be replaced by the variable's value in the web browser.)Note
We're able to set the state of the dynamic panel to the droplist's selected option — which is stored in the variable — because the panel's states have the same names as the droplist's options.
Click OK to close the Edit Value dialog, and then click OK to save the Set Panel State action.
5. Preview the Interaction
Preview Page 1 and select a color in the dropdown.
Click the Next Page button to navigate to Page 2. The dynamic panel should display the color you selected in the droplist.