Dynamically Set Droplist Options Tutorial
In this tutorial, you'll learn how to reveal different options in a second droplist based on the selection made in the first.
Note
It isn't possible to dynamically change the options in a single droplist widget, so this technique involves creating multiple versions of the second droplist and switching between them using a multi-state dynamic panel.
Note
Click here to download the completed RP file for this tutorial.
1. Widget Setup
Create Three Droplist Widgets

Open a new RP file and open Page 1 on the canvas.
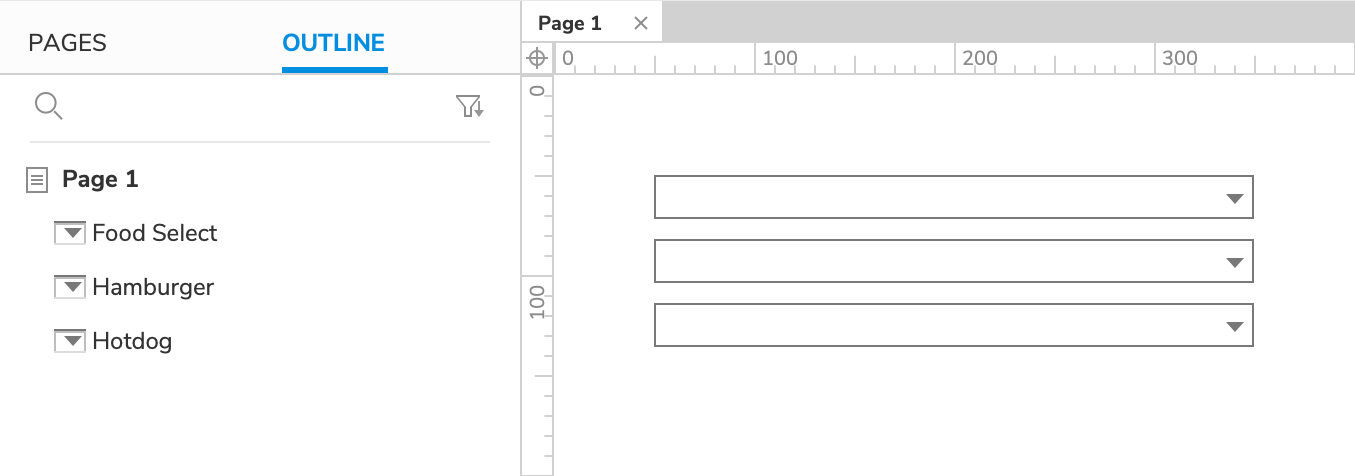
Drag three droplist widgets onto the canvas. Name one droplist
Food Select, oneHamburger, and oneHotdog.
The Primary Droplist's Options

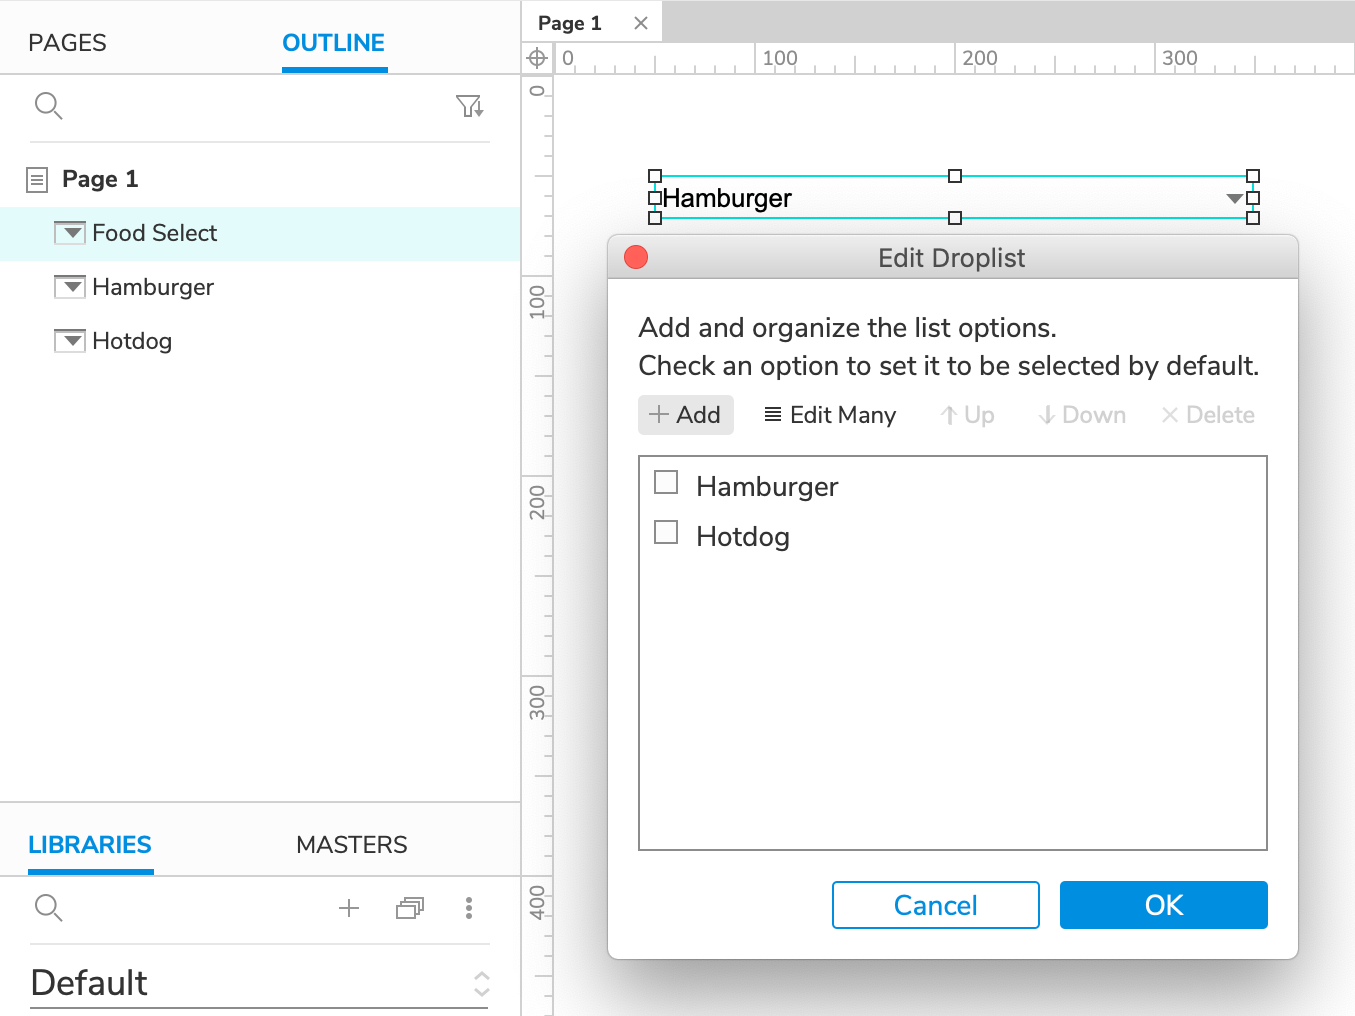
Double-click the Food Select droplist to edit its options.
In the dialog that appears, click Add twice to create two new options. Make the first one
Hamburgerand the secondHotdog.Click OK to close the dialog.
The Secondary Droplists' Options
Give the Hamburger droplist two options:
CheeseandNo Cheese.Give the Hotdog droplist two options:
Ketchup and MustardandHorseradish and Sauerkraut.
2. Place the Secondary Droplists in a Two-State Dynamic Panel

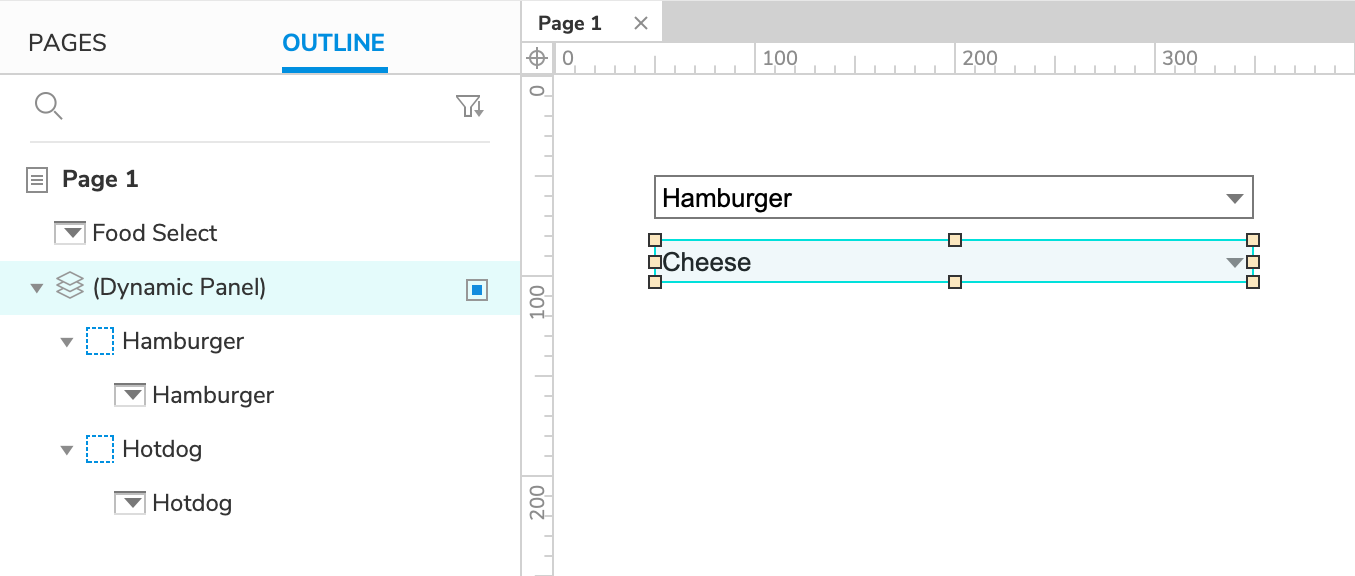
Right-click the Hamburger droplist and select Create Dynamic Panel in the context menu.
In the Outline pane, name the new dynamic panel's first state
Hamburger.Still in the Outline pane, hover your cursor over the dynamic panel widget and click the Add State icon to the right. Name this new state
Hotdog.Still in the Outline pane, select the Hotdog droplist and drag it to the right to indent it under the Hotdog dynamic panel state. This will add it to that state and open the state on the canvas.
Move the Hotdog droplist to (0,0) on the canvas.
Click Close at the top-right of the canvas or press ESC to exit state-editing mode.
3. Change the Dynamic Panel's State When the Primary Droplist's Selection Changes

Select the Food Select droplist widget and click New Interaction in the Interactions pane.
Select the Selection Changed event in the list that appears, and then select the Set Panel State action.
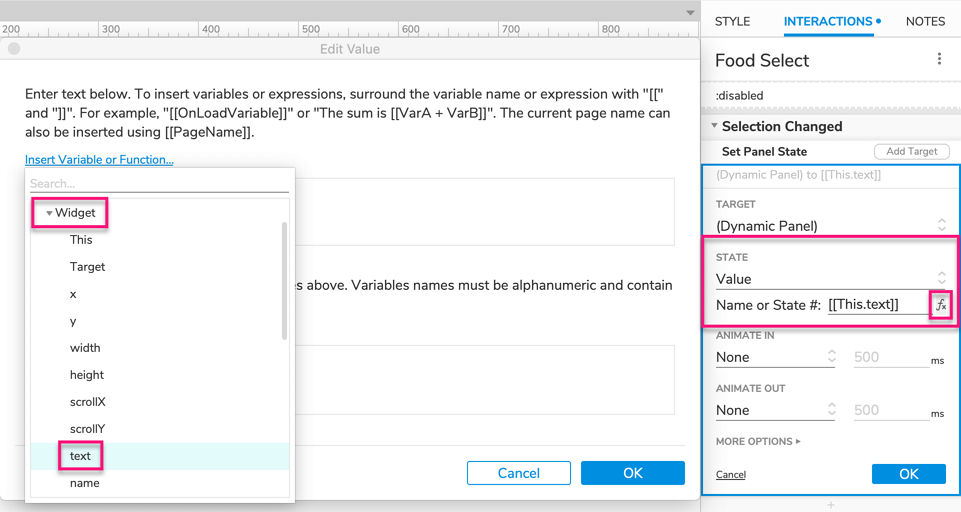
Select the dynamic panel in the Target dropdown.
In the State dropdown, select Value. Then click the fx icon next to the field that appears to open the Edit Value dialog.
Delete the text in the upper field of the dialog, and then click Insert Variable or Function.
In the dropdown that appears, select text under the Widget heading. The upper field of the dialog should now read
[[This.text]], which represents the droplist's currently displayed selection.Note
We're able to set the state of the dynamic panel to the selected option of the Food Select droplist because the panel's states have the same names as the droplist's options.
Click OK to close the Edit Value dialog, and then click OK again to save the Set Panel State action.
4. Preview the Interaction
Preview the page. Hamburger is selected in the first droplist by default, and the second droplist shows the relevant toppings.
Click the first droplist and choose Hotdog instead, and the options in the second droplist should change.
Additional Information and Tips
Add More Options
Using this technique, you can add as many options as you'd like to the primary droplist. Just add more states to the dynamic panel and give each state a droplist with your desired options. Make sure to name the new dynamic panel states the same as the new options in the primary droplist.
