
Axure Cloud for Business Accounts and Permissions
This document is a guide for managing Axure Cloud for Business user accounts. The information presented covers private instances hosted on Axure servers as well as on-premises installations.
Log in to an administrator account to access the controls described below.
Managing User Accounts
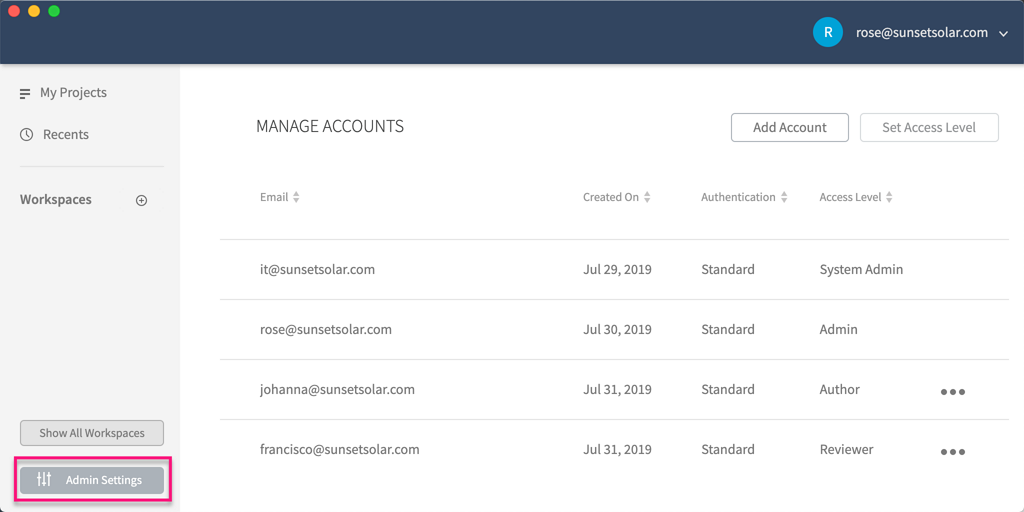
To manage your users' accounts, click Admin Settings at the bottom-left of the Axure Cloud for Business web interface.
Adding Accounts
Before your teammates can access your Axure Cloud for Business private instance or on-premises server, you'll need to create user accounts for them.
Click Add Account at the top-right of the Manage Accounts page to open the Add Accounts dialog.
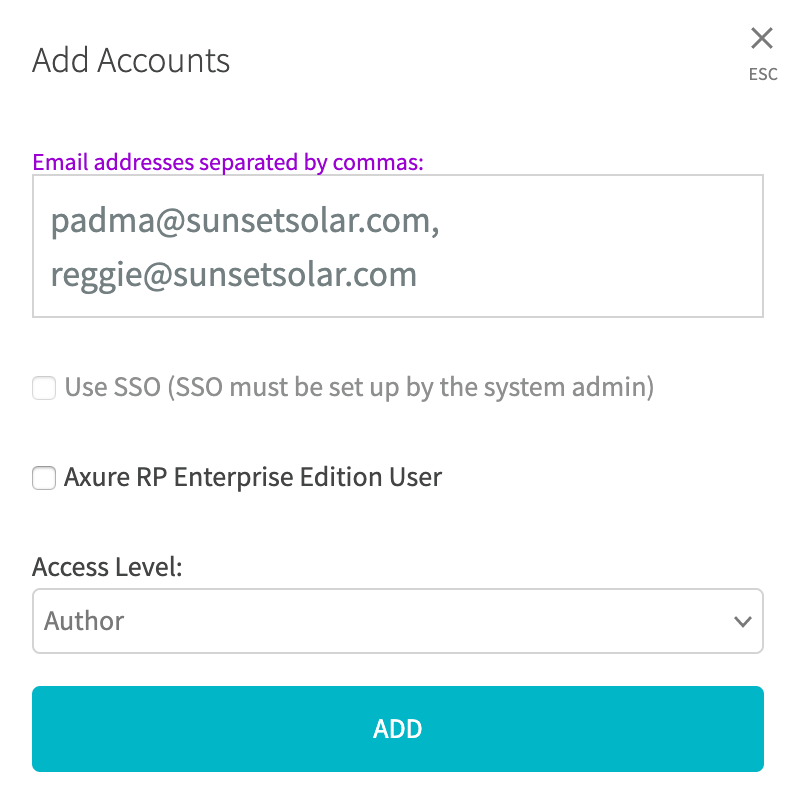
Private Instance:
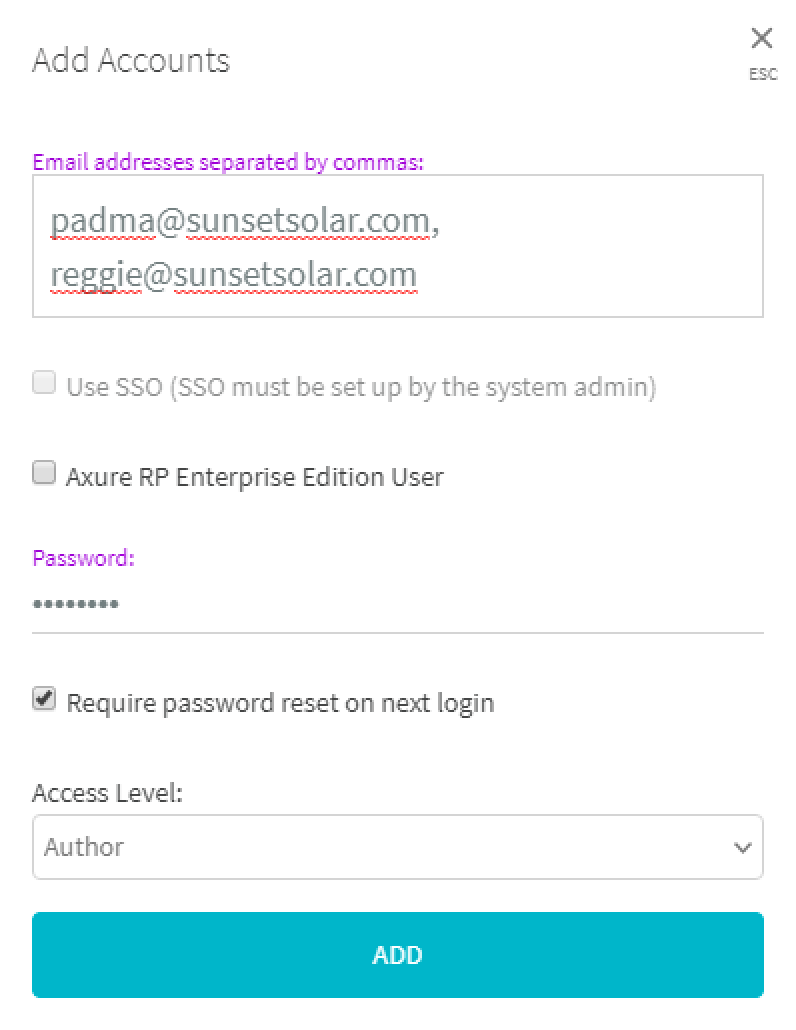
On-Premises:
Enter the email addresses of one or more teammates you want to create user accounts for.
If you have configured Single Sign On (SAML), you can check the box for Use SSO to make the new user accounts sign in with their SAML credentials. (This can be enabled or disabled later.)
If you leave this box unchecked:
Private instance users will receive emails prompting them to create passwords to log in to their accounts.
On-premises users' passwords are set by the administrator in the Password field of the Add Accounts dialog.
You can optionally require users to choose new passwords upon login by checking the box for Require password reset on next login.
If the teammates you're adding use Axure RP Enterprise edition, check the box for Axure RP Enterprise Edition User. These users will not count toward the monthly user cap for Axure Cloud for Business.
Finally, select the user access level you want to grant to the new accounts. (You can change a user's access level later.)
Note
Only the super administrator can create other admin accounts.
Disabling Accounts
Disabling an account prevents the user from logging in or publishing to the Axure Cloud for Business server.
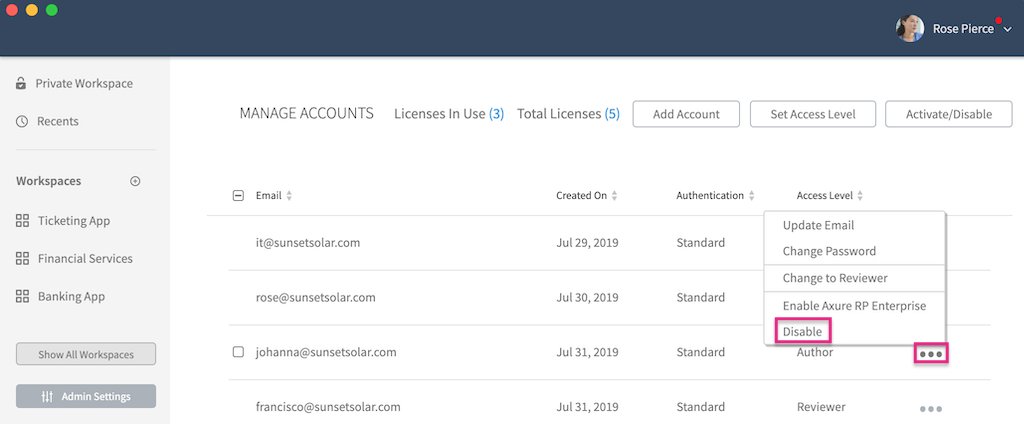
Locate the account you want to disable in the table on the Manage Accounts page.
Click the ellipsis menu in the far right column and select Disable.
In the dialog that appears, click DISABLE to confirm the action.
Note
You can reactivate disabled accounts by selecting Activate in the ellipsis menu.
User Access Levels
| Reviewer | Author | Admin | Technical Admin | Super Admin | |
|---|---|---|---|---|---|
| View, Inspect, and Comment | |||||
| Create and Edit Projects | |||||
| Create Workspaces and Invite Collaborators | |||||
| Create Author and Reviewer Accounts | |||||
| Create Admin Accounts |
Reviewer
Reviewer accounts can:
- view and inspect projects
- participate in project discussions
Note
Author accounts can be restricted to reviewer-only access for specific workspaces. Check out the workspaces article to learn more.
Author
Author accounts can do everything reviewers can do. In addition, they can:
- create, delete, and edit projects, including building prototypes from artboard projects
- create new workspaces and invite other users to them
Admin
Administrator accounts can do everything authors can do. In addition, they can:
- create author and reviewer accounts
- add SAML/SSO to user accounts
- activate and disable user accounts
- view and self-invite to any workspace
Technical Admin
Technical administrator accounts are created for the purpose of handling the technical aspects of setting up and configuring the Axure Cloud for Business private instance or on-premises server. Technical admins do not count toward the monthly user cap for Axure Cloud for Business, since they cannot create and edit projects, or create workspaces and invite collaborators.
Technical admins can do everything admins can do, except for create projects and workspaces. Additionally, they can:
Super Admin
The super administrator account is created during the Axure Cloud for Business setup process, and it manages all other user accounts on your private instance or on-premises server.
The super admin account can do everything that all of the previously mentioned user accounts can do. There is only one super admin account per server.
Changing a User's Access Level
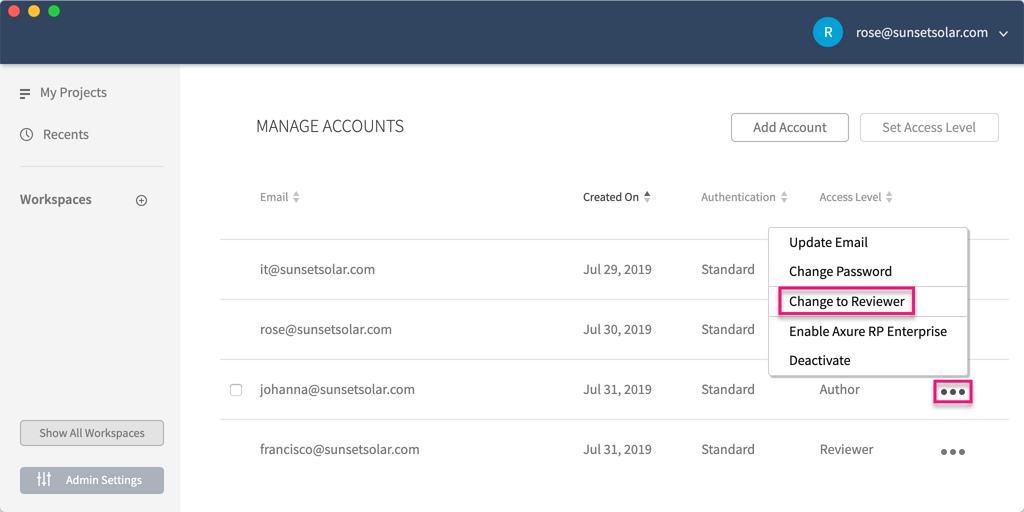
Locate the account you want to edit in the table on the Manage Accounts page.
Click the ellipsis menu in the far right column and select one of the following:
- Change to Admin
- Change to Author
- Change to Reviewer
Note
Only the system administrator can grant or revoke admin access.
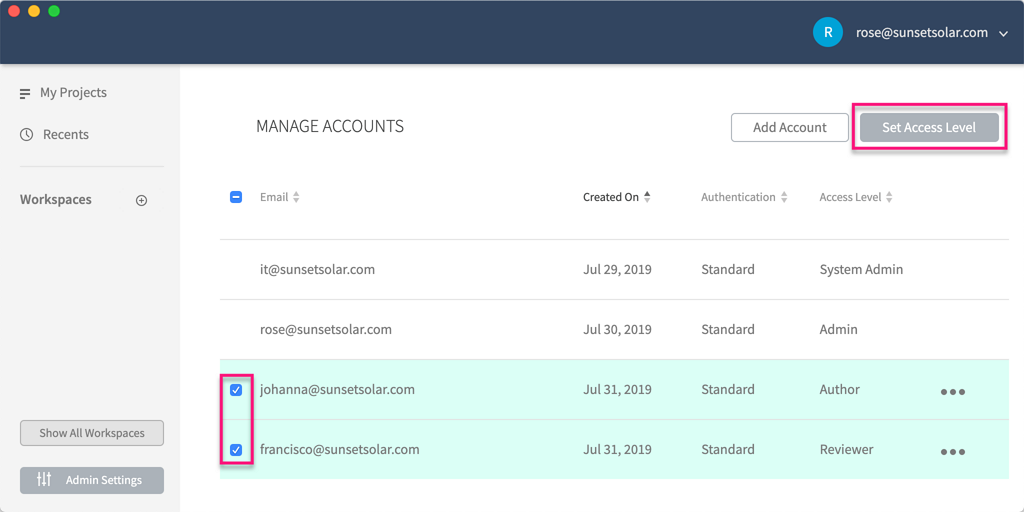
Alternatively, you can set the access levels for multiple accounts at once by checking them and clicking Set Access Level at the top-right of the page.
User Sign-In Options
Axure Cloud Password
By default, users can sign in to your Axure Cloud for Business private instance or on-premises server with the password they choose at account creation.
Users can reset their passwords at any time by clicking their email address at the top-right of the UI and selecting Manage Account.
Administrators can change users' passwords by following these steps:
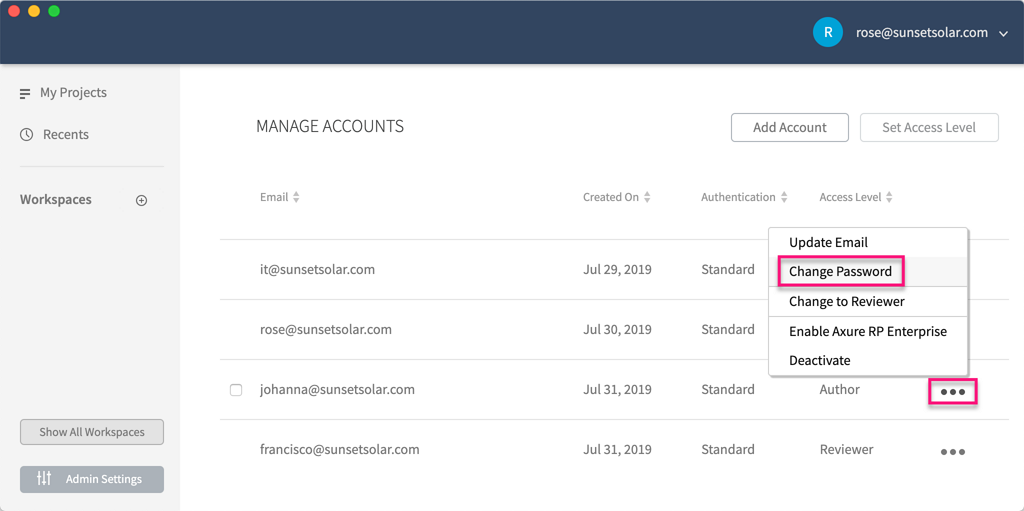
Locate the account you want to edit in the table on the Manage Accounts page.
Click the ellipsis menu in the far right column and select Change Password.
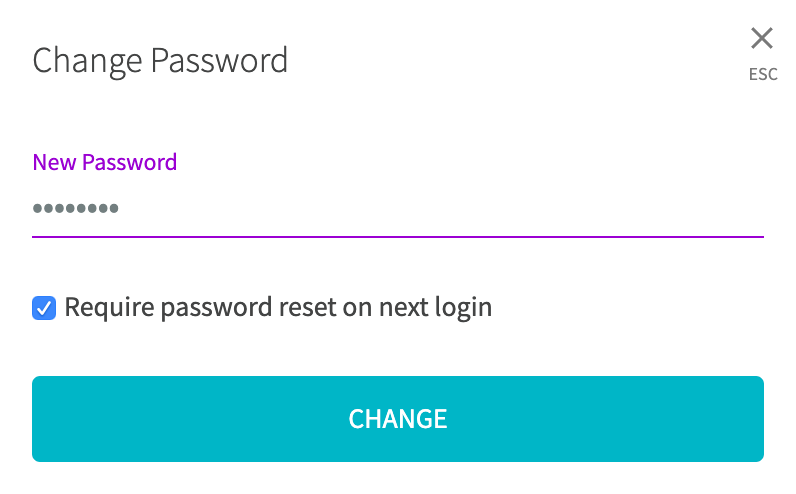
Enter a new password in the dialog that appears, and click Change.
You can optionally require the user to choose a new password upon login by checking the box for Require password reset on next login.
SAML
Note
Axure Cloud for Business uses SAML 2.0.
If the user accounts will use SAML authentication, you'll first need to configure your Axure Cloud for Business private instance or on-premises server to use your identity provider. This must be done by the system administrator.
In the admin settings, switch to the Single Sign On (SAML) tab and provide the requested information.
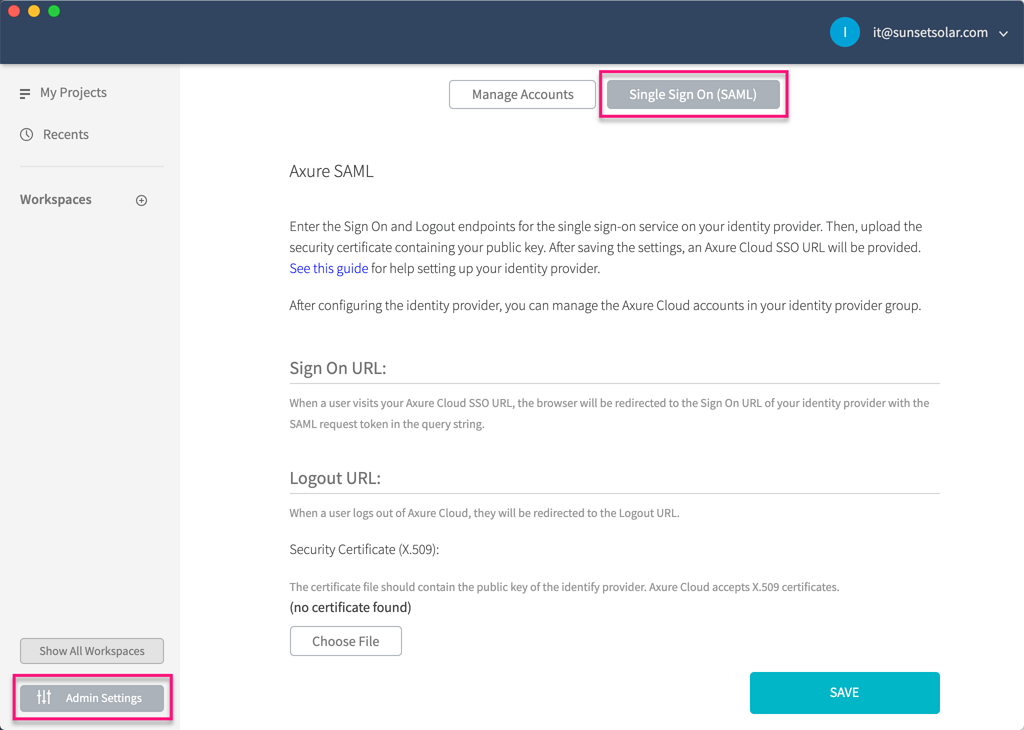
Sign On URL: This is the URL your users will be redirected to in order to sign in to your SAML identity provider. You can get the Sign On URL from your identity provider.
Logout URL: This is the URL your users will be redirected to after logging out of Axure Cloud for Business. It can be any URL you like, including the Sign On URL.
Security Certificate (X.509): This file contains information Axure Cloud for Business needs to process authentication responses from your SAML identity provider. You can generate the Security Certificate through your identity provider, and you will need the following information to do so:
Service Provider Entity ID:
If you have a private instance of Axure Cloud for Business hosted on Axure servers, the Entity ID is your instance's subdomain.
https://[domain].axure.cloudIf you have an on-premises installation of Axure Cloud for Business, the Entity ID is the IP address or hostname of your Axure Cloud for Business server.
Assertion Consumer Service (ACS) URL: This is the Entity ID followed by /identity/consume.
https://[domain].axure.cloud/identity/consume
SSO with Microsoft Active Directory Federation Service
For information on setting up single sign-on with Microsoft's Active Directory Federation Service (ADFS), click the link below:
Axure Cloud On-Premises SSO with ADFS (PDF download)
Adding and Removing SAML from User Accounts
If you originally set up a user account with an Axure Cloud password but want to convert it to use SAML authentication, you can do so by going to the Manage Accounts page.
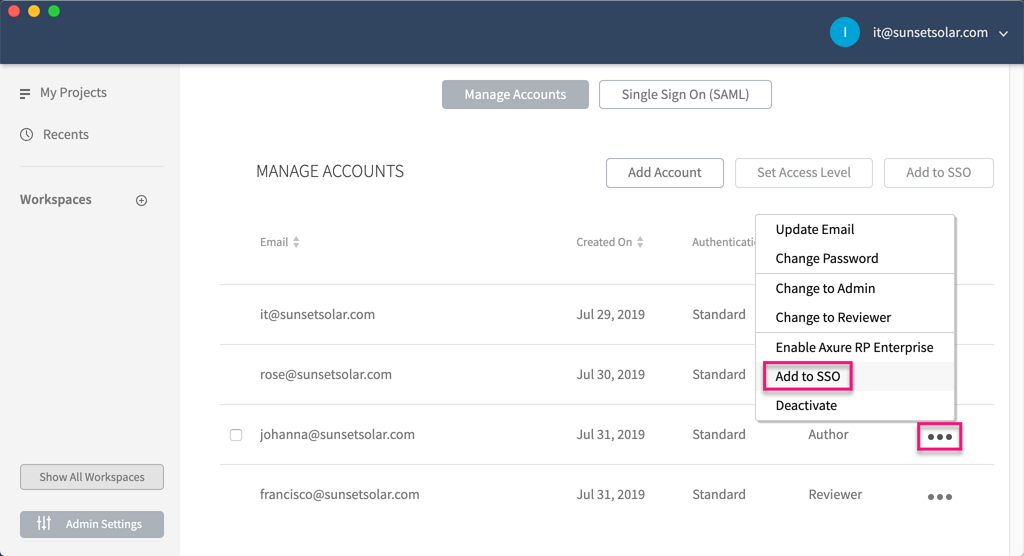
Locate the account you want to want to add SAML to in the table of accounts.
Click the ellipsis menu in the far right column and select Add to SSO. (This option will only appear if your system administrator has already configured SAML on the Single Sign On (SAML) tab.)
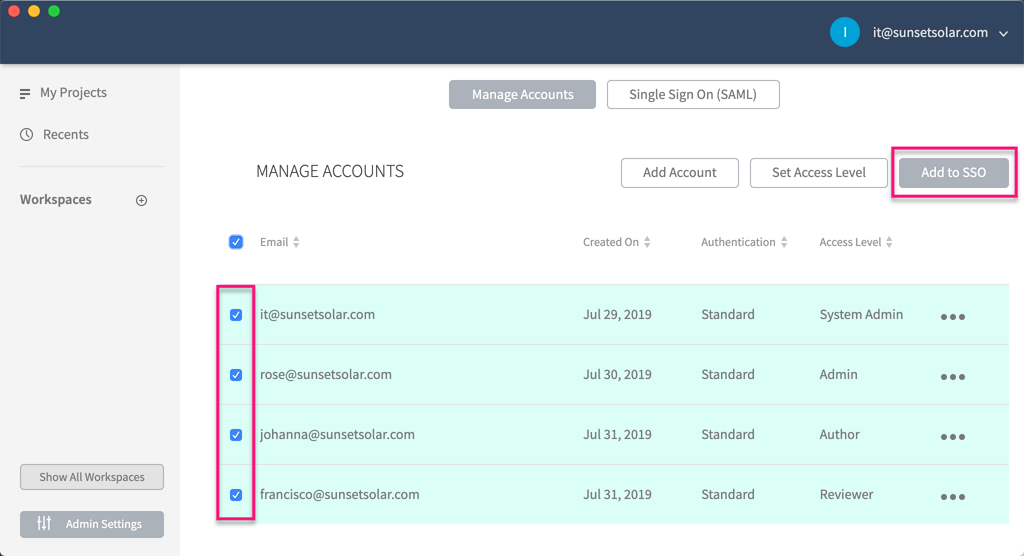
Alternatively, you can add SAML authentication to multiple accounts at once by checking them and clicking Add to SAML at the top-right of the page.
To remove SAML from an account, use the Remove from SSO option in the ellipsis menu.
Active Directory and LDAP
Note
Active Directory and LDAP only work with Axure Cloud for Business on-premises servers.
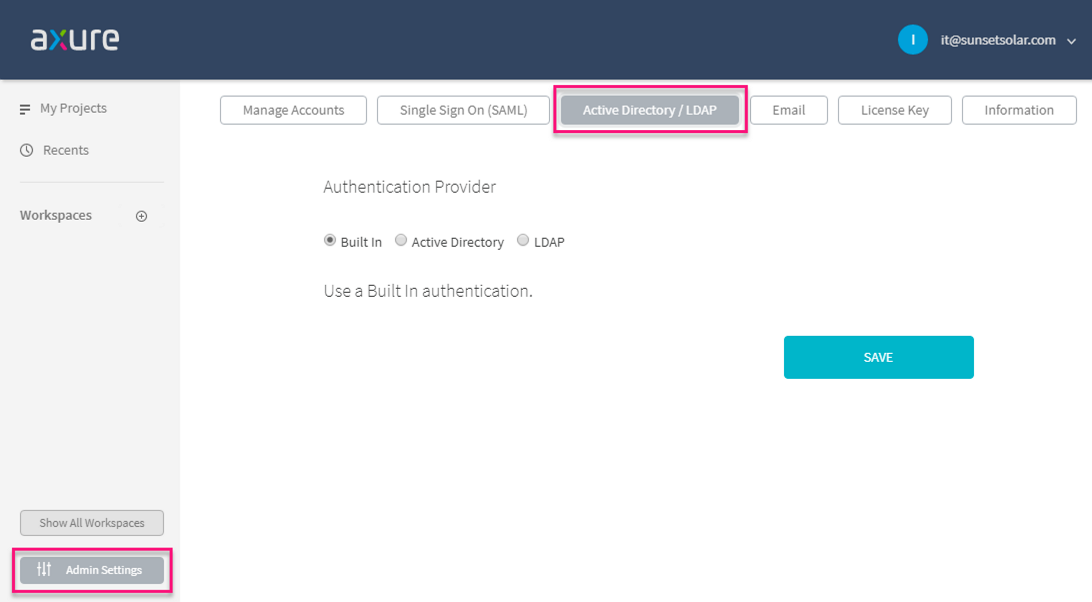
If the user accounts will use Active Directory or LDAP authentication, you'll first need to configure your on-premises server to use your Active Directory or LDAP server. This must be done by the system administrator.
In the admin settings, switch to the Active Directory / LDAP tab. Select the radio button for Built In, Active Directory, or LDAP, and complete the form below.
Note
If Active Directory or LDAP authentication is enabled, SAML settings will be ignored.