Installing Axure Cloud for Business On-Premises
Axure Cloud for Business On-Premises provides all the sharing capabilities and features of Axure Cloud with added user management controls behind your company's firewall. Follow the steps below to get started.
Note
For information on setting up an Axure Cloud for Business private instance on Axure's servers, please refer to our guide on Creating Axure Cloud for Business Private Instances.
On-Premises Architecture Diagram
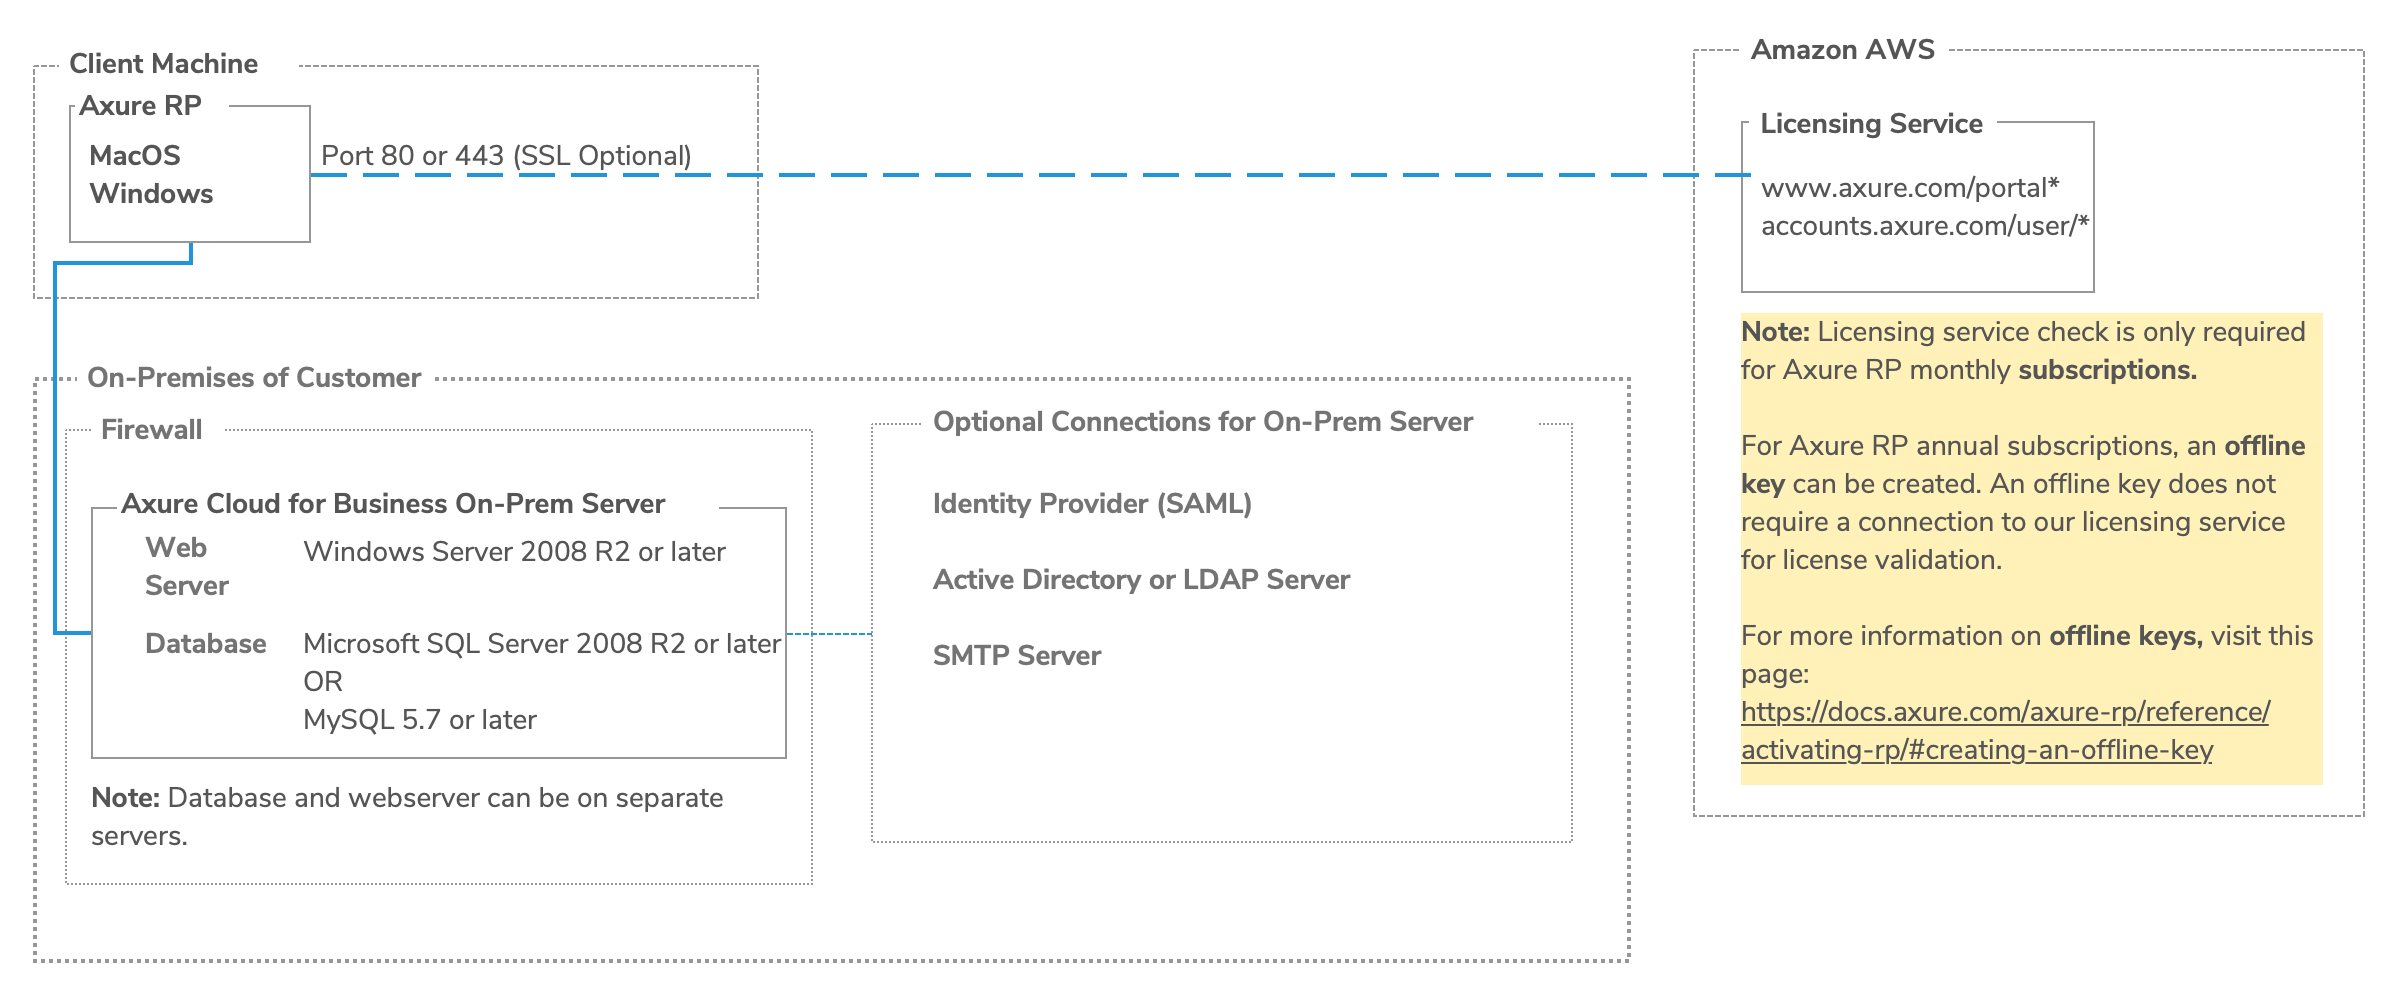
Installing the Axure Cloud Web Server
Axure Cloud for Business On-Premises requires both a web server and a database server. Installation steps must be performed for both servers. The installations can be performed simultaneously or separately (useful when there is a database administrator handling the provisioning and installation of the database and a separate system administrator).
By default, installation of the web service will walk you through setting up the database server, but it can also detect if the database server has already been set up.
Prerequisites
Web Server:
- Windows Server 2008 R2 or later
- .NET Framework 4.7.2
Database Server:
- Microsoft SQL Server (2008 or later, Express Edition or better)
- Should be installed with Mixed Mode authentication (aka "SQL Server and Windows Authentication mode")
- MySQL 5.7 or later
Note
It is also possible to install the web server and the database server on the same machine.
System Resource Recommendations
The system requirements for the Axure Cloud database are quite low:
- 1 Ghz CPU
- 1 GB RAM
- 25 GB disk space
The Axure Cloud web service is more resource-intensive. Generation time for the HTML output is improved by using processors with better single-threaded performance. Axure Cloud also stores the generated HTML output files on the web server. Accordingly, it has much higher requirements:
- 2 Ghz CPU (2 cores recommended)
- 2 GB RAM (4GB Recommended)
- 30 GB free disk space
Standard Installation
1. Download and Run the Installer
If you haven't already done so, contact our sales team to get the Axure Cloud for Business On-Premises installer.
Run the installer and click Finish on the final screen. The Axure Cloud web app will open in your web browser.
Note
Axure Cloud for Business on-premises uses ASP.NET's built-in Kestrel web server rather than Windows Server's Internet Information Services (IIS). Installing Axure Cloud for Business will deactivate "Default Web Site" and start a new service that listens on port 80.
If you need to keep features that IIS provides, contact us at support@axure.com.
2. Database Setup
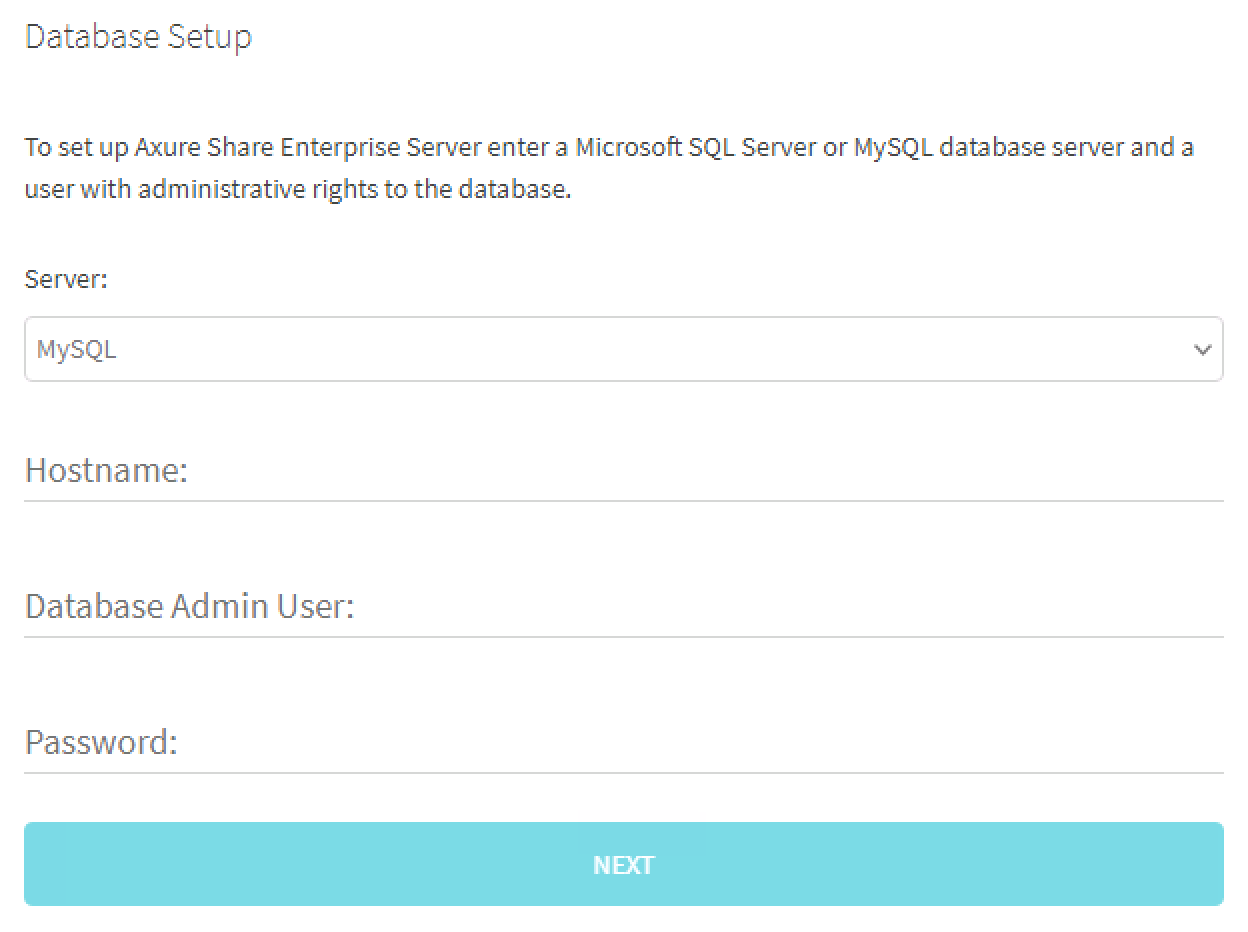
On the Database Setup screen, select either MySQL or SQL Server in the dropdown and provide the hostname and administrator credentials for your database server. (The admin user must have the necessary permissions to create tables and functions.)
The admin username is generally root for MySQL and sa for Microsoft SQL Server.
If you're installing with SQL Server Express, it's generally configured with an instance name (defaulted to SQLExpress), which can be specified with \SQLExpress appended to the host name: [hostname]\SQLExpress
Note
It is required that you install SQL Server with mixed mode authentication ("SQL Server and Windows Authentication mode").
3. Create or Select Database
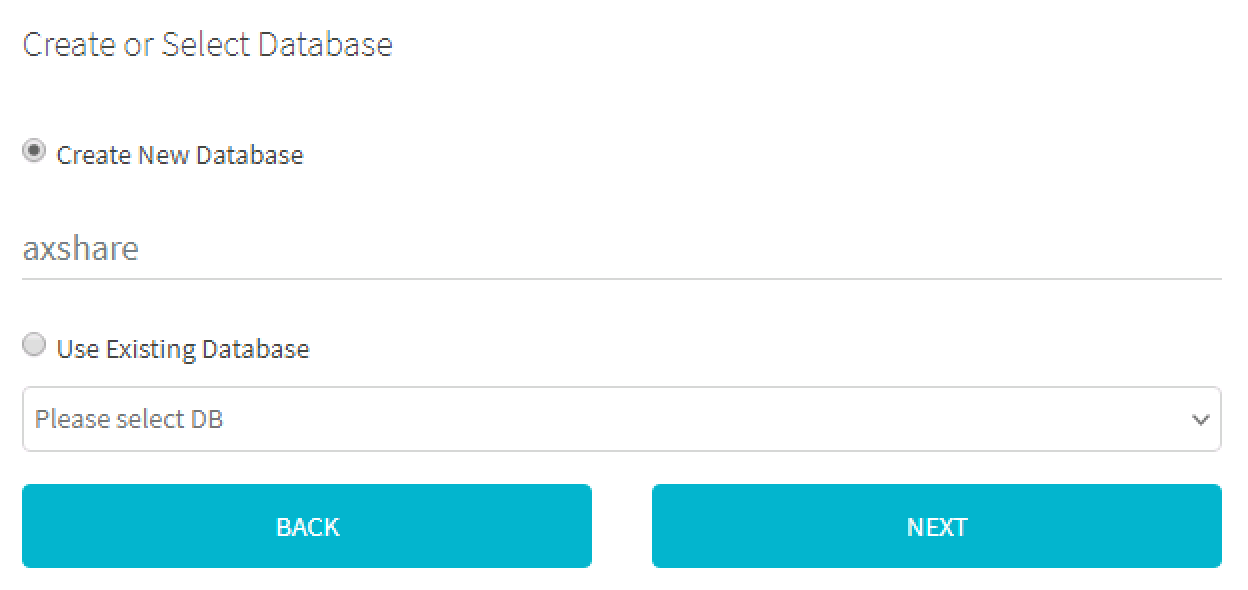
On the Create or Select Database screen, choose one of the following:
If you have not already created an Axure Cloud database on your database server, leave Create New Database selected.
If you have previously created an Axure Cloud database on your database server and would like to use it for this installation, select Use Existing Database and select from your available databases in the dropdown.
4. Create Database User for Axure Cloud
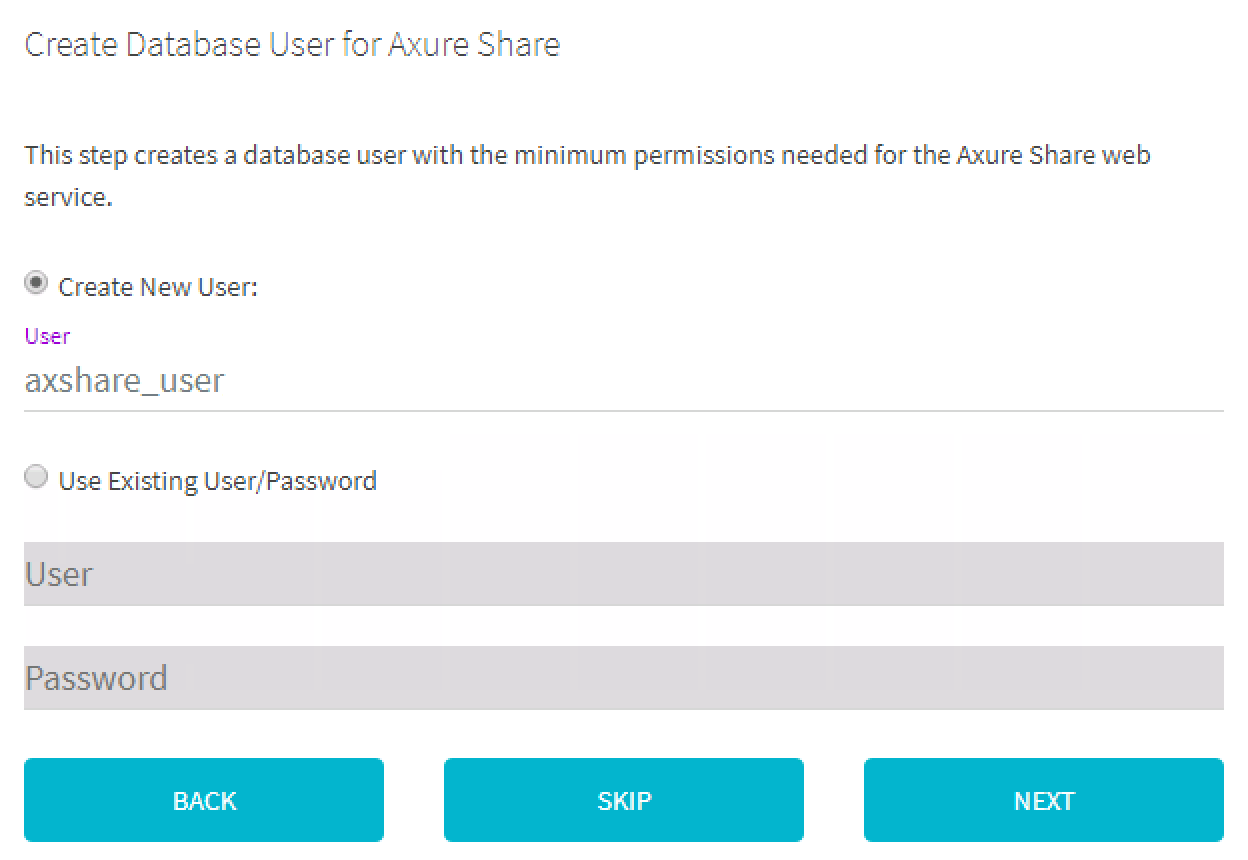
On the Create Database User for Axure Cloud screen, choose one of the following:
Select Create New User to create a new database user with the minimum permissions needed for the Axure Cloud web service. (You'll need this option if you created a new database in the previous step.)
You may select Use Existing User/Password if you chose to connect to an existing database in the previous step. Alternatively, you may create a new user for the existing database if desired.
5. Configure Administrative User
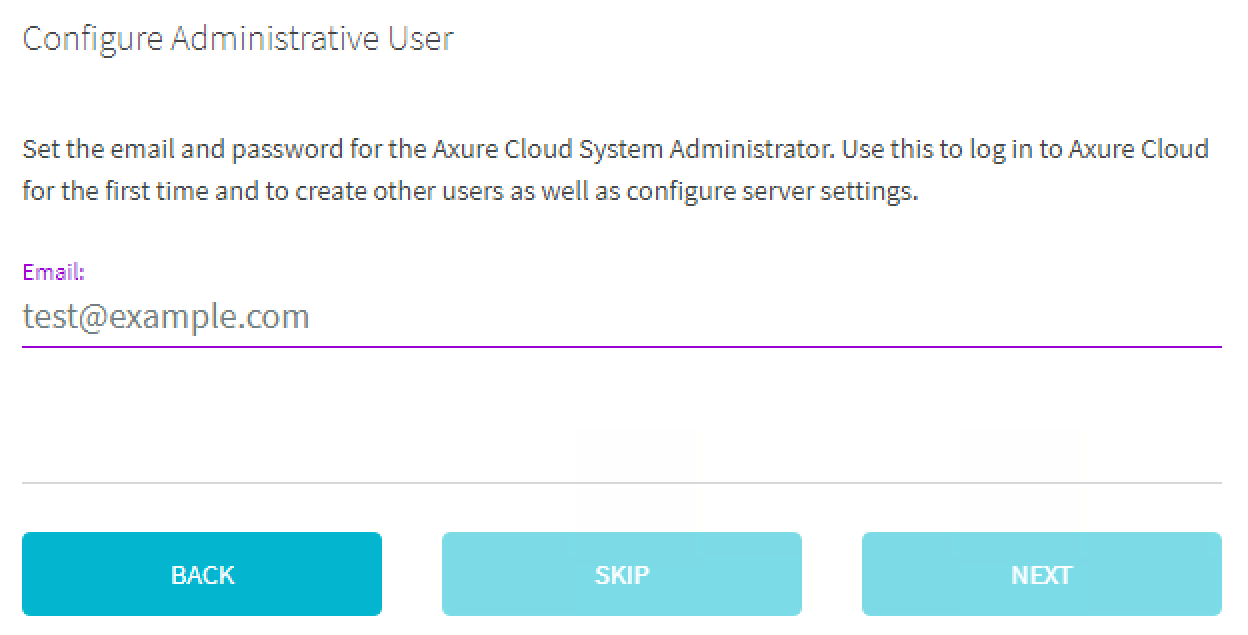
On the Configure Administrative User screen, create a system administrator account for the Axure Cloud server. You will use this account to manage user access to your Axure Cloud for Business On-Premises server.
6. Enter Your License Key
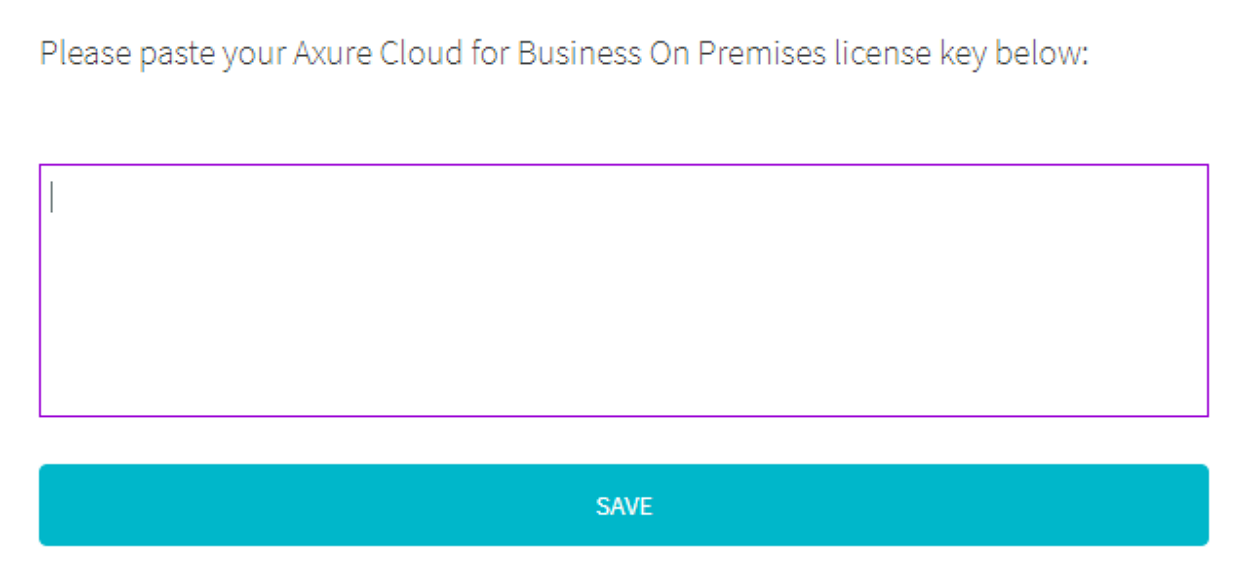
Copy the Axure Cloud for Business On-Premises license key you received from your Axure account executive and paste it into the text area. Then click Save.
When you click Save on this screen, you'll be taken to the login screen for your Axure Cloud server. Log in with the admin account you just created to begin adding users to your Axure Cloud for Business server.
Note
If needed, you can skip this step by clicking Save without entering a license key. You can then enter your license key later by logging in to the server and clicking Admin Settings at the bottom-left of the screen.
Manual Installation
If you're unable to install the Axure Cloud for Business On-Premises server with the automated installer, or if you would like to perform a custom installation, follow the steps below to install the server manually.
Note
Before you begin the manual installation steps, make sure you have a database server set up with a database (SQL Server) or schema (MySQL) ready to be configured.
1. Download and Unzip the Server Files
If you haven't already done so, contact our sales team to get the Axure Cloud for Business On-Premises manual installation files.
Unzip AxureCloud-OnPrem-Manual.zip and place the extracted files in C:\Program Files\Axure\Share9 (or your directory of choice).
2. Unblock the Server Files
Open either Powershell or Command Prompt and execute the corresponding commands below:
Powershell:
cd "C:\Program Files\Axure\Share9"
dir -Recurse | unblock-file
Command Prompt:
cd "C:\Program Files\Axure\Share9"
FOR /r %a IN (*) do (echo.>%a:Zone.Identifier)
3. Register and Run the Server's Services
Run the register_and_run_services.bat file in the root install directory as an Administrator. This will create and start the Axure Cloud Maintenance Service and the Axure Cloud Web Site Service.
4. Connect to Your Database
Edit the customsettings.json file in the site directory as an Administrator. Make the following changes to enable the Axure Cloud for Business On-Premises server to connect to your database:
{
  "SessionEncryptionKey": "[don't change this value]",
  "RootStoragePath": "[your storage location]",
  "DbDialect": "[MySql OR SqlServer]",
  "ConnectionStrings": {
    "ApplicationServices": "[your database connection string]"
  }
}
You can learn more about these fields in the customsettings.json required fields documentation.
5. Configure the Database
In either Powershell or Command Prompt, execute:
cd "C:\Program Files\Axure\Share9\site"
.\axshare_mvc --configuredb
Warning
This step will fail with the error message Unknown database '[database name]' if you haven't yet created a database (SQL Server) or schema (MySQL) with the name specified in your database connection string.
To proceed, create the database/schema and try this step again.
6. Create the System Administrator Account
In either Powershell or Command Prompt, execute:
cd "C:\Program Files\Axure\Share9\site"
.\axshare_mvc --resetpassword [your password]
You should now be able to log in to the Axure Cloud for Business On-Premises web app at http://localhost. Enter Administrator in the Email field, and use the password you just chose.
Note
You can set an email address for the system administrator account by clicking Administrator at the top-right of the web page.
7. Enter Your License Key
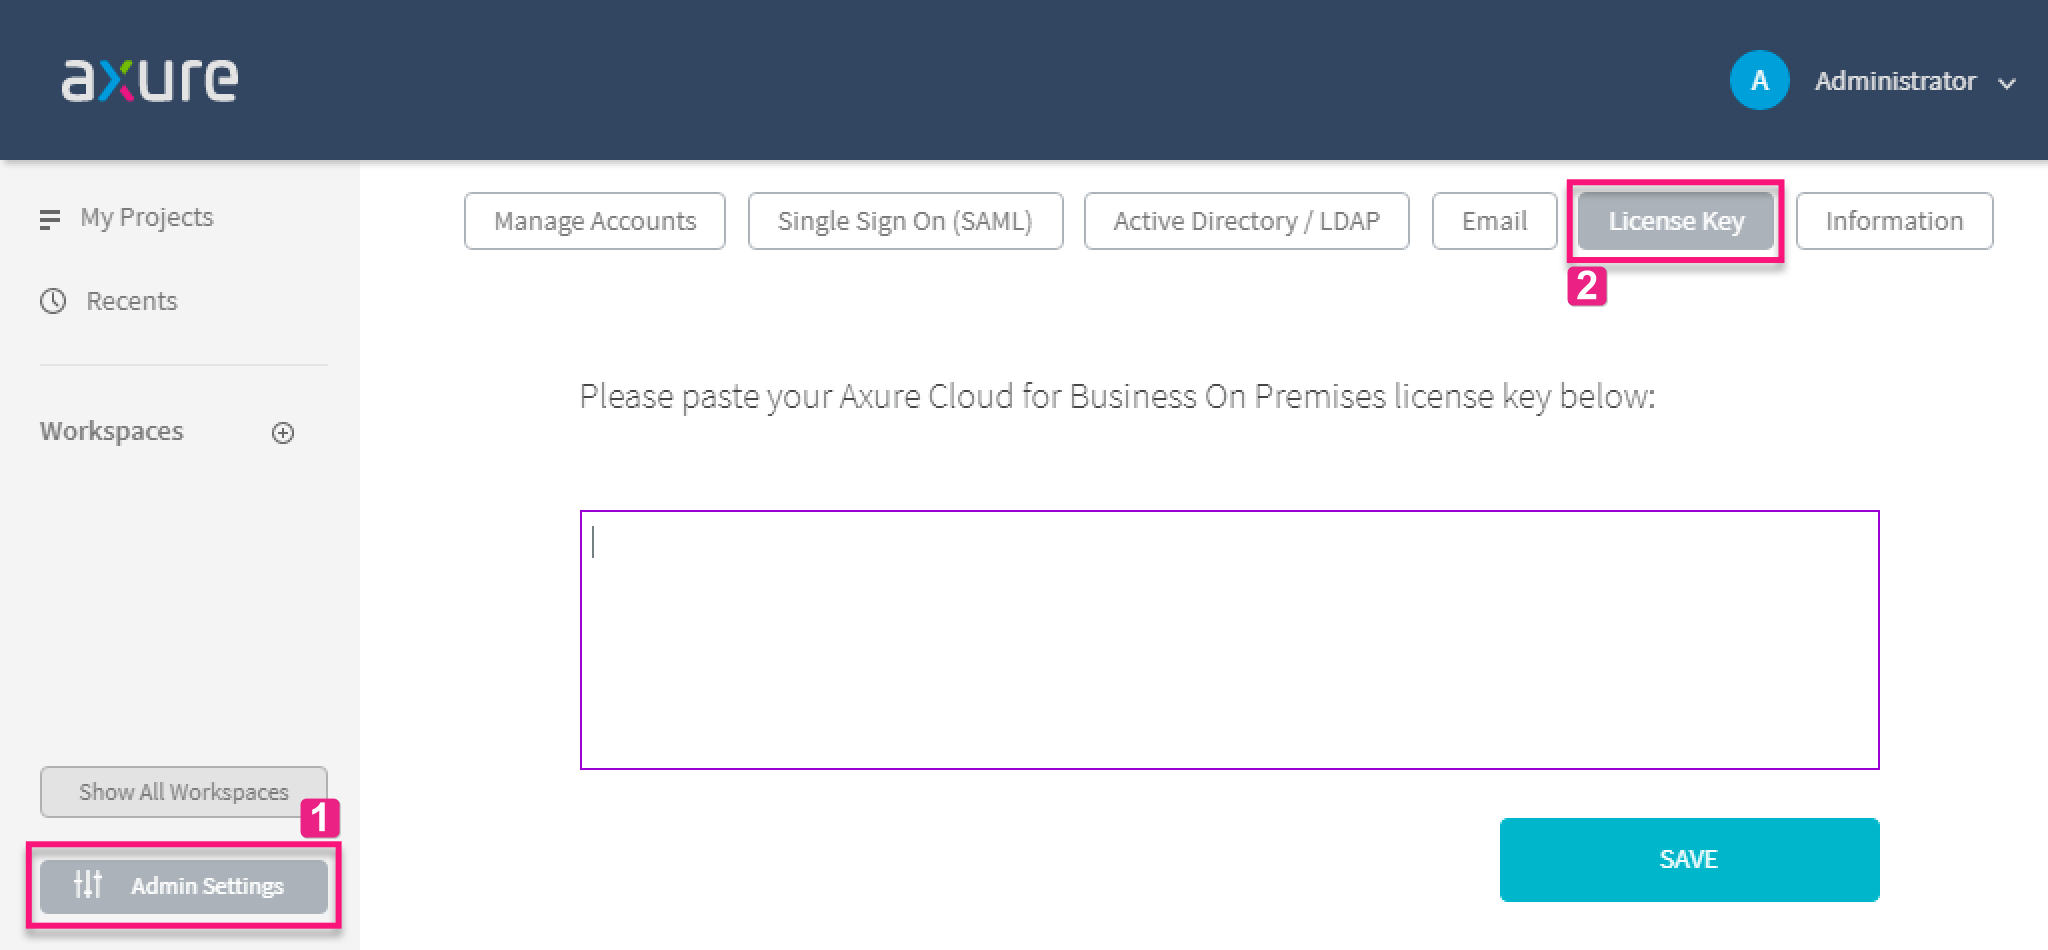
Click Admin Settings at the bottom-left of the web page and then switch to the License Key screen.
Copy the Axure Cloud for Business On-Premises license key you received from your Axure account executive and paste it into the text area. Then click Save.
Email Setup
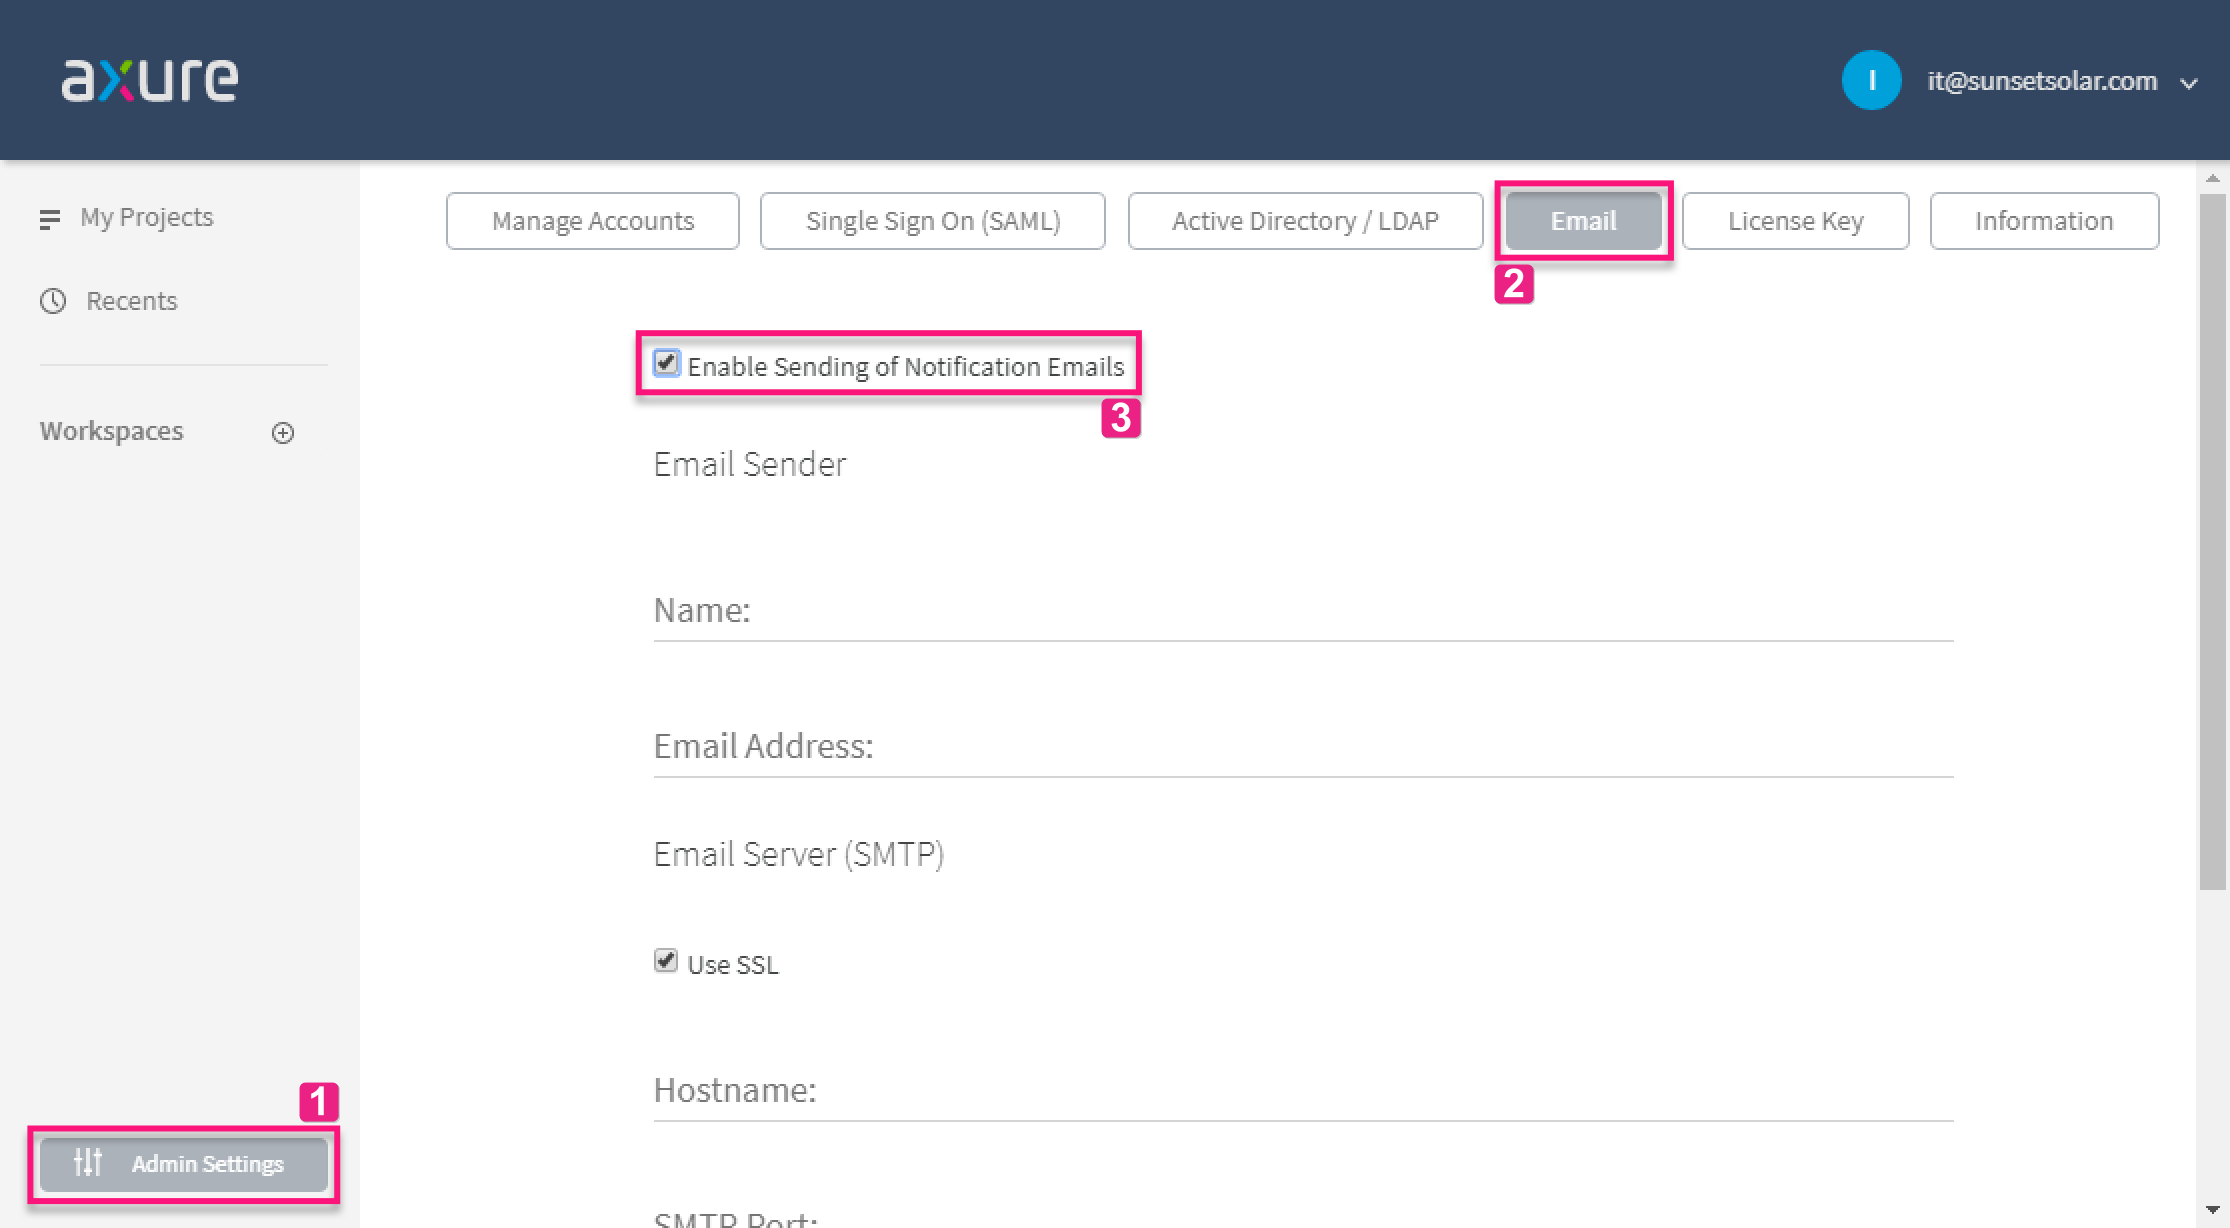
Axure Cloud users may request email notifications on their projects, and they can request a password reset email if they forget their password. In order for these services to work in your on-premises installation of Axure Cloud for Business, you'll need to provide the Axure Cloud server an email address it can use to send emails. We recommend doing so.
Log in to the Axure Cloud server's web interface in your browser and click Admin Settings at the bottom-left.
Switch to the Email tab and check the box for Enable Sending of Notification Emails.
Fill out the form below and click Save.
Customizing Your Server
At this point, you can customize your Axure Cloud for Business On-Premises server by editing its customsettings.json file. If you installed the server in the default location, you can find this file at:
C:\Program Files\Axure\Share9\site\customsettings.json
Some common customizations include:
