
Axure Cloud Workspaces
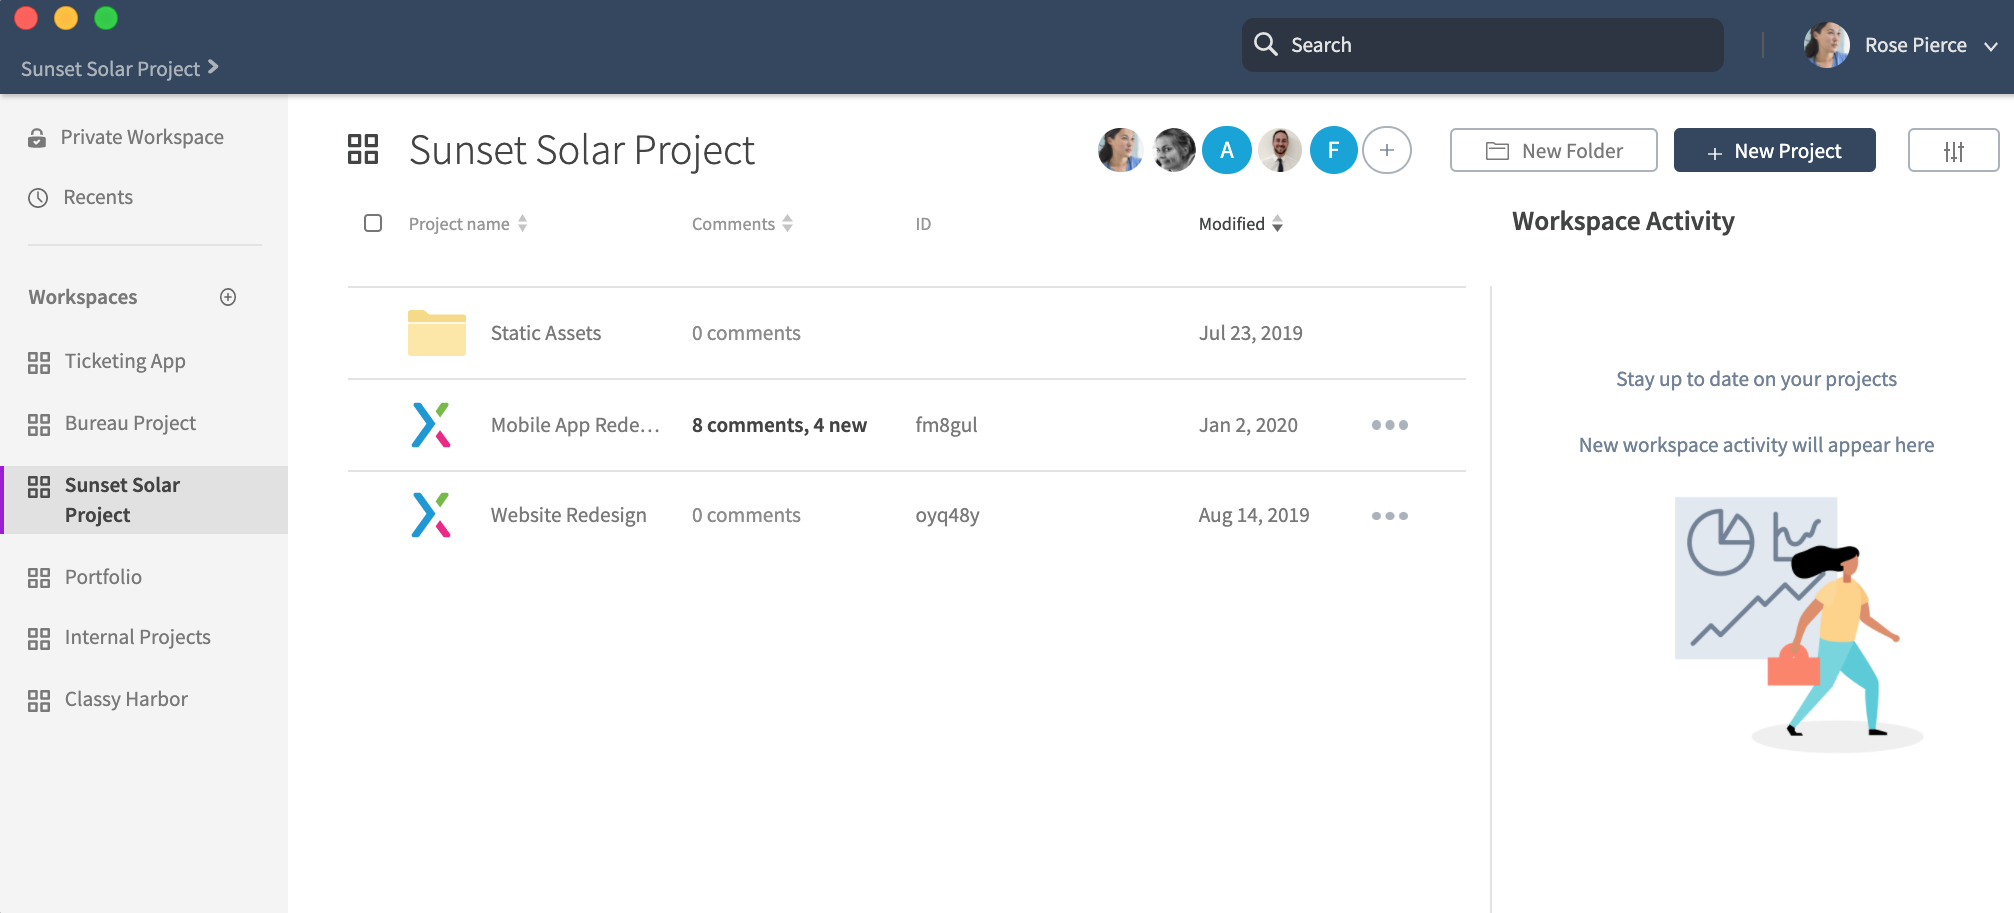
Axure Cloud projects are organized into workspaces, which are listed along the left side of the interface when you log in to app.axure.cloud or the Axure Cloud desktop app. Workspaces are like folders, and you can organize them further by adding any number of subfolders.
Managing Workspaces
Creating Workspaces
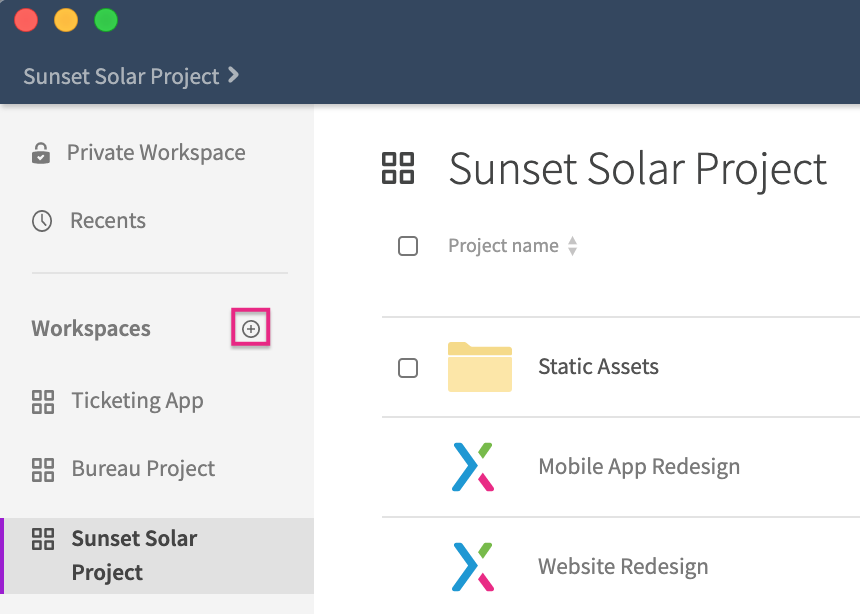
Click the Create Workspace button (+) at the top of the list of workspaces.
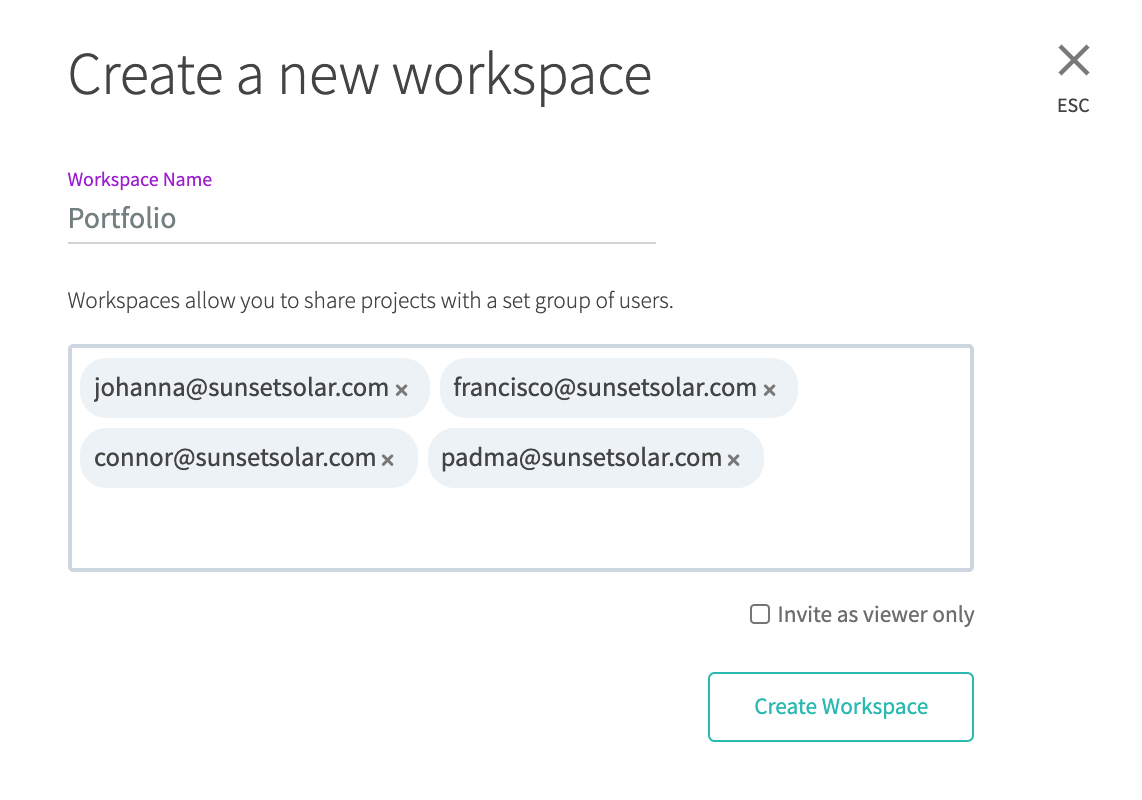
Give the workspace a name.
Optionally include the email addresses of anyone you would like to invite to the workspace. You can check the box for Invite as Viewer Only to add them with viewer-only access.
Click Create Workspace.
Archiving Workspaces
When you're finished working on a project, you can archive that project's workspace.
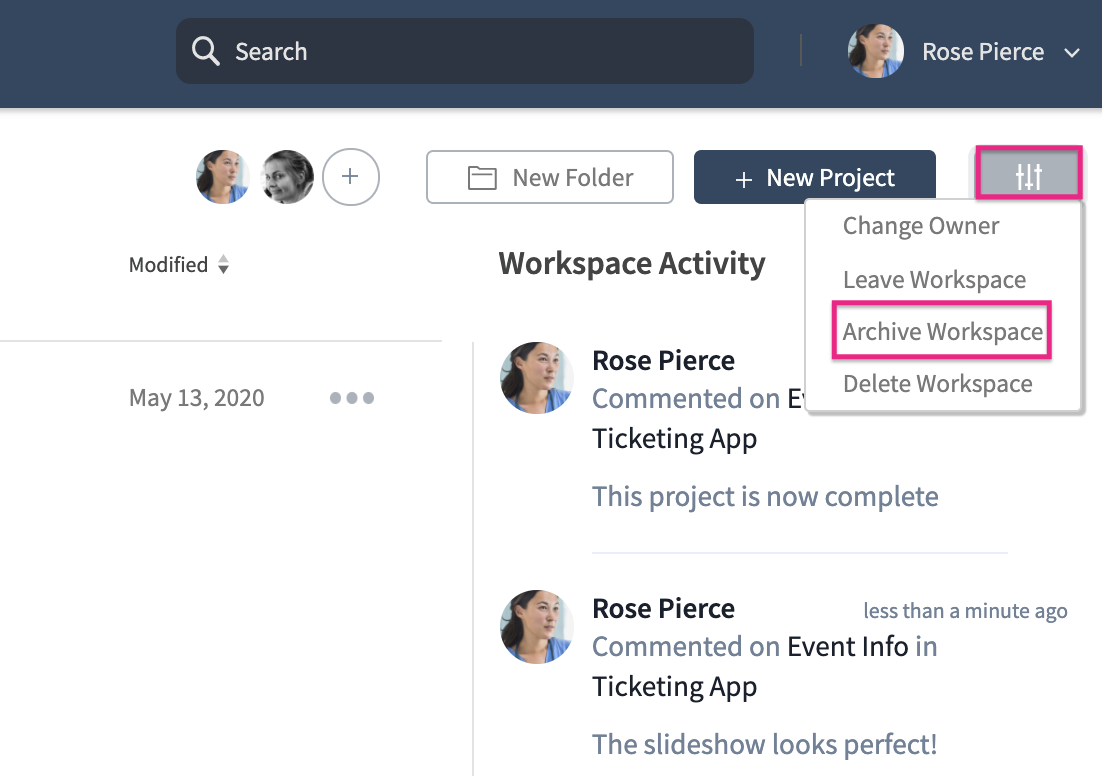
At the top-right of the workspace, click the Workspace Settings button.
Select Archive Workspace in the context menu.
In the dialog that appears, click ARCHIVE to confirm.
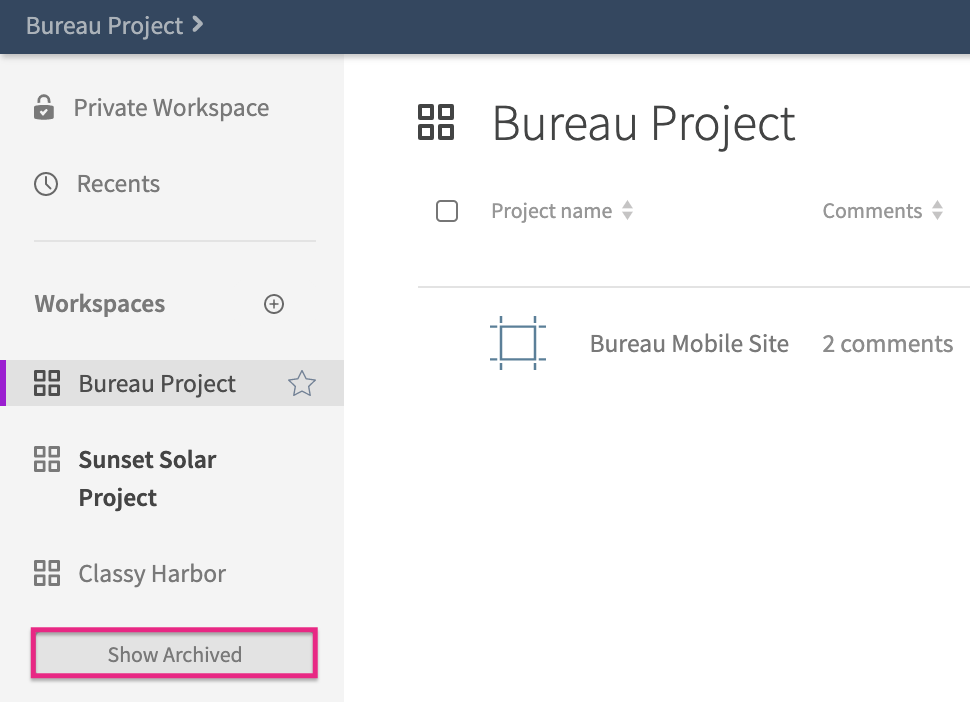
If you need to unarchive a workspace, you can do so by clicking Show Archived under the list of workspaces on the left side of the page. Once you open the archived workspace, you can select the Workspace Settings button again, and select Unarchive Workspace in the context menu.
Note
Archiving and unarchiving workspaces will do so for every member of the workspace.
Deleting Workspaces
Warning
Deleting a workspace will also delete all of its contained projects and folders. This cannot be undone. Before proceeding, move any projects you want to keep out of the workspace.
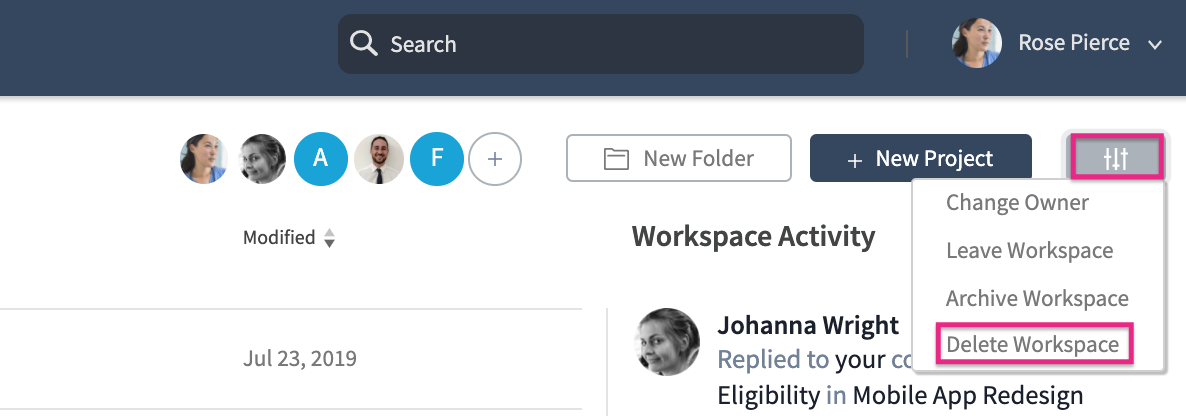
In the list of workspaces on the left-side of the page, select the workspace you want to delete.
At the top-right of the workspace, click the Workspace Settings button.
Select Delete Workspace in the context menu.
In the dialog that appears, click DELETE to confirm.
Adding Folders to a Workspace
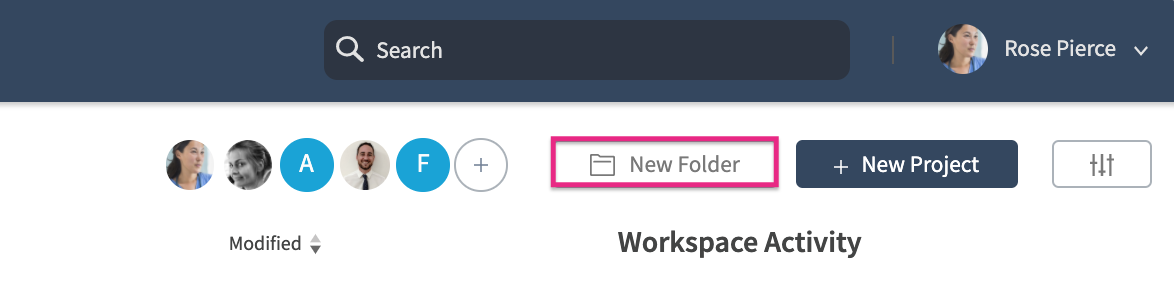
You can further organize your workspaces into folders and subfolders. To create a folder, click the New Folder button at the top-right of a workspace.
Deleting Folders and Projects
Warning
Deleting a folder will also delete all of its contained projects and subfolders. This cannot be undone. Before proceeding, move any projects you want to keep out of the folder.
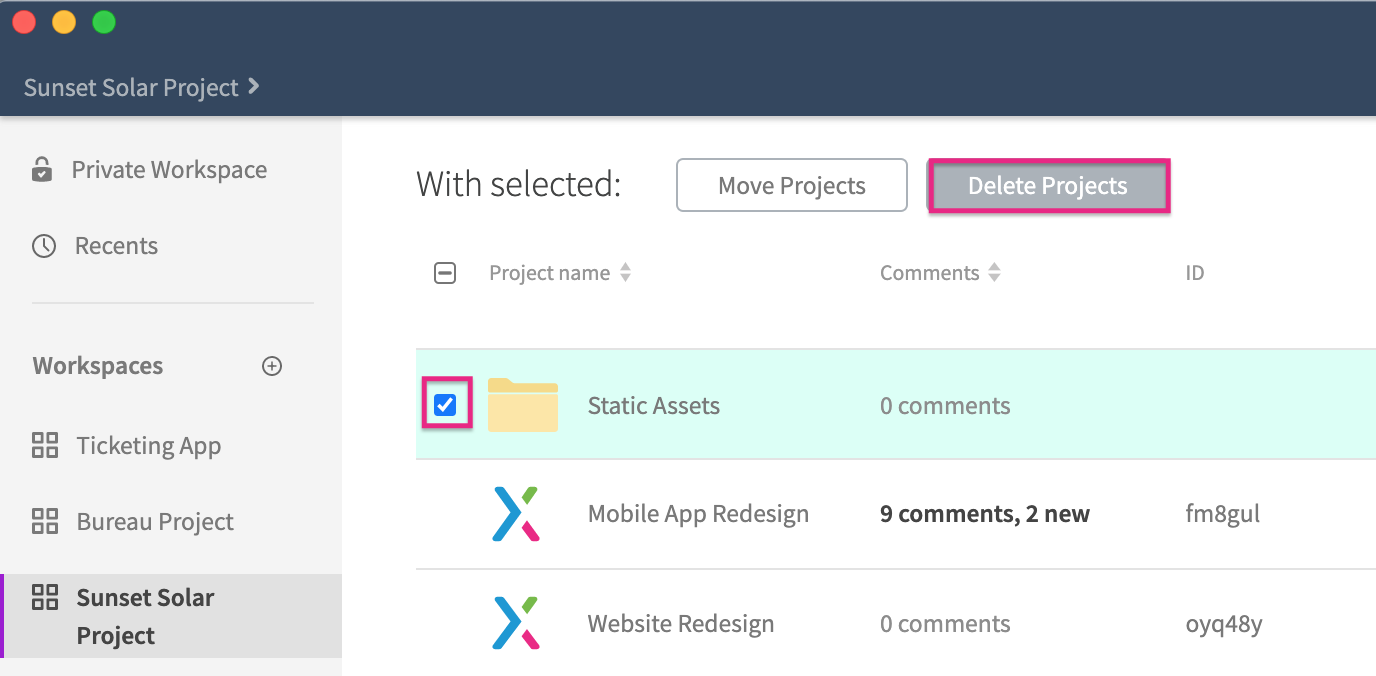
Hover your cursor over the folder or project you want to delete and check the box that appears to its left.
At the top of the page, click Delete Projects.
In the dialog that appears, click DELETE to confirm.
Sharing Workspaces with Others
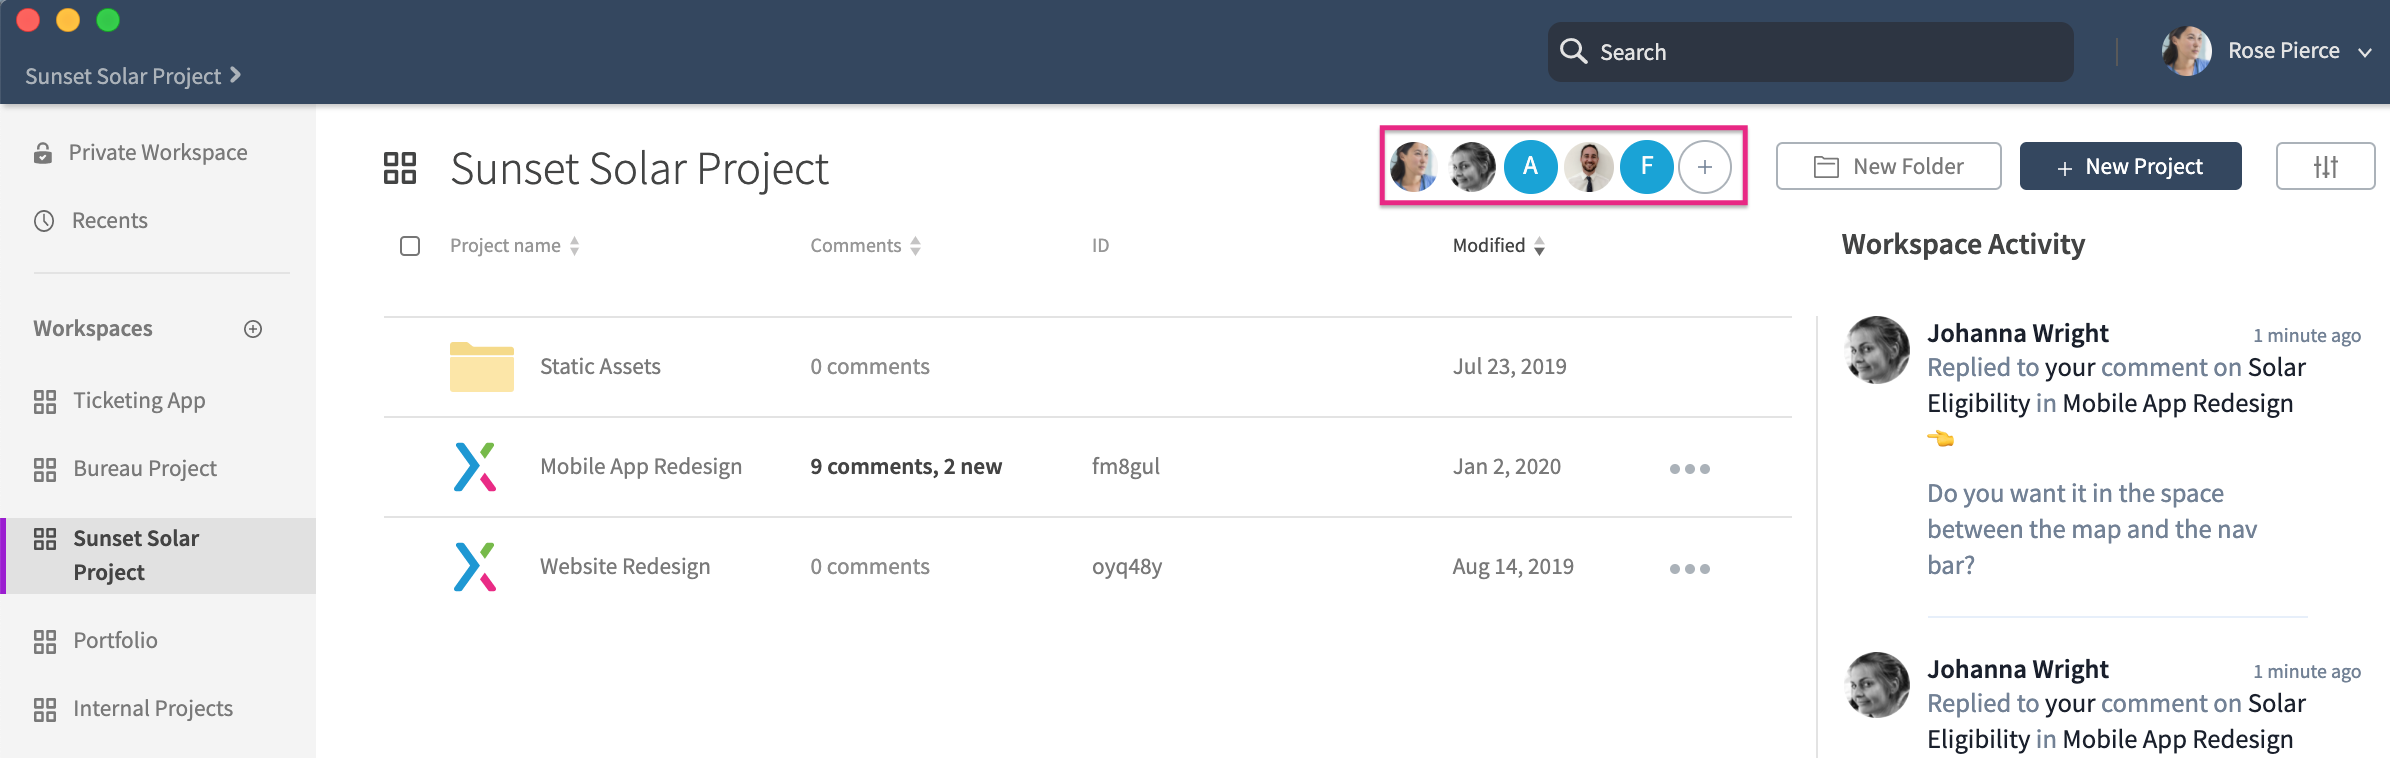
You can share access to your workspaces with other Axure Cloud users. You can give them full access to the projects in a workspace so they can collaboratively build, publish, and manage them with you, or you can restrict them to viewer-only access.
There are three access levels for Axure Cloud workspaces:
Owner: This is the administrator of the workspace. The owner has full access to all projects in the workspace, even projects created by other users. The owner can also add new users to the workspace, remove existing users, and change users' access levels.
The owner is usually the person who created the workspace, but a new owner can be appointed if the original creator transfers ownership or leaves the workspace.
Author: Authors have full access to all projects in the workspace, even projects created by other users. Invite someone to a workspace as an author if you want them to be able to edit projects in the workspace, create new projects, and delete projects.
Authors can also invite other users to the workspace, but they cannot remove users or change users' access levels.
Note
Users must have author access if you want them to contribute to team projects in the workspace.
Viewer: Viewers can preview and inspect any project in the workspace. They cannot make edits to either projects or users.
Inviting New Users
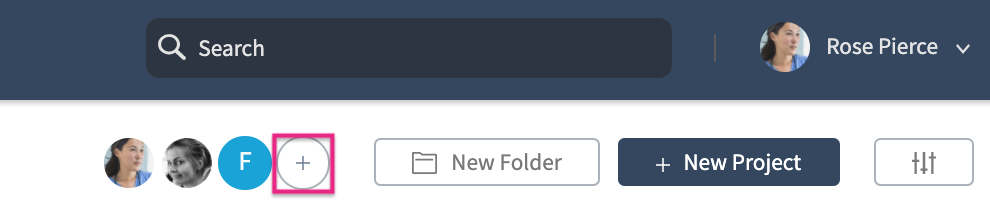
Select the workspace you want to invite users to in the list of workspaces.
At the top-right of the workspace, click the Invite Others button.
Enter the email addresses of the users you would like to invite. You can optionally click the Invite as Viewer Only link to add them with viewer-only access.
Click Invite to confirm. Your teammates will be able to access the workspace the next time they log in to Axure Cloud.
Note
If you invite teammates who do not yet have Axure Cloud accounts, they will receive an email inviting them to sign up for free.
Changing User Access Levels
The owner of a workspace can change other users' access levels at any time.
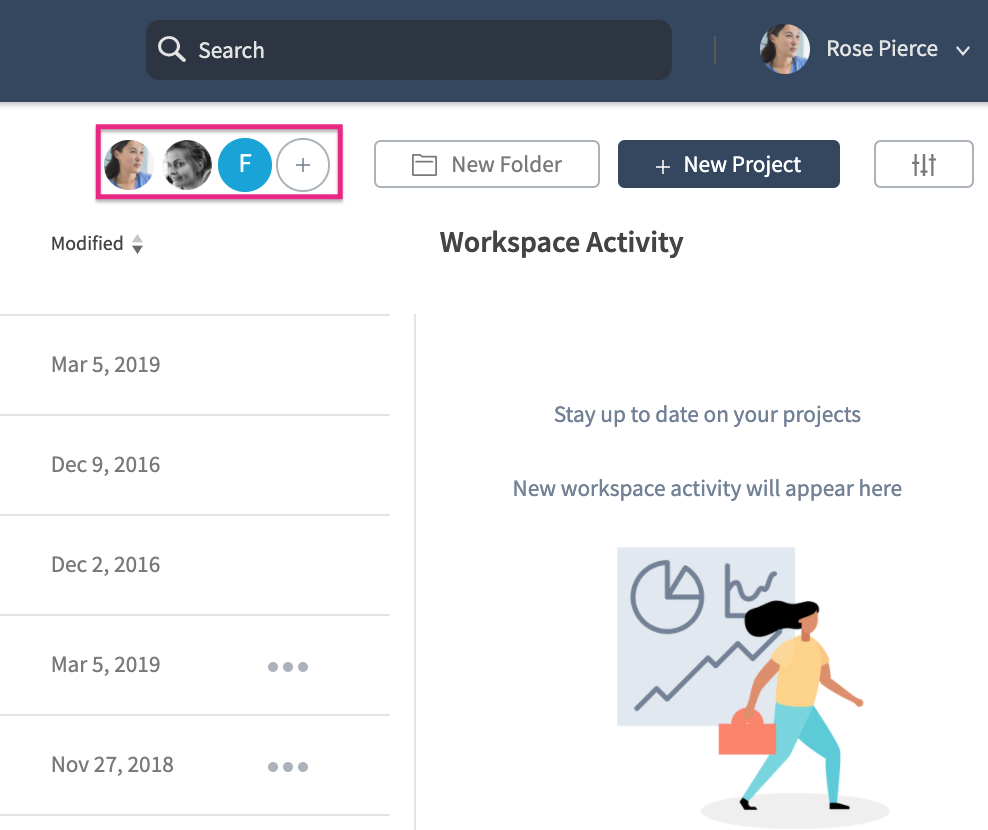
At the top of the workspace, click on the user avatars or the Invite Others button.
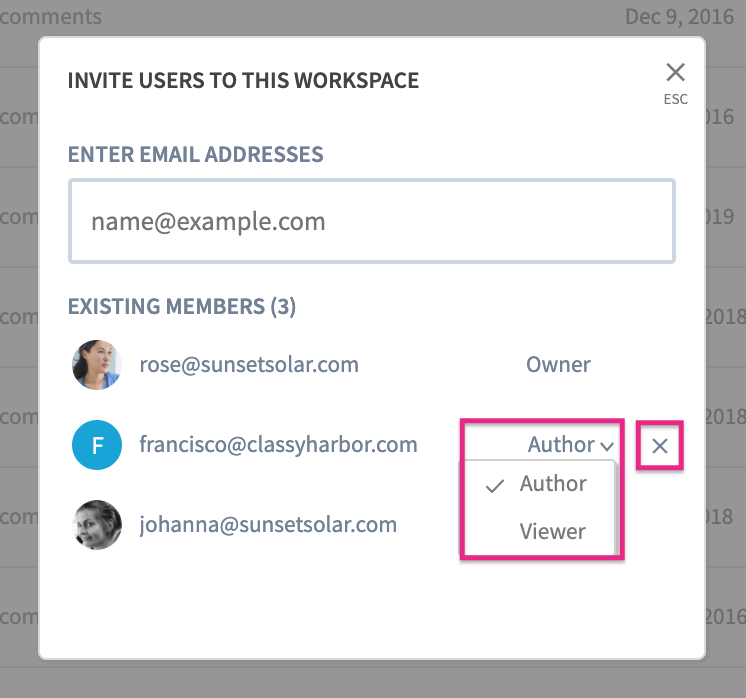
In the dialog that appears, you can do the following:
Select Author or Viewer in the dropdown next to a user's email address to change their access level.
Click the X on the right side of a user's access level to remove them from the workspace.
Transferring Workspace Ownership
The current owner of a workspace can transfer ownership of the workspace to another user.
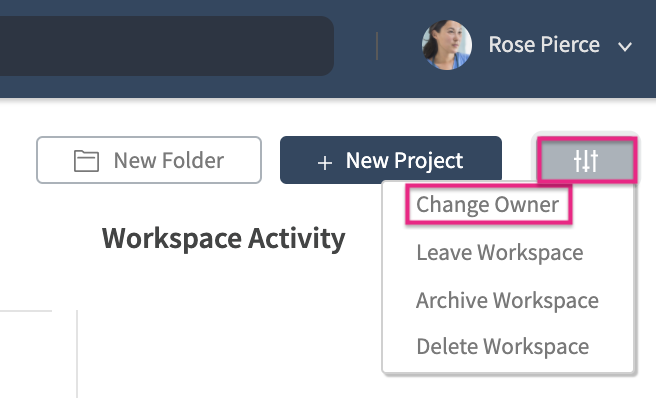
At the top-right of the workspace, click the Workspace Settings button, and select Change Owner in the context menu.
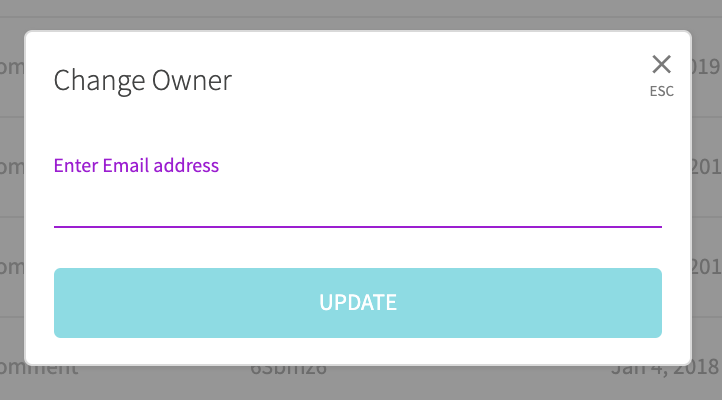
Enter the email address of the user you would like to be the new workspace owner.
Click UPDATE to finalize the change.
Leaving a Shared Workspace
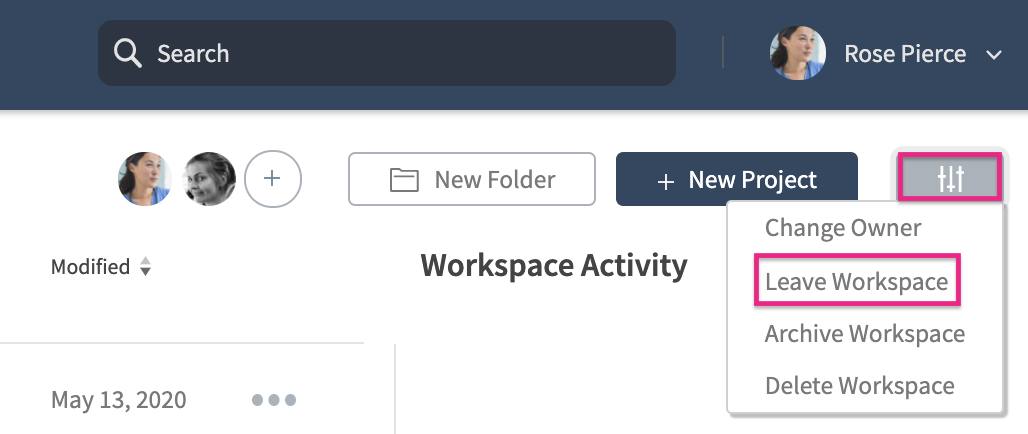
You can leave a shared workspace by clicking the Workspace Settings button, and selecting Leave Workspace in the context menu. If you are the owner of the workspace, you'll need to select a new owner from the list of existing members before you can leave.
If there are no other members in the workspace, you will need to add another user first before you can leave the workspace. Alternatively, you can transfer ownership of the workspace, archive the workspace, or delete the workspace instead.
Publishing to a Workspace
When publishing to Axure Cloud from Axure RP, click the ellipsis icon at the bottom-right of the project's name to choose which workspace and folder you want to publish the project to.
When publishing from app.axure.cloud or the Axure Cloud desktop app, select the workspace and folder you want to publish to and click New Project at the top-right of the page.
Moving Projects Between Workspaces
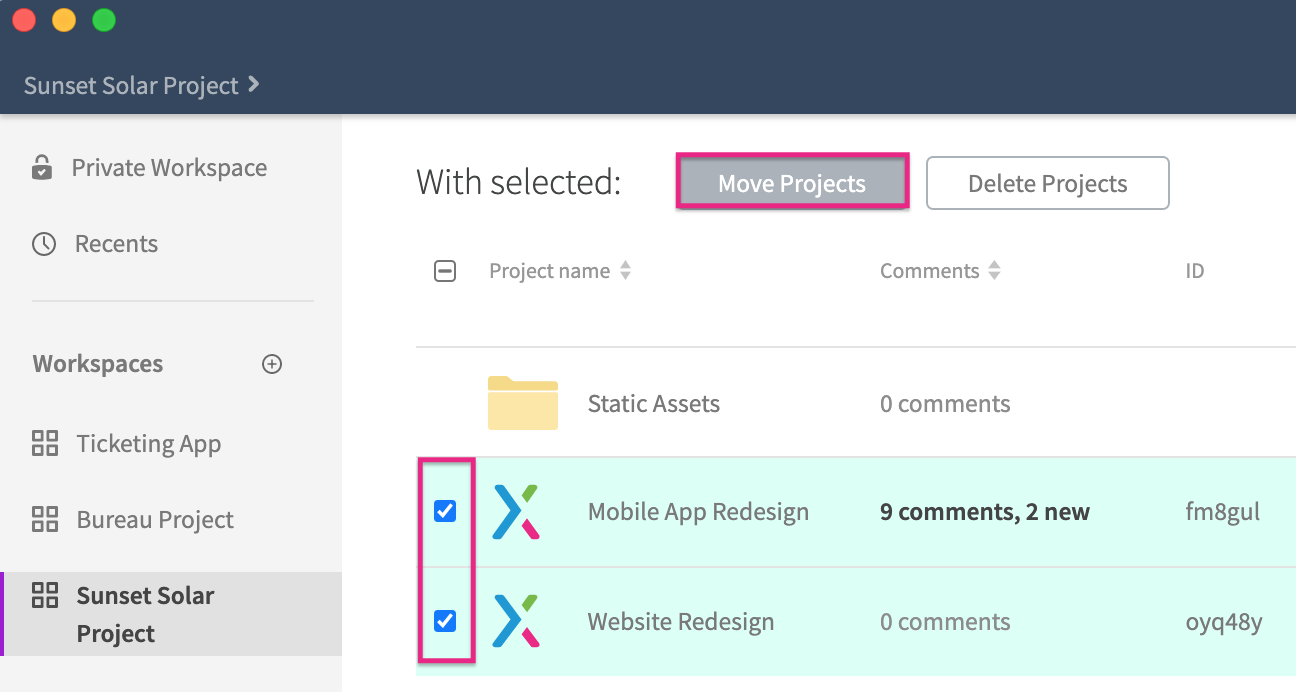
Hover your cursor over the project you want to move and check the box that appears to its left.
Click Move Projects at the top of the workspace.
Select the workspace or folder you want to move the project to in the list that appears and click Move.
Importing Workspaces
You can import workspaces between Axure Cloud and Axure Cloud for Business private instances. Follow the steps below to get started.
Note
This function is not available for Axure Cloud for Business On-Premises.
Open your web browser and log in to app.axure.cloud or your private instance, depending on which instance you want to import your workspaces to.
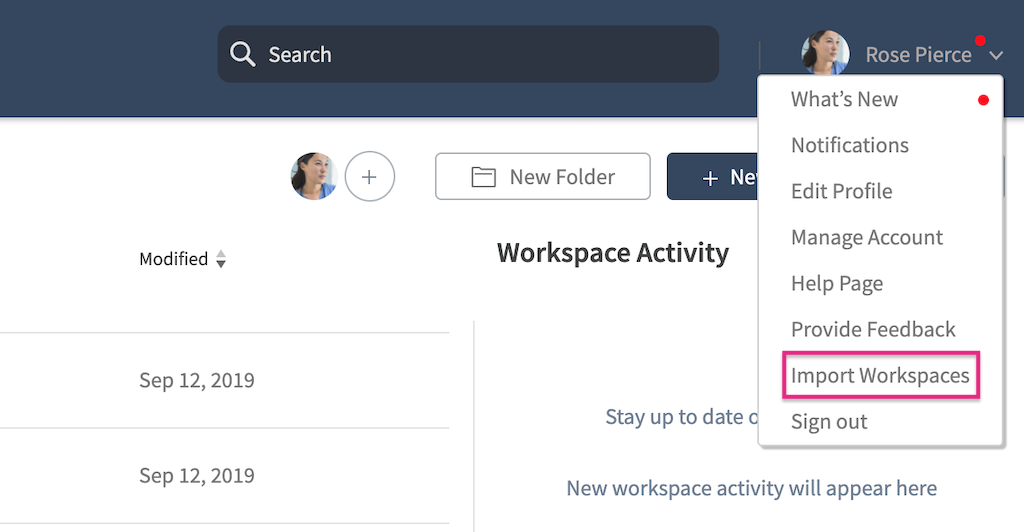
Click your email address or name at the top-right of the page and select Import Workspaces in the dropdown.
Follow the steps in the import dialog to import the workspaces you would like to move from one Cloud instance to another.
Note
If needed, you can move your workspaces back to the original Axure Cloud or private instance at any time.