
SAML Integration in Okta
Follow the steps in this guide to set up Axure Cloud for Business SAML 2.0 with the Identity Provider: Okta
Launch the Application Integration Wizard
Verify that you are using the Admin Console. If you are using the Developer Console, switch over to the Admin Console. If you see < > Developer Console in the top left corner of your console, click it, then select Classic UI in the context menu.
In the Admin Console, go to Applications → Applications.
Click the Add Application button.
Click the Create New App button.
Set Platform to Web and Sign on method to SAML 2.0
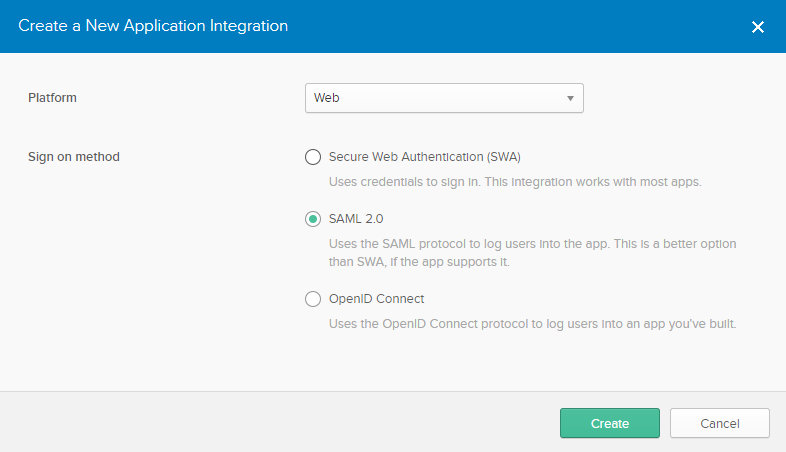
Click Create.
Give your app a name, then click Next.
Configure SAML settings
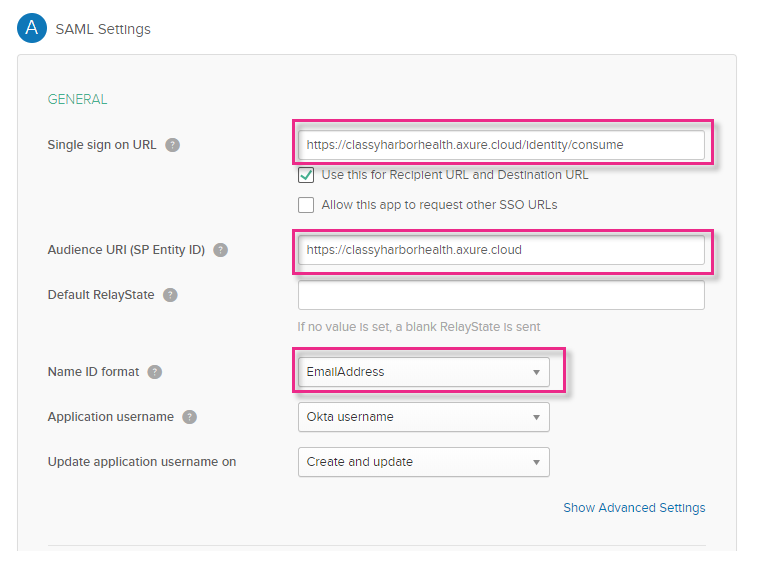
In the Single sign on URL field type your ACS URL:
If you have a private instance of Axure Cloud for Business hosted on Axure servers, the ACS URL is your instance's subdomain followed by /identity/consume:
https://[[domain]].axure.cloud/identity/consume.If you have an on-premises installation of Axure Cloud for Business, the ACS URL is the IP address or hostname of your Axure Cloud for Business server followed by /identity/consume.
In the Audience URI (SP Entity ID) field type your Entity ID:
If you have a private instance of Axure Cloud for Business hosted on Axure servers, the Entity ID is your instance's subdomain,
https://[[domain]].axure.cloud.If you have an on-premises installation of Axure Cloud for Business, the Entity ID is the IP address or hostname of your Axure Cloud for Business server.
Set the Name ID format to EmailAddress.
- Click Next, then click Finish.
View Set-up Instructions
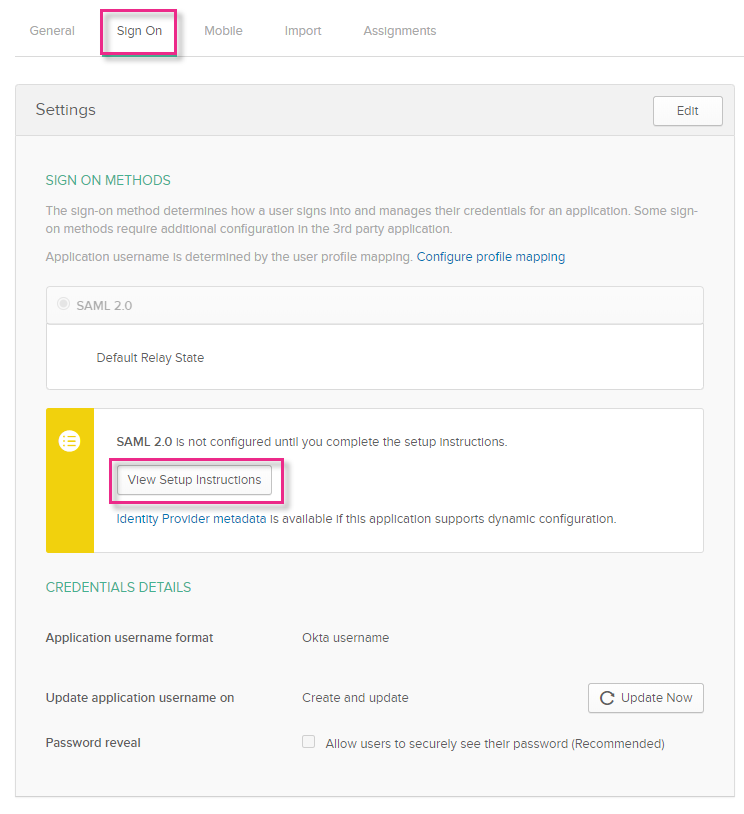
On the Application Overview page, click the Sign On tab.
Click the View Setup Instructions button.
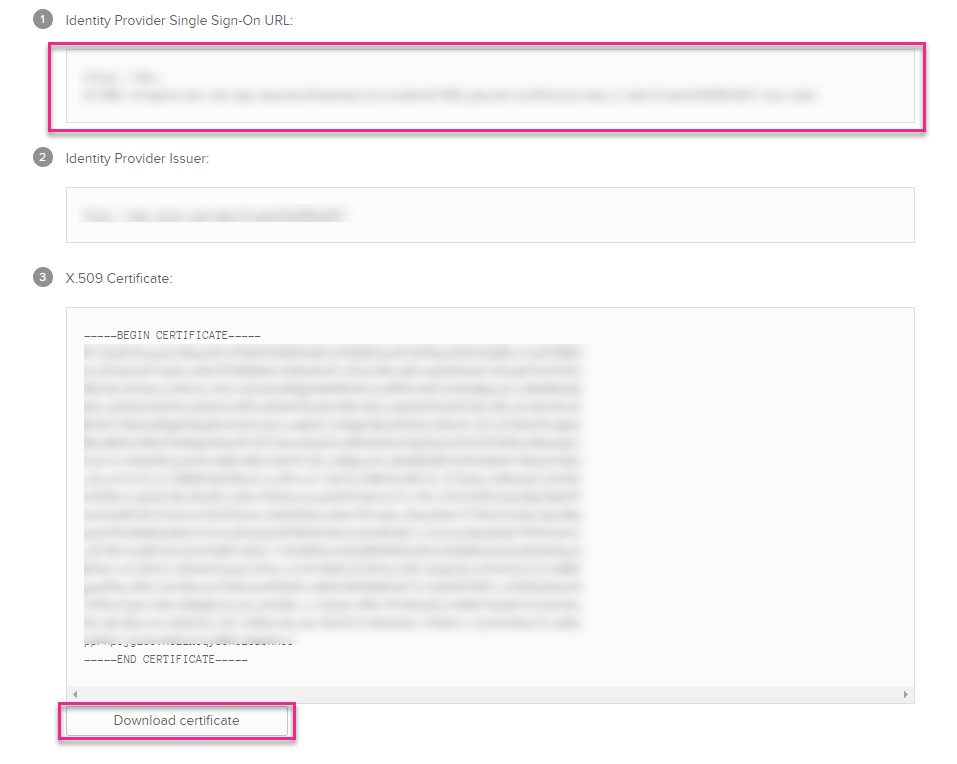
On the next page, note down the URL in the Identity Provider Single Sign-On URL field. You will need this in the next section.
Under X.509 Certificate, click the Download Certificate button.
Configure SSO in Axure Cloud for Business
Sign in to Axure Cloud for Business as a technical admin or as the super administrator.
Click the Admin Settings button at the bottom-left of the interface.
Click the Single Sign On (SAML) button at the top of the page.
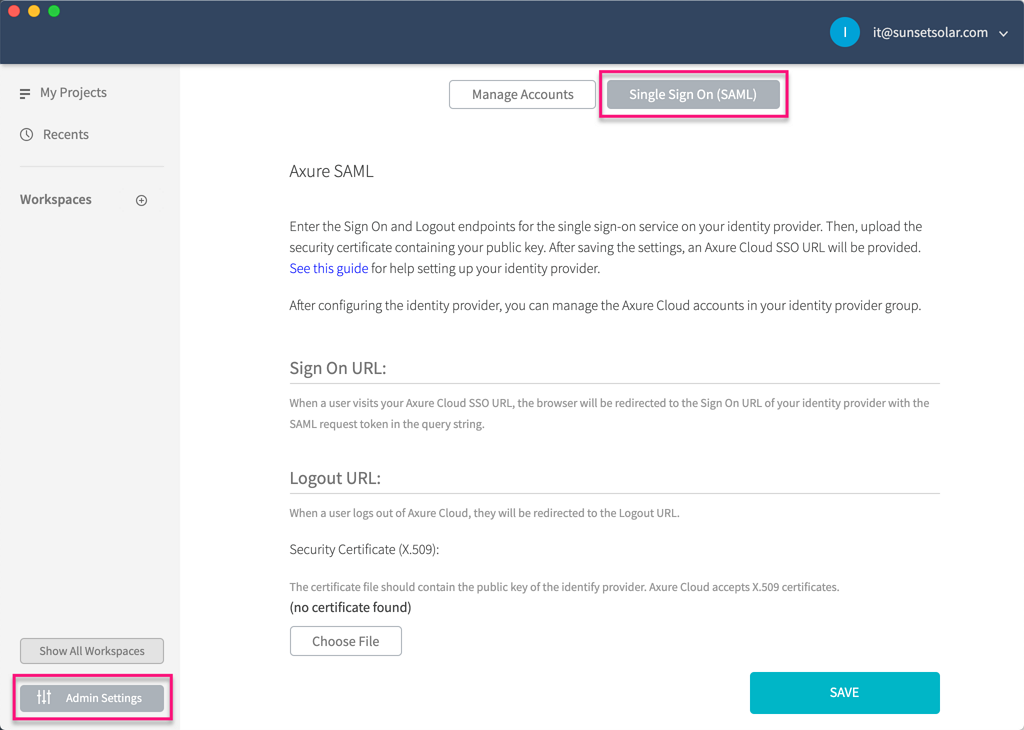
In the Sign On URL field, enter the Identity Provider Single Sign-On URL from step 3 of the previous section.
Set the Logout URL to any URL you like. This is the URL your users will be redirected to after signing out of Axure Cloud for Business.
In the Security Certificate section, click the Choose File button, then upload the X.509 certificate downloaded from step 4 of the previous section.
Click Save.
Next Steps
Add SSO to User Accounts in Axure Cloud for Business.